
I would like to begin this review by saying a few good words (well deserved) for the company Silverstone and their products. Silverstone are best known for their Temjin (TJ) and Raven (RV) computer cases, which are needless to say, outstanding in terms of performance, build quality and features. The company also offers fans, accessories, water cooling and air cooling solutions. Today I received a product from Silverstone, which is budget oriented with not-yet-announced price, although I consider it would be attractive. PS10 is part of the Precision Series cases and is made to provide silent operation. In the following link you can check out the previous review of Precision series – the PS06 – Silverstone Precision PS06 Test and Review. So, let’s continue with unpacking and reviewing this stealth case and what it has to offer.
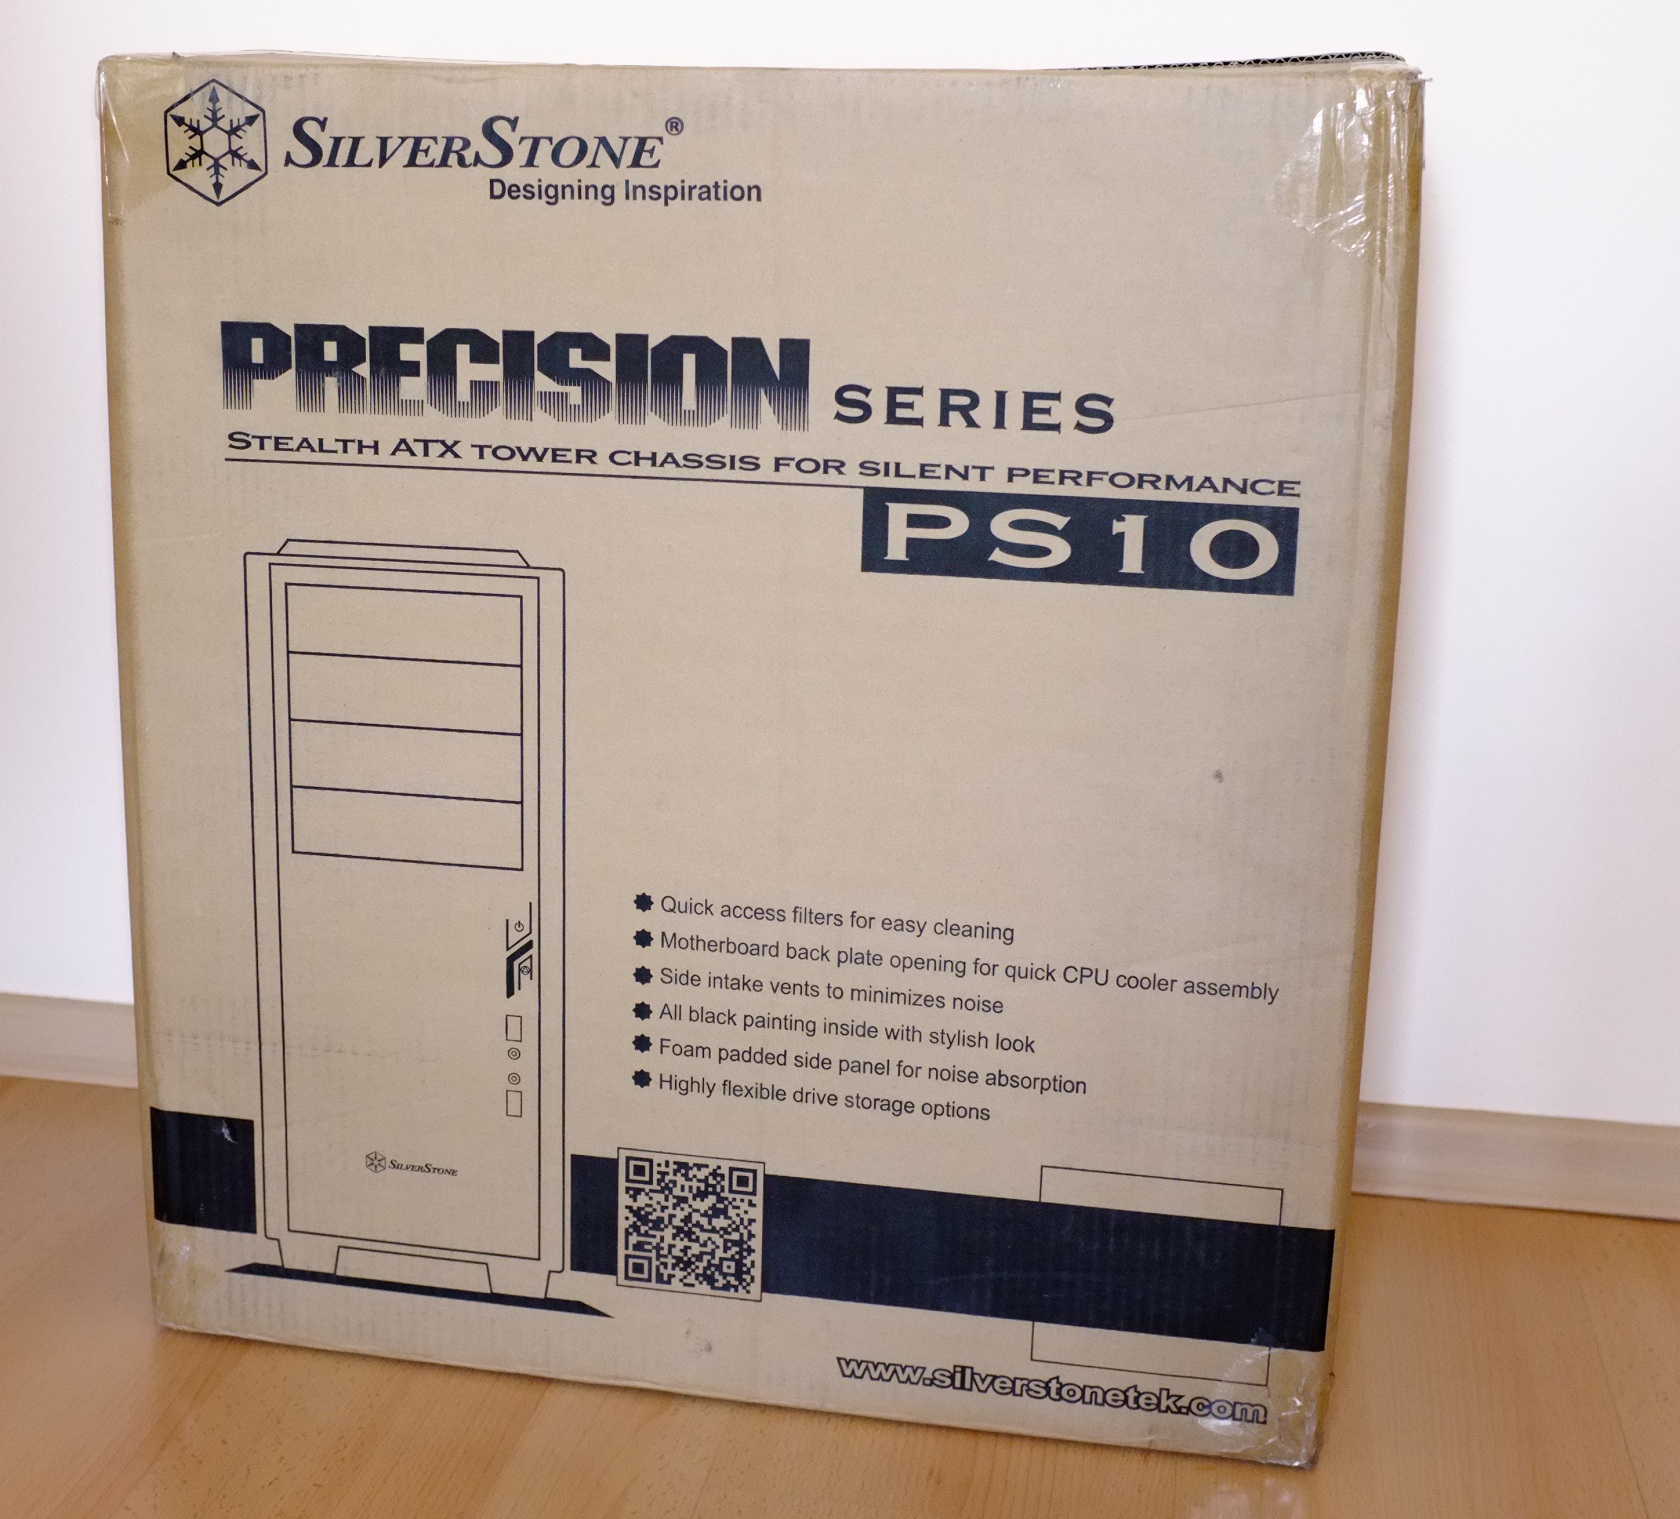
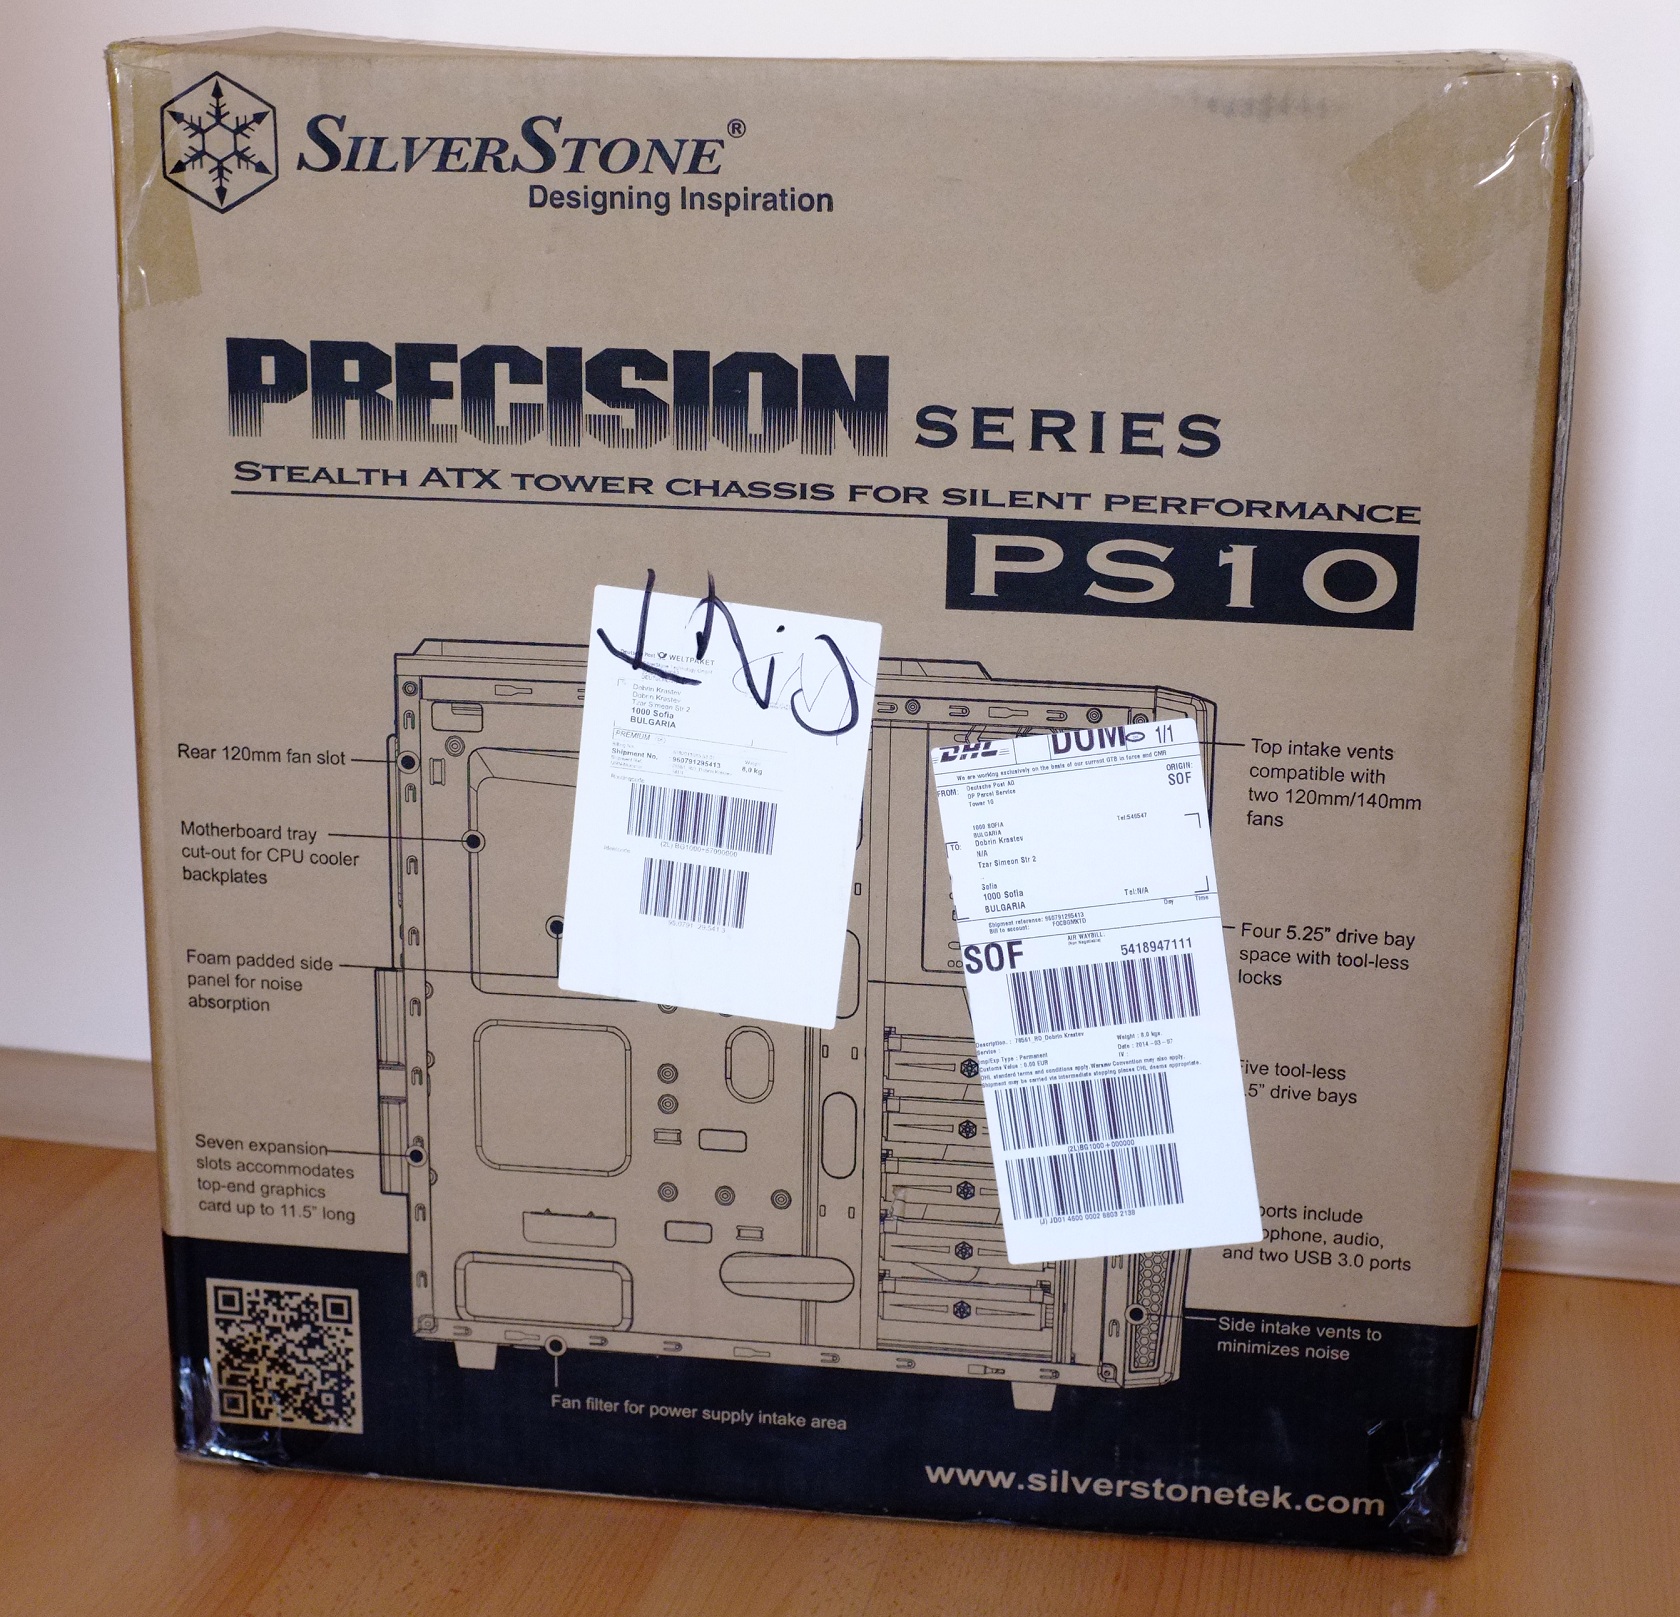
Silverstone Precision PS10 arrived to me in a medium-sized carton packaging with big, black, distinctive letters stating the model name, the series it belongs to, some of the features it has and the company name, along with the snowflake logo. Also on the same side there was a picture of the front of the silent case, where you can get an idea of what’s inside the box. On the other side, as you can see, there is the same lettering, but this time there’s a picture on the whole side, showing off the interior of the case (excluding the delivery stickers), and some of the features are presented here again.
| The side of the box | PS10 protective packaging |
 |
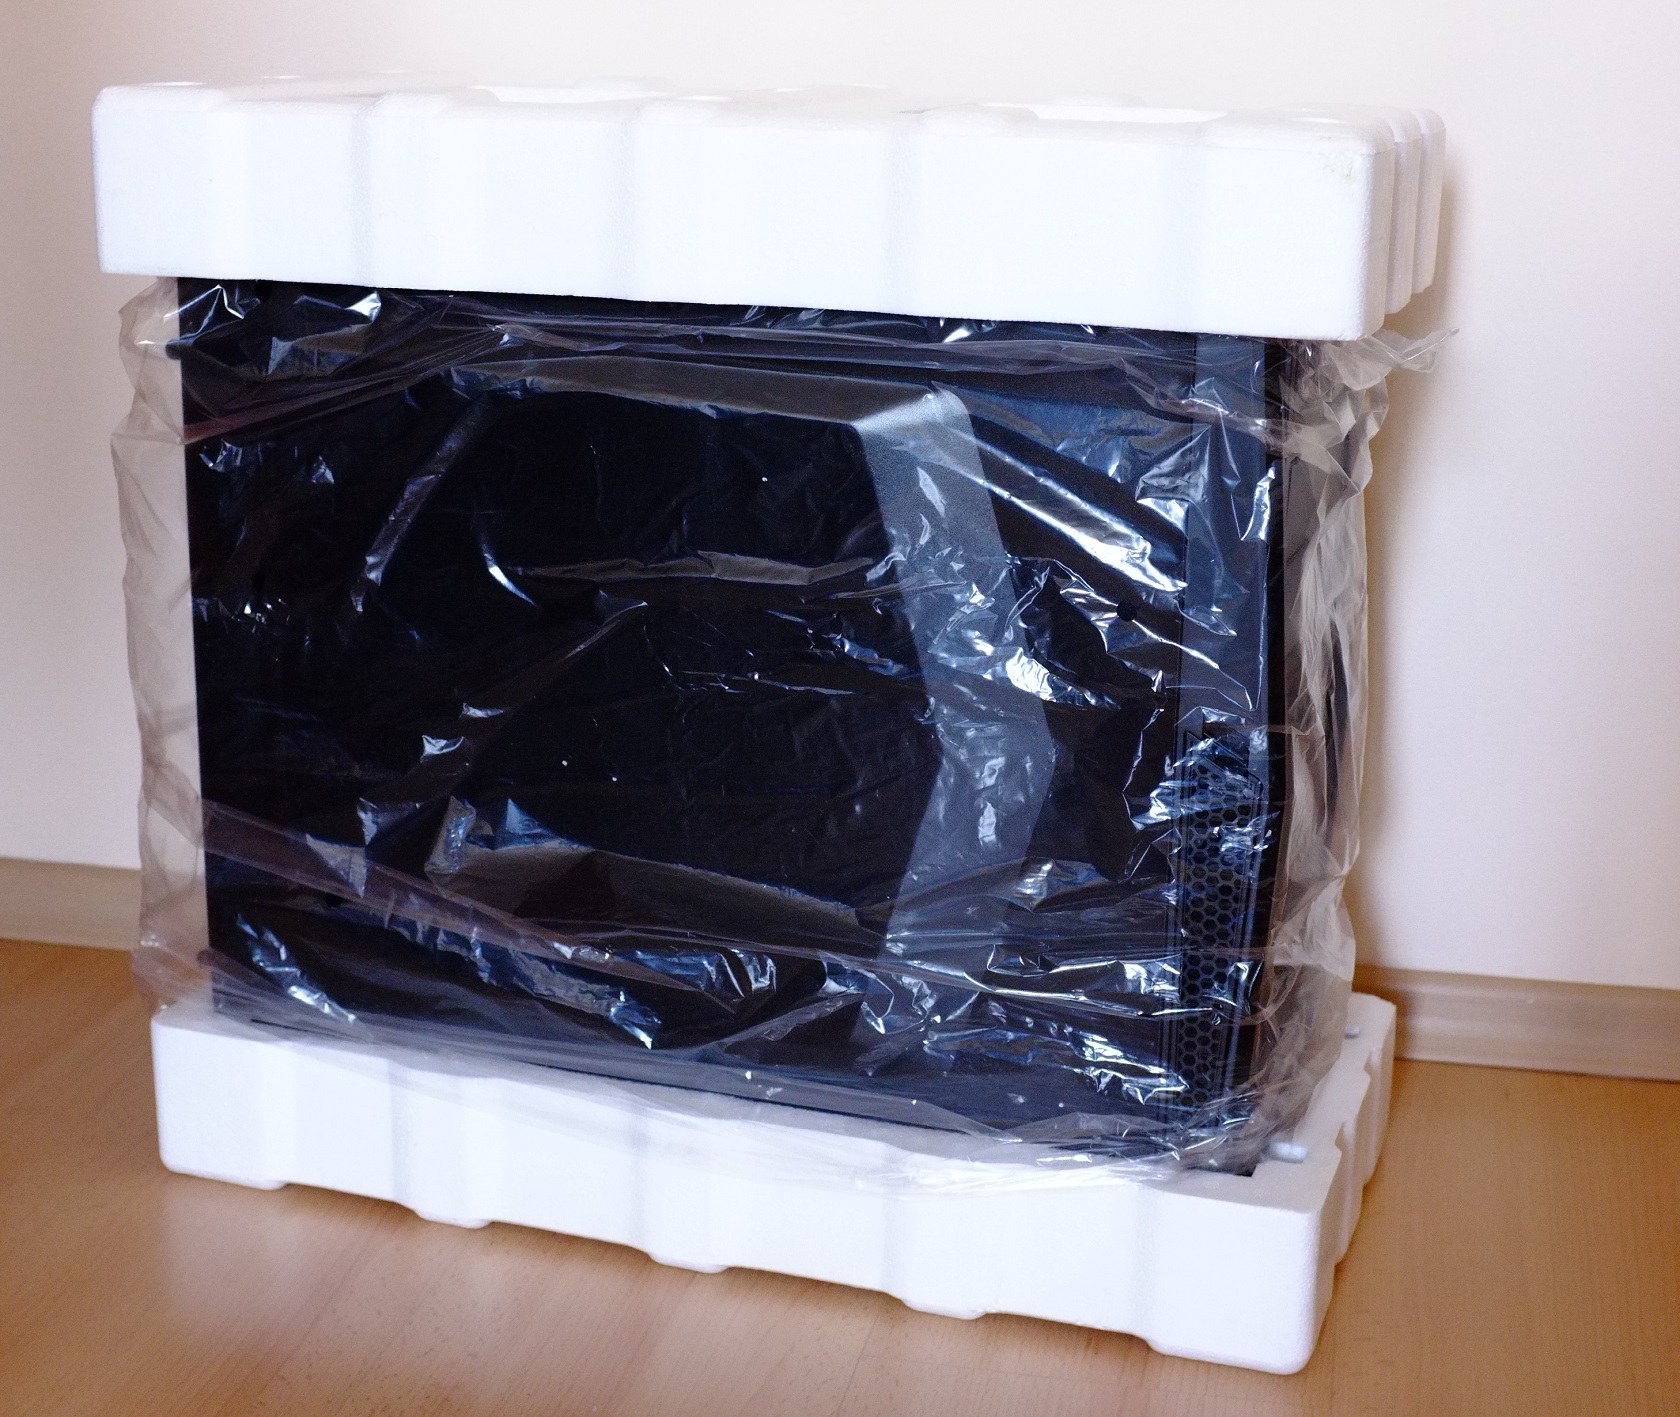 |
When I cut the duct tape and removed the case from the box I saw some nylon packaging and the pretty much standard, hard styrofoam. As I’ve said in previous reviews I am not a big fan of the hard styrofoam version, but this one is thick enough to withstand even a drop of the carton box with no damage to the case inside. Since the foam and the nylon are blocking the view to the case, nothing could be said before putting them aside. Here’s the actual chassis as has revealed itself to me.
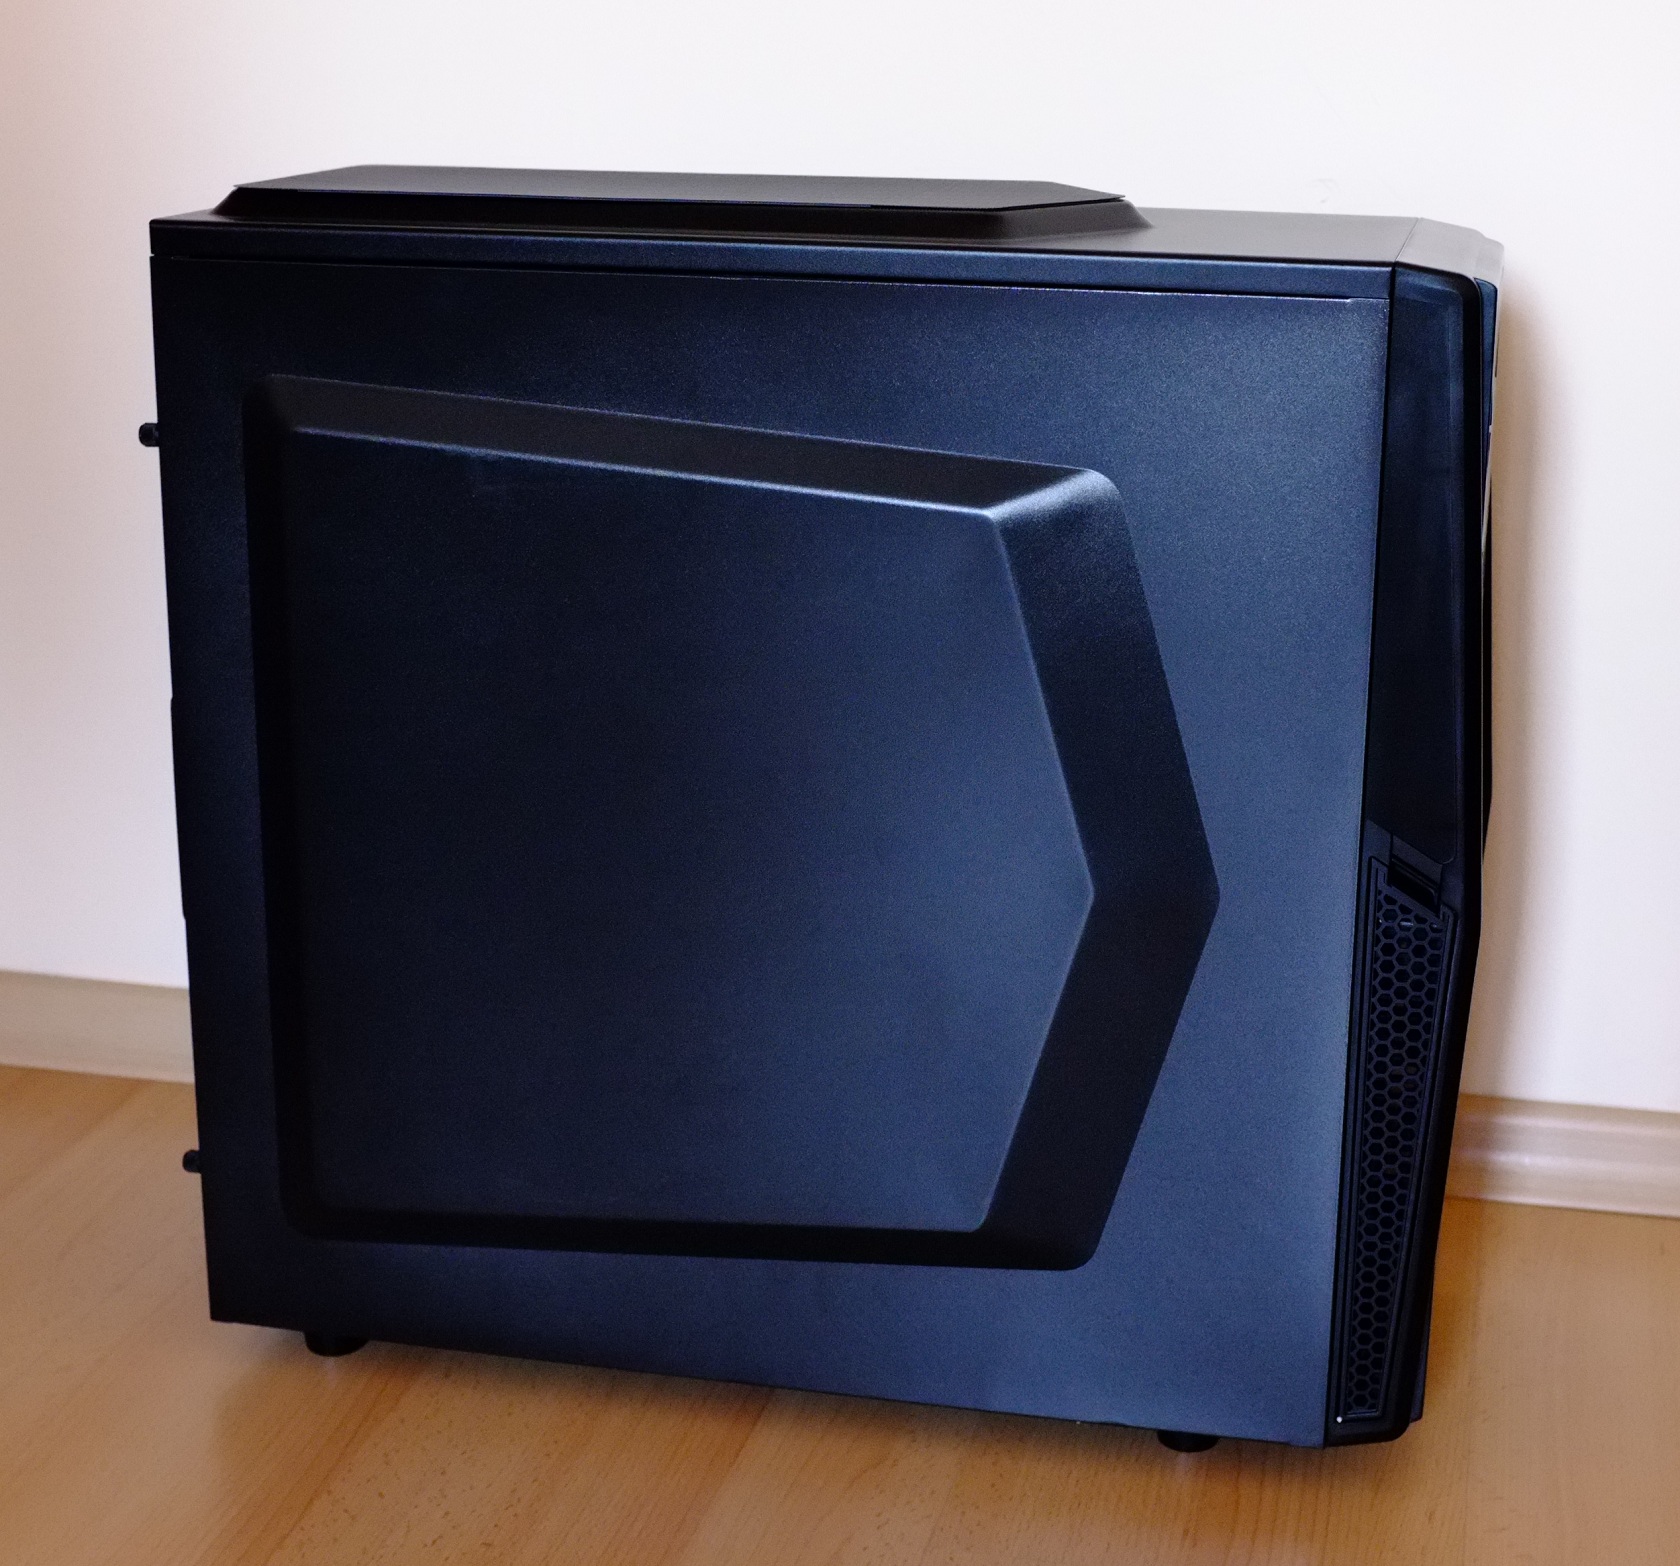
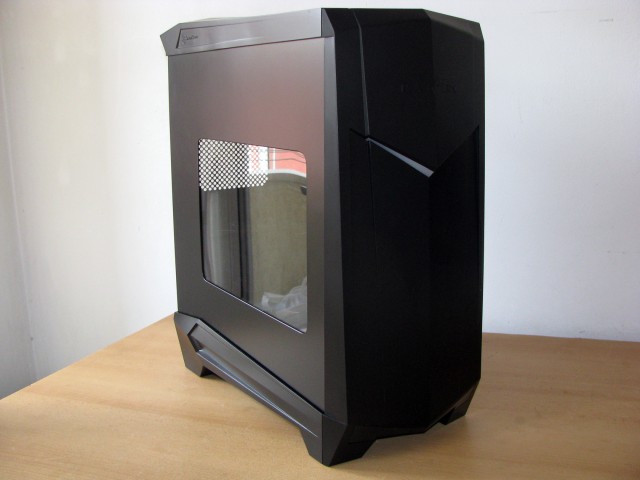
Silverstone Precision PS10 is covered in black paint all the way trough, with the side panels and top panel sticking out a little bit. I guess the top panel sticks out to add a little extra “mm” if you decide to place a 240mm radiator on the top, just to prevent clearance issues with the motherboard and the radiator. The case looks small actually, at least exterior wise. It supports ATX and Micro-ATX motherboards and has dimensions of 219.9 mm (W) x 480mm (H) x 521.5mm (D) and is very, very light – 6.2kg. I was a bit stressed when I pulled it out of the carton box, it felt like something was missing, but there was nothing to worry about. I think it is time to check out the front and back of the case.
| Front panel | Back of the case |
 |
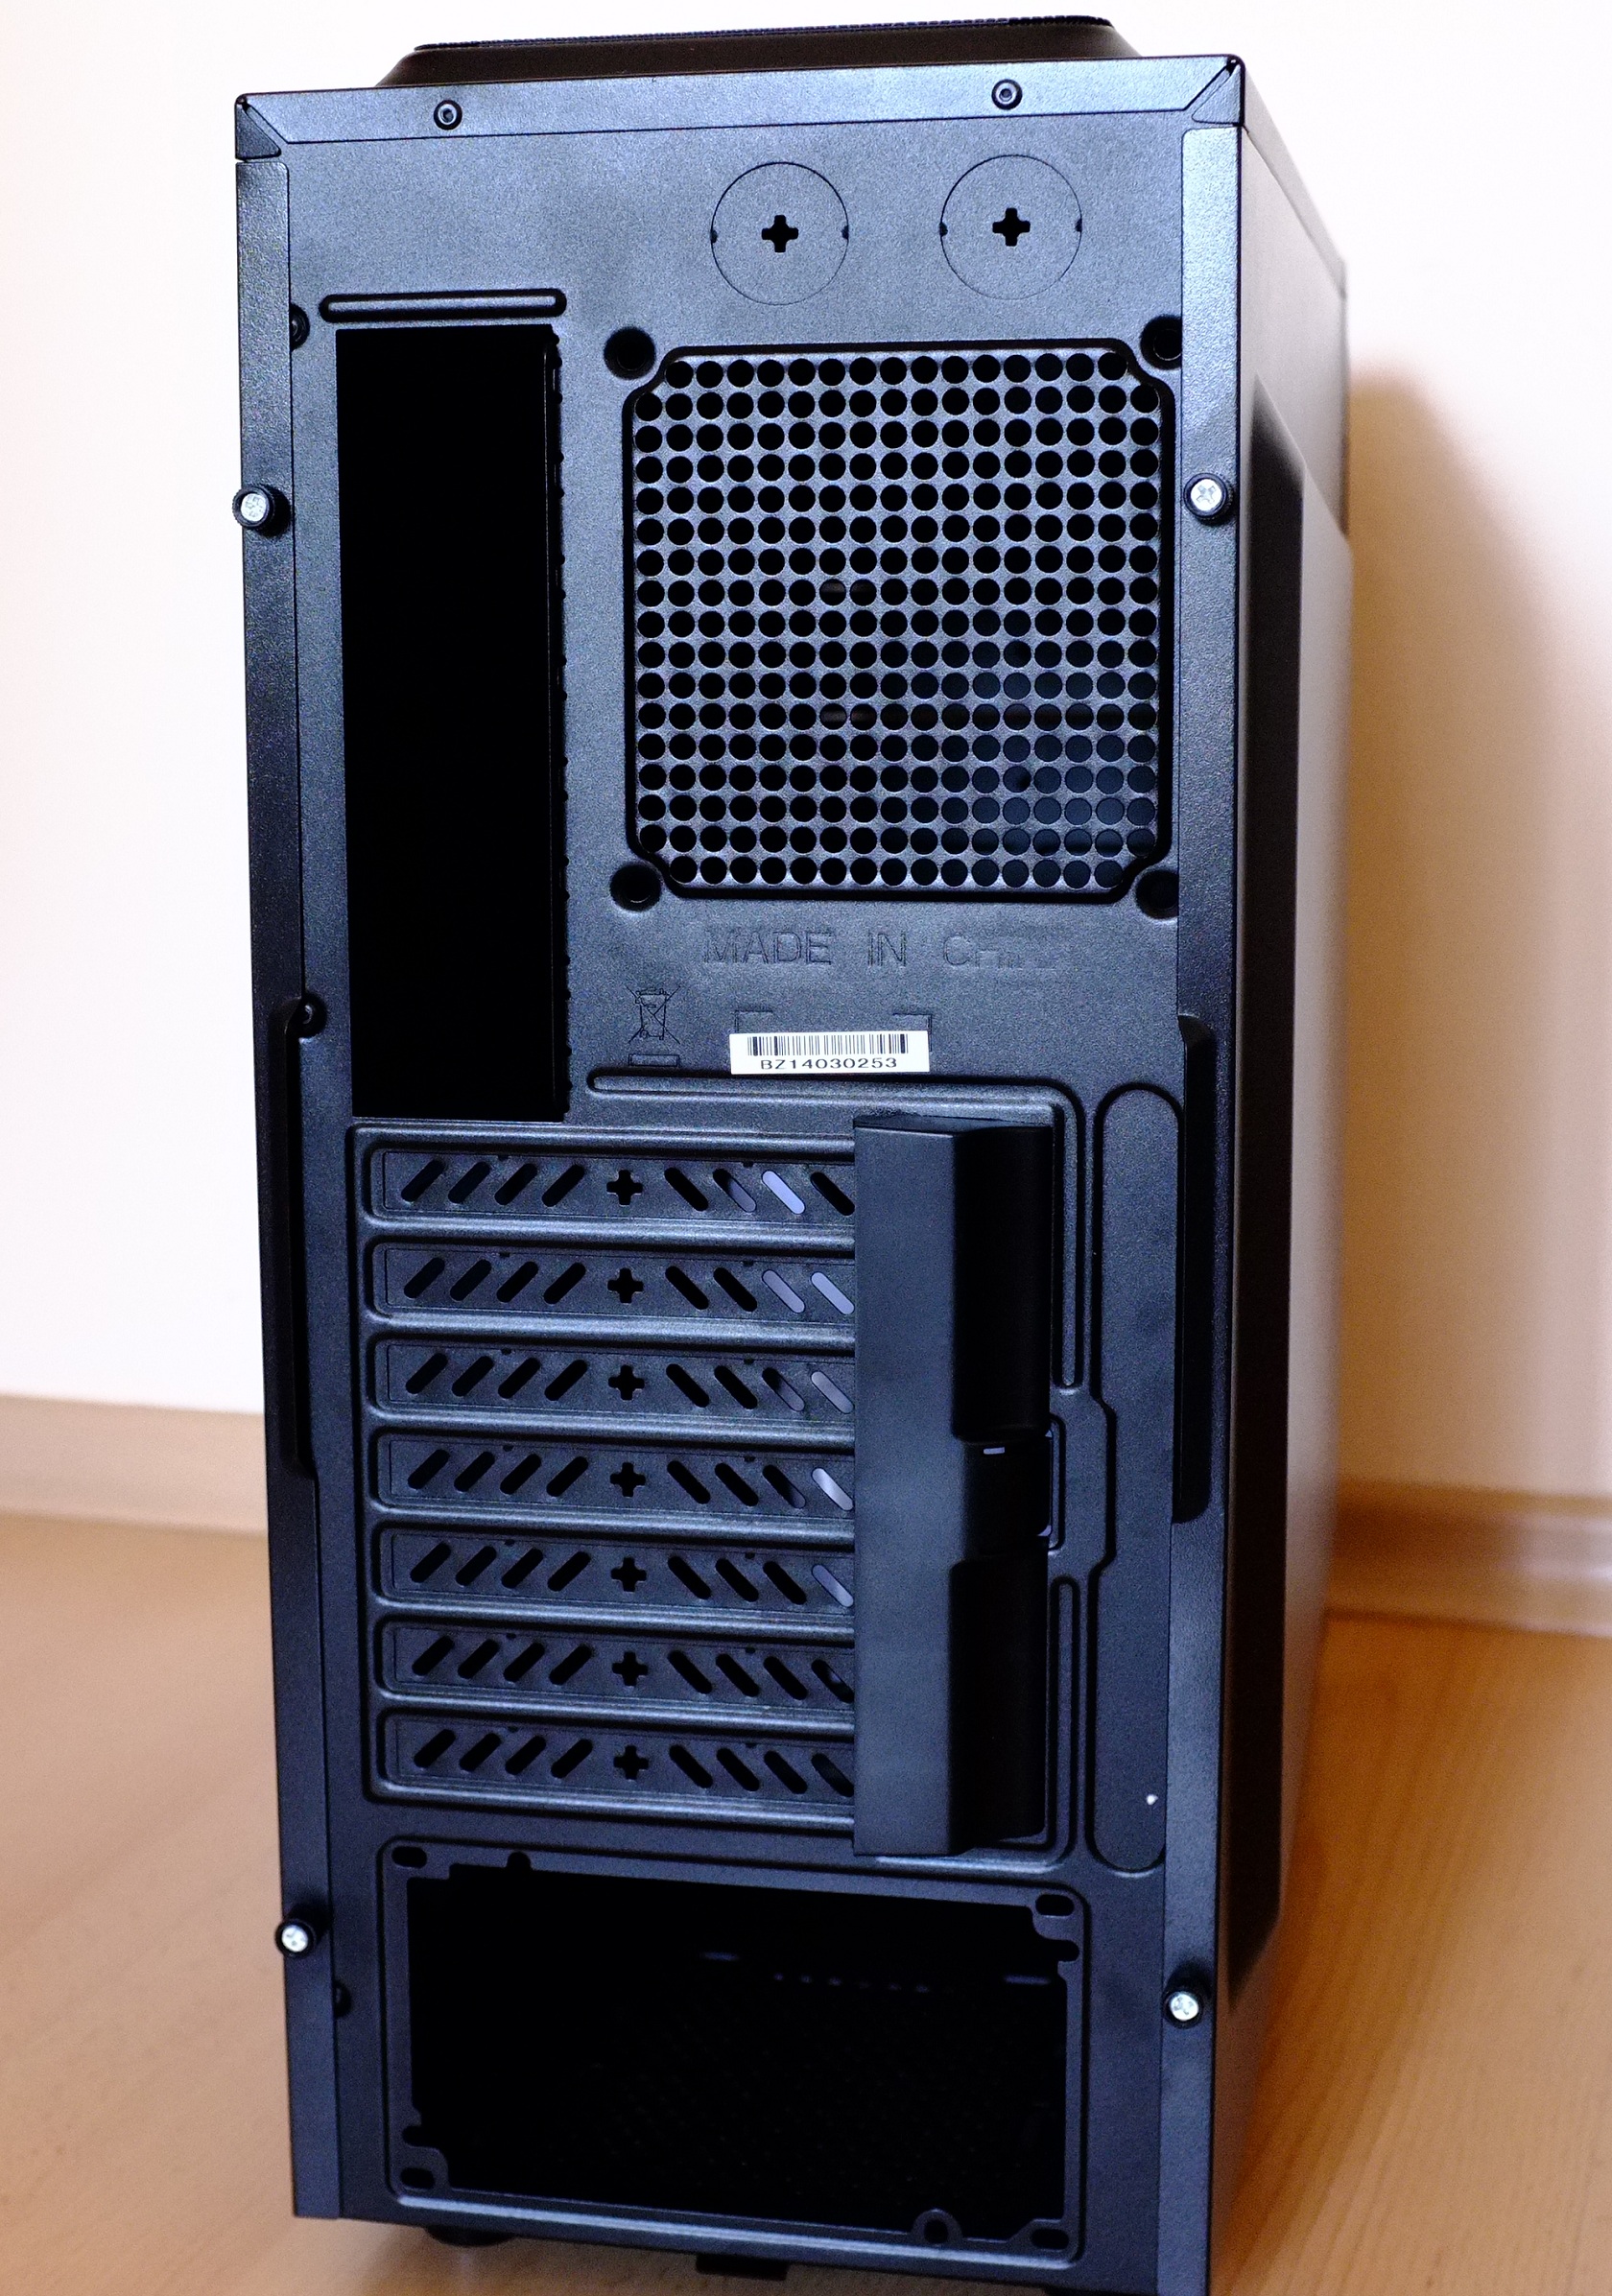 |
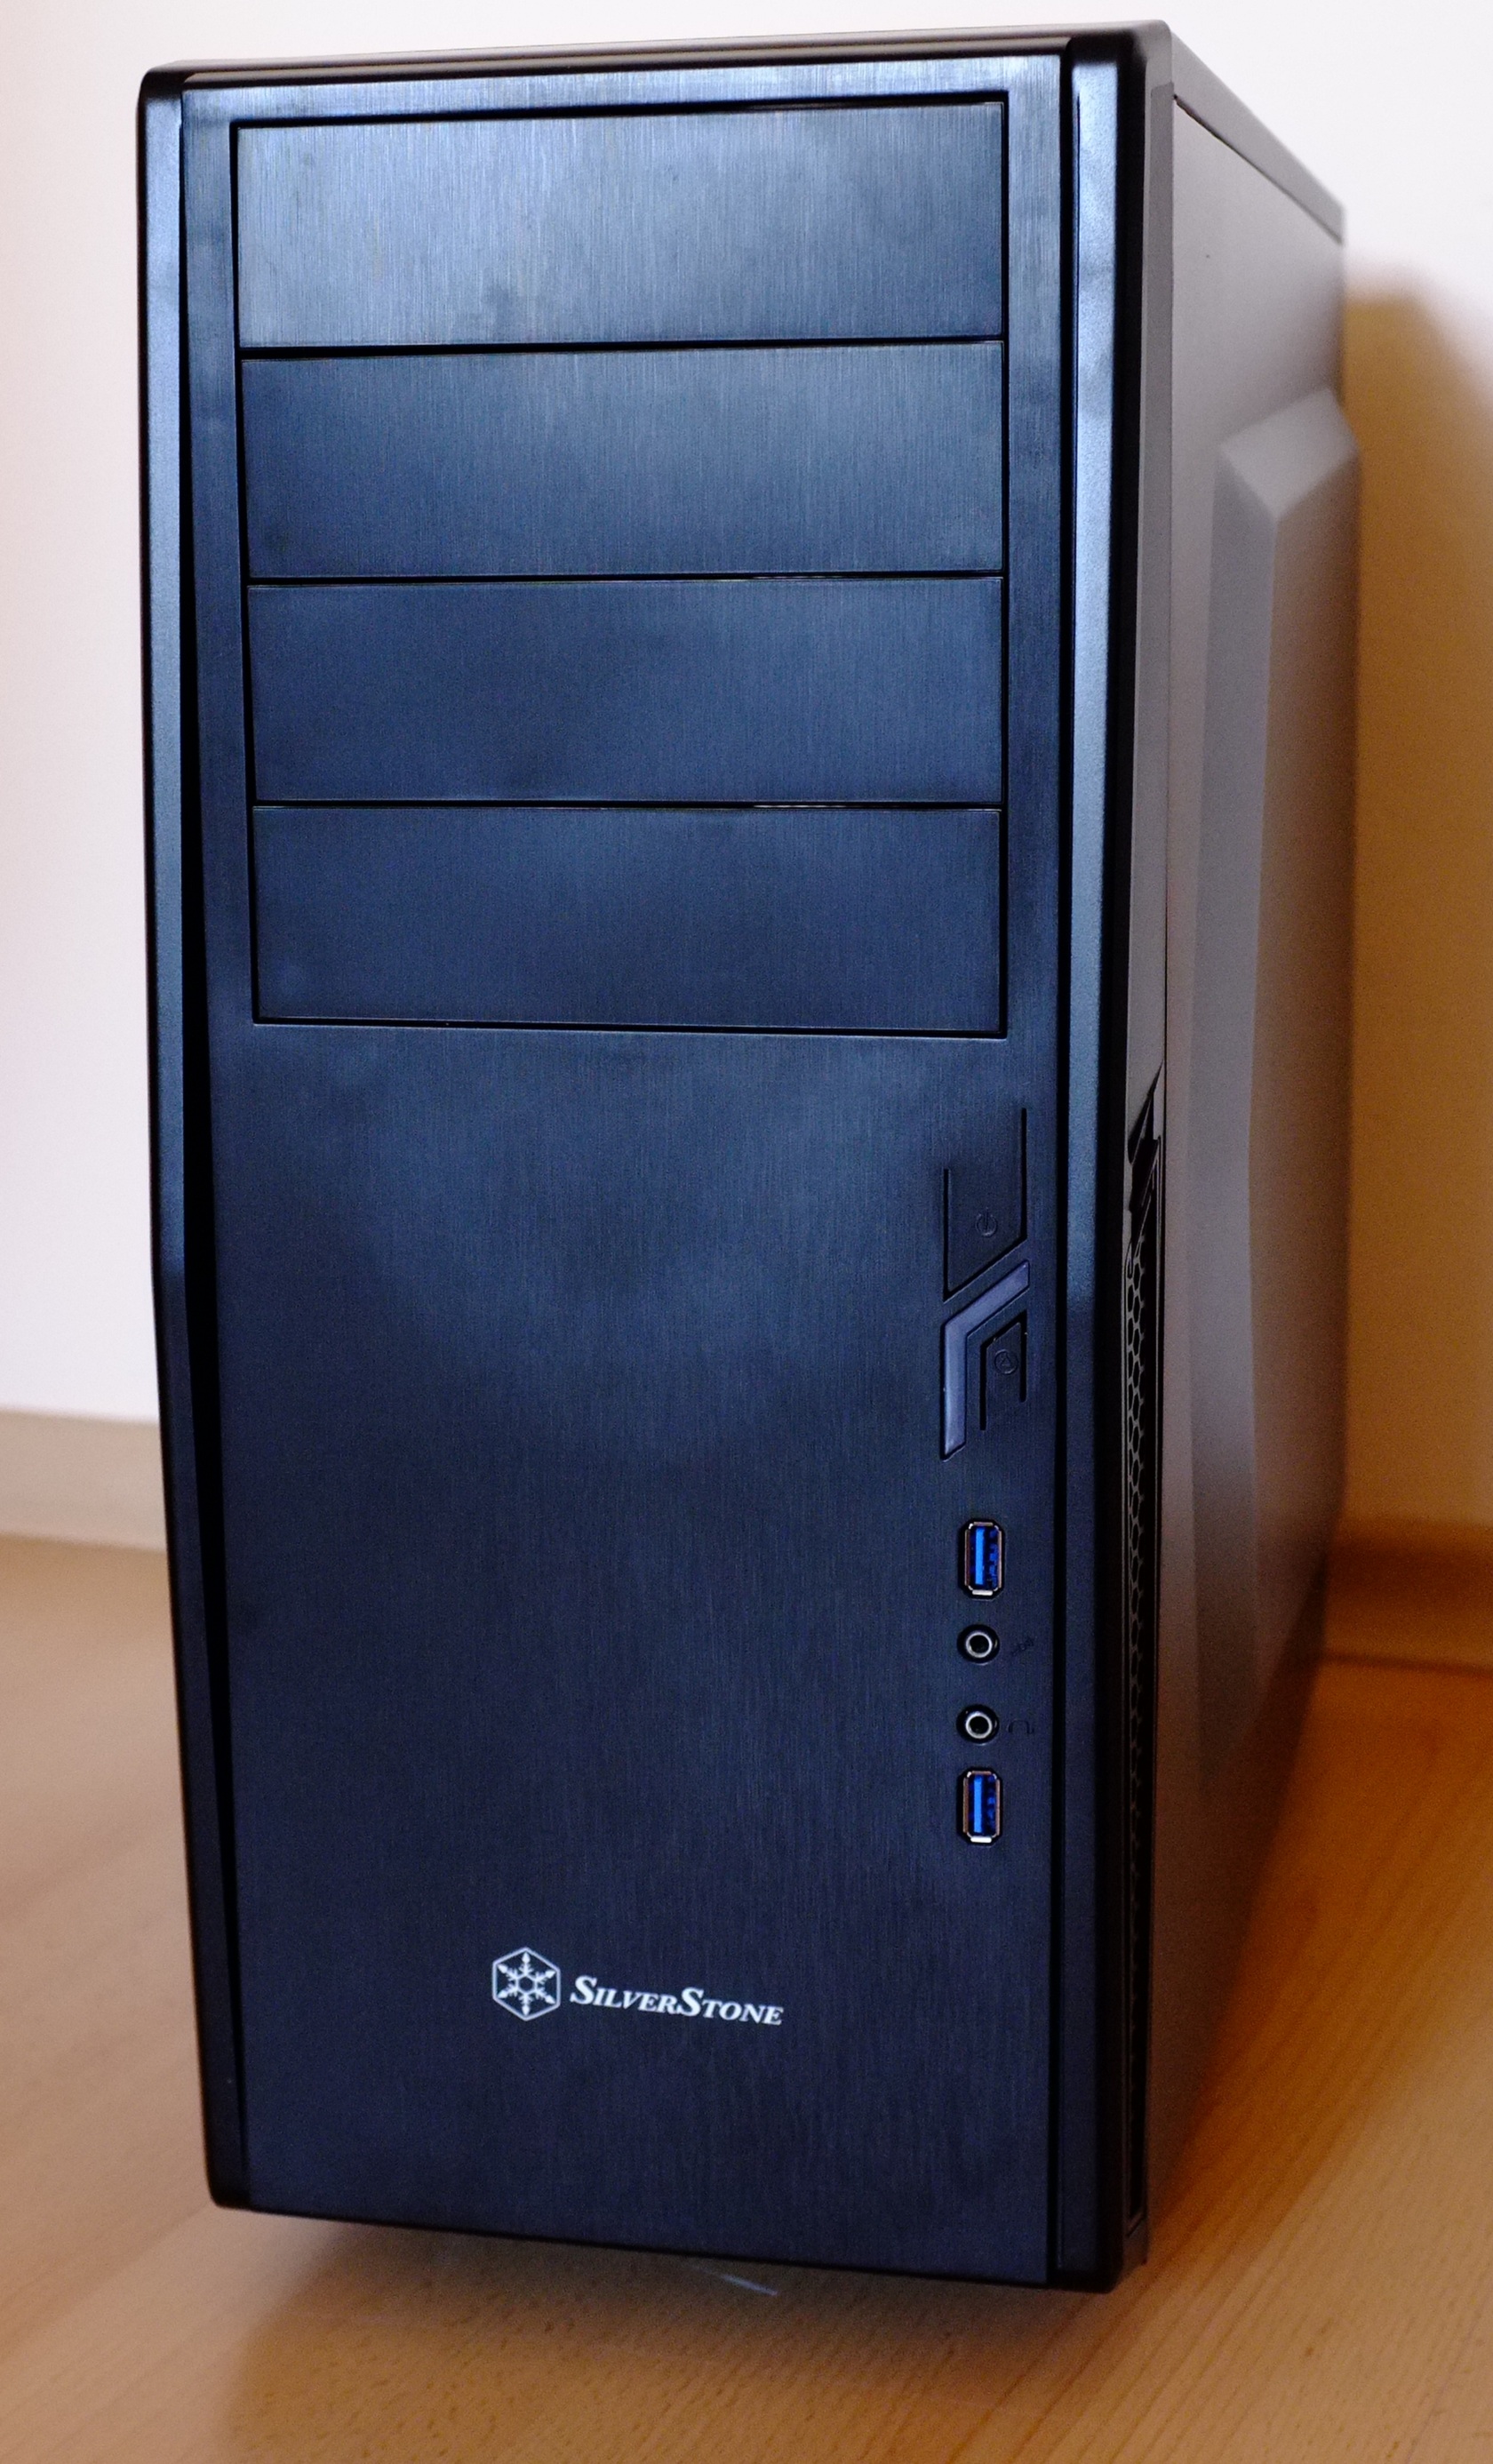
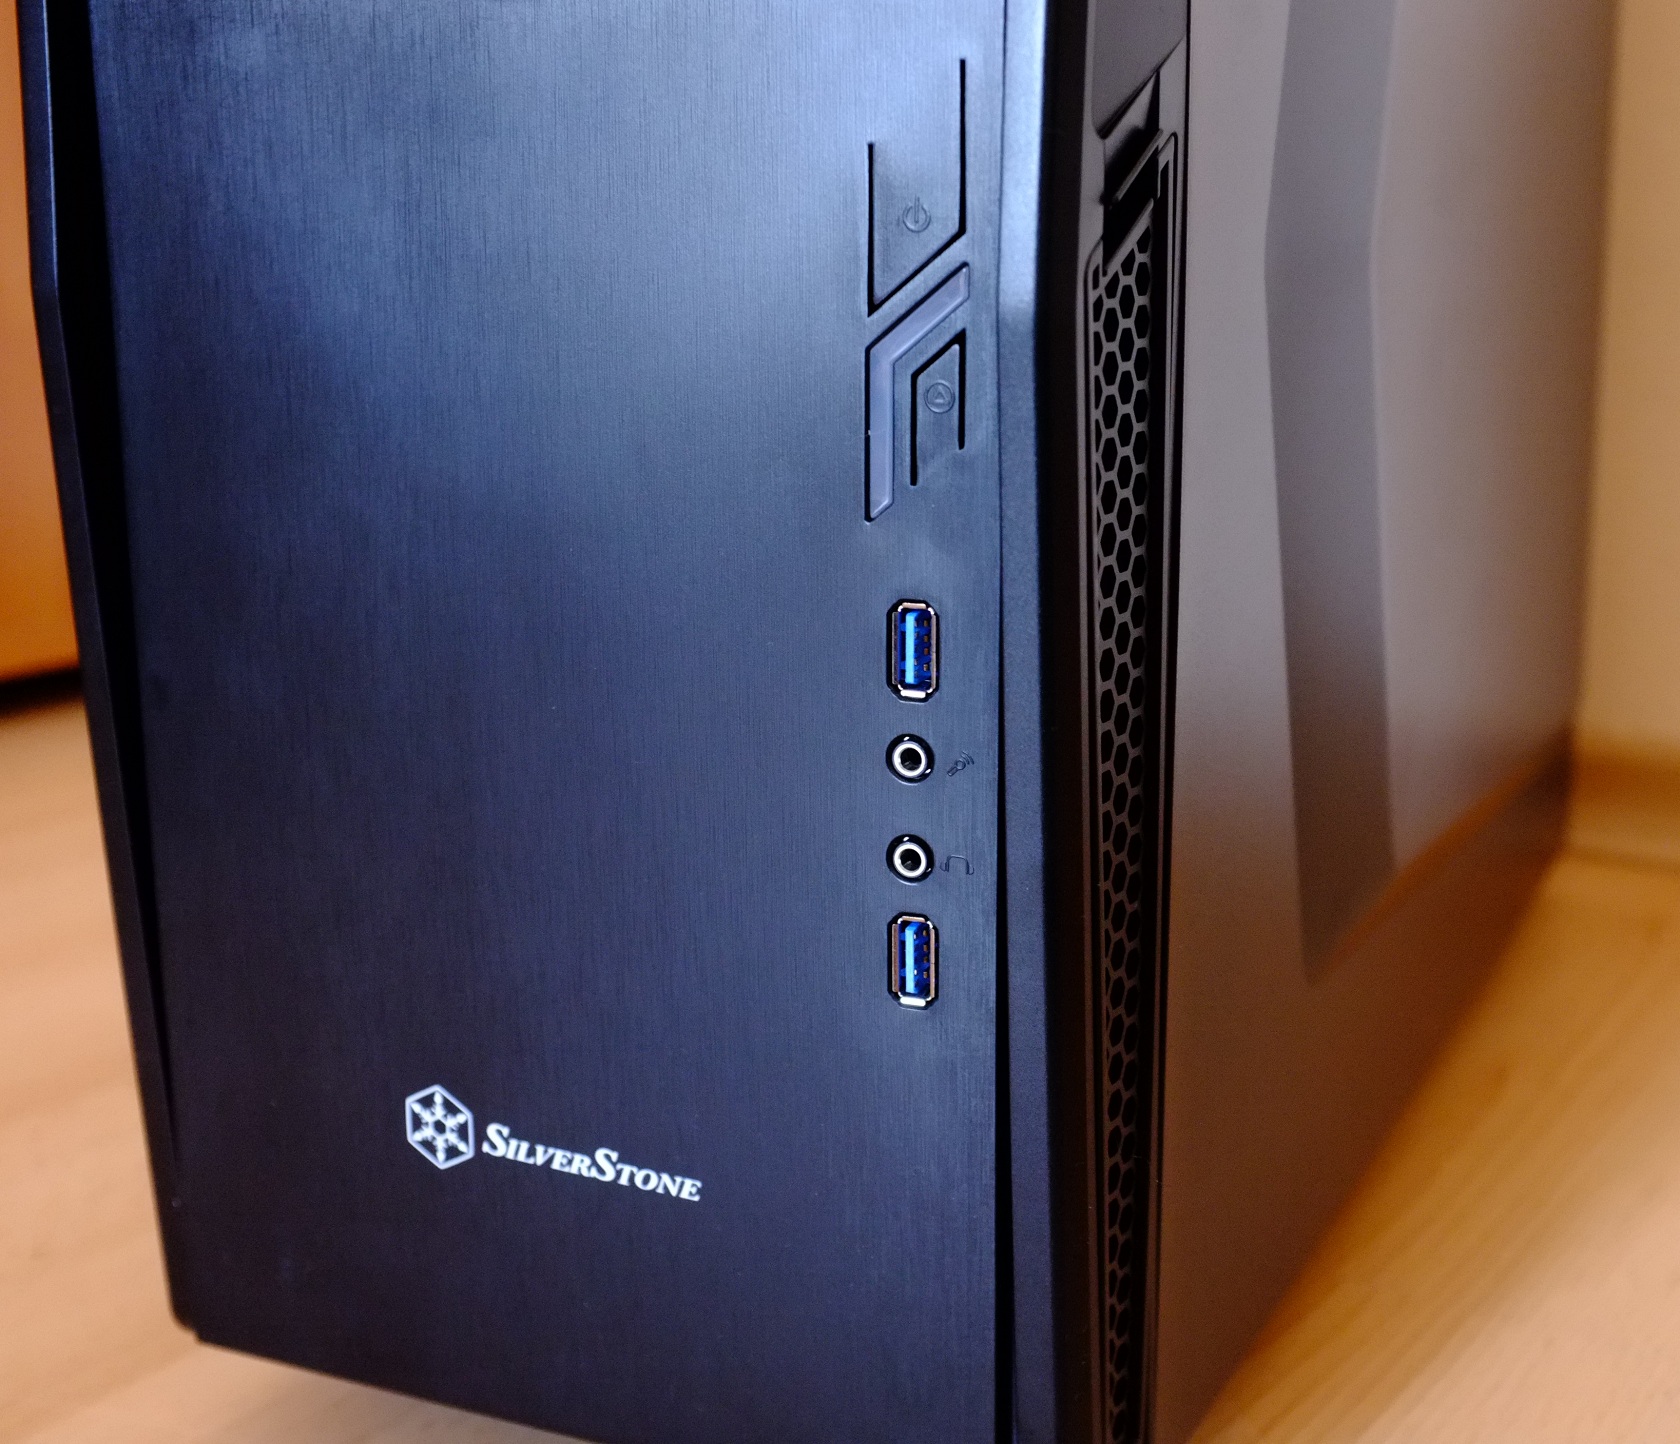
The front panel is very clean looking and has an overall flat design. Silverstone has placed their logo at the bottom of the front panel with white lettering, that contrasts the black plastic. Front panel features four 5.25″ drive bays with removable plastic covers, two USB 3.0 ports, audio jacks for headphones and microphone. What caught my attention was the design of the HDD activity LED and Power and Reset buttons – they are part of the whole plastic cover that makes the front panel and are very easy to press, also they give good feedback so that you know when is the actuation of the button. After checking out the front panel I turned the case around and what I saw was two pre-cut water cooling holes and seven expansion slots, which for a case this size is actually a nice touch.
| Power and Reset Buttons | Top panel |
 |
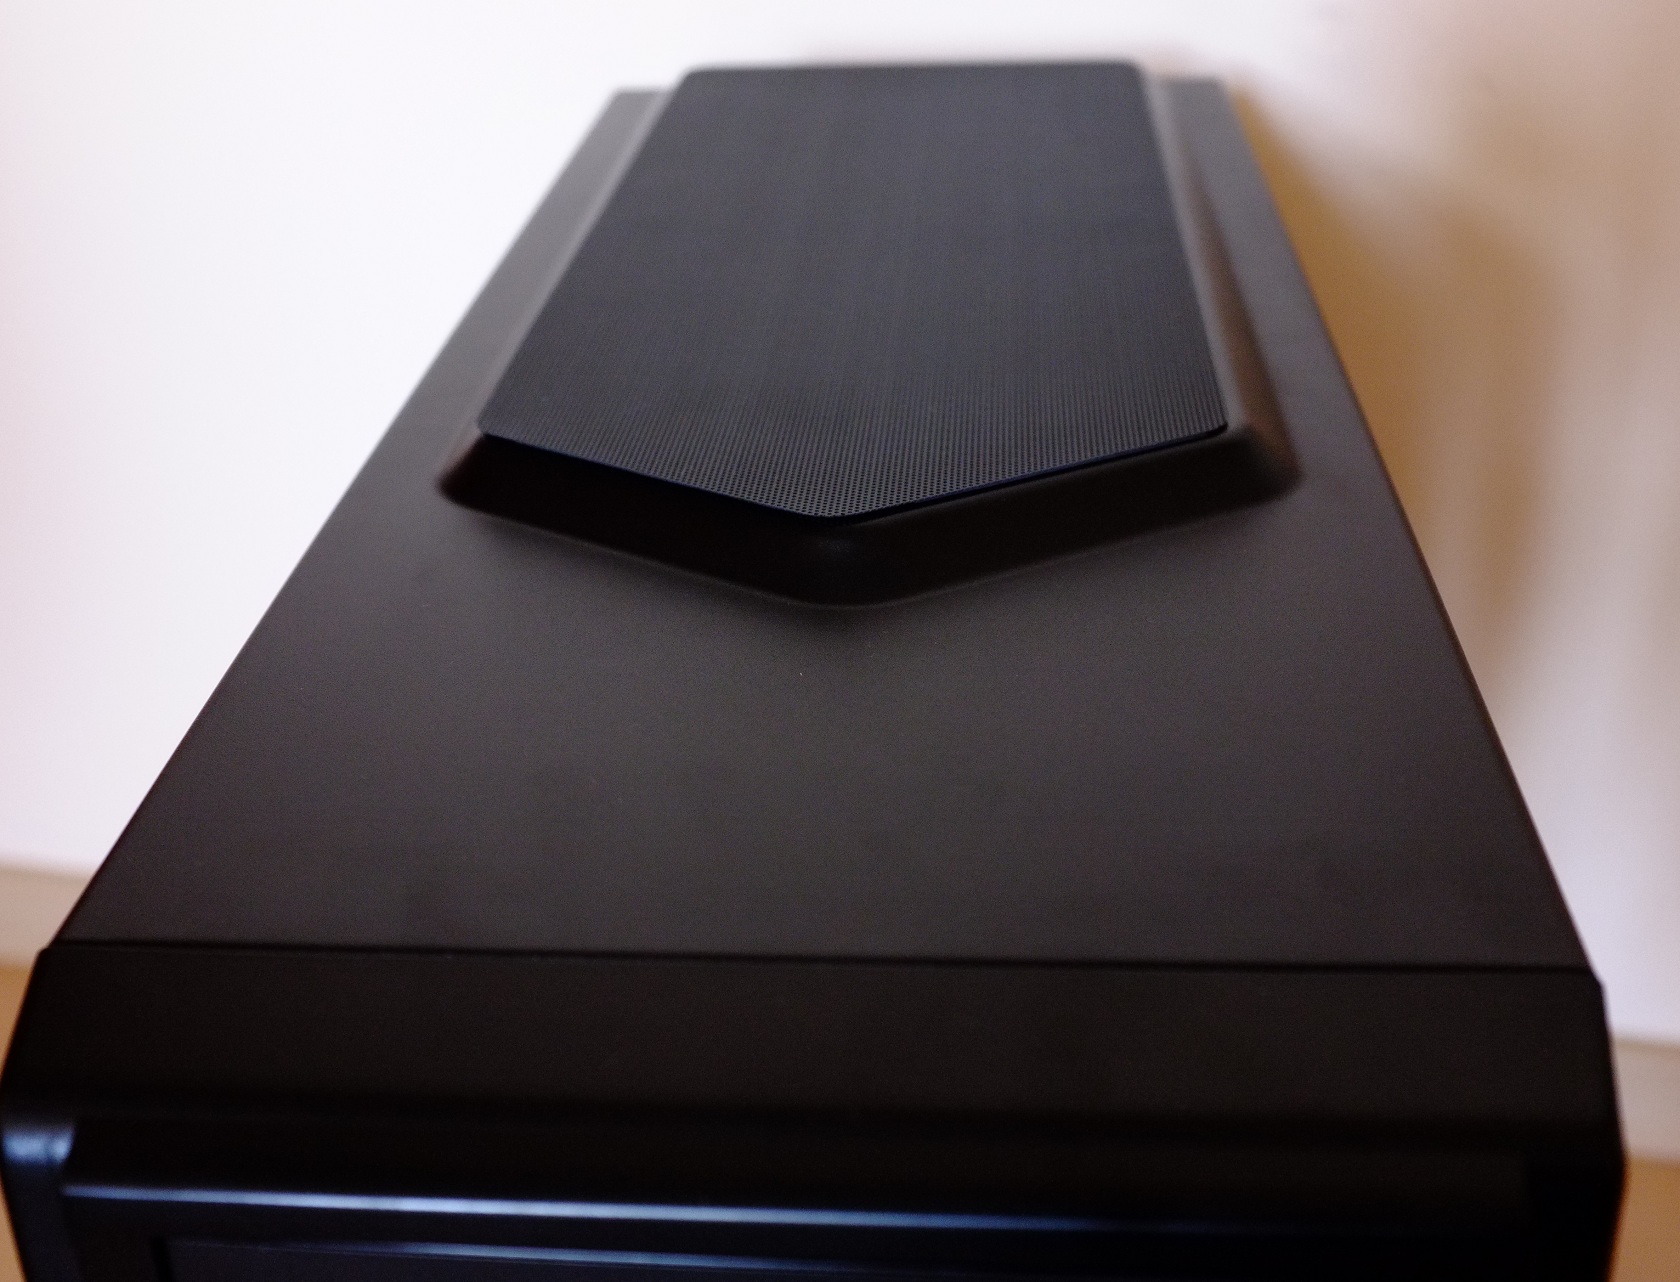 |
So after I was done inspecting the exterior of the case I had to move on to the interior and check out what it has to offer.
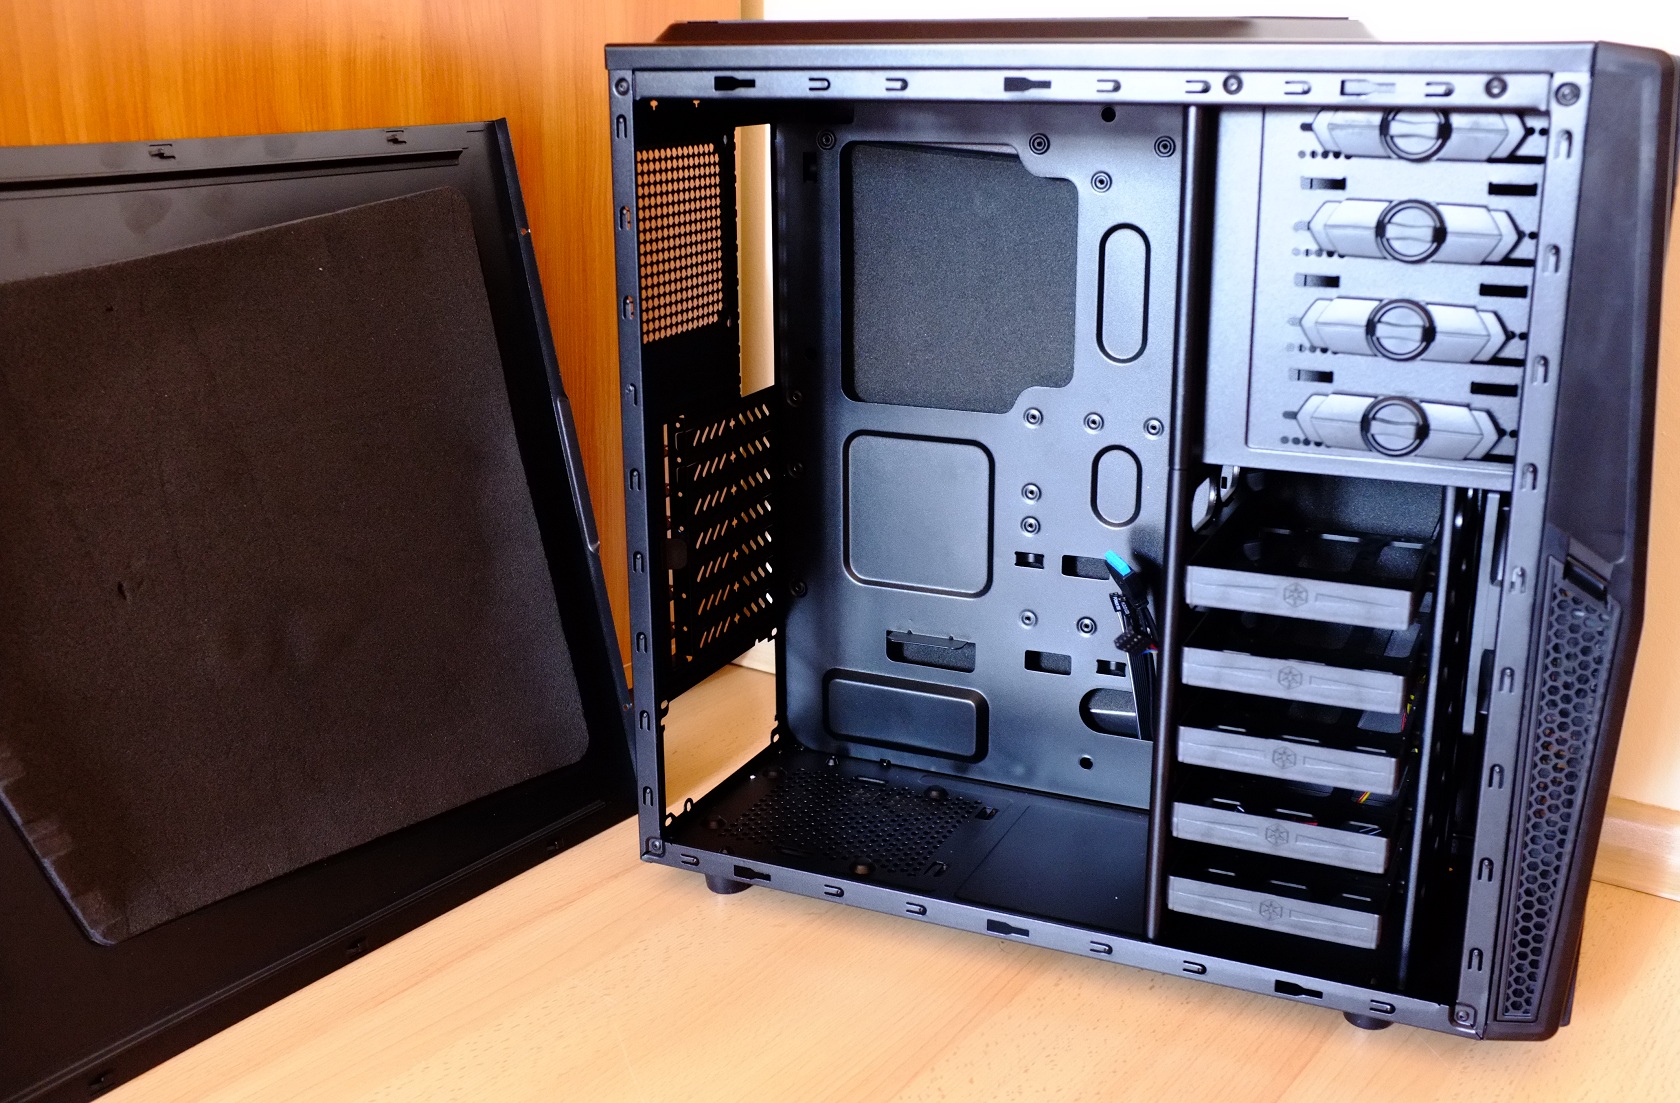
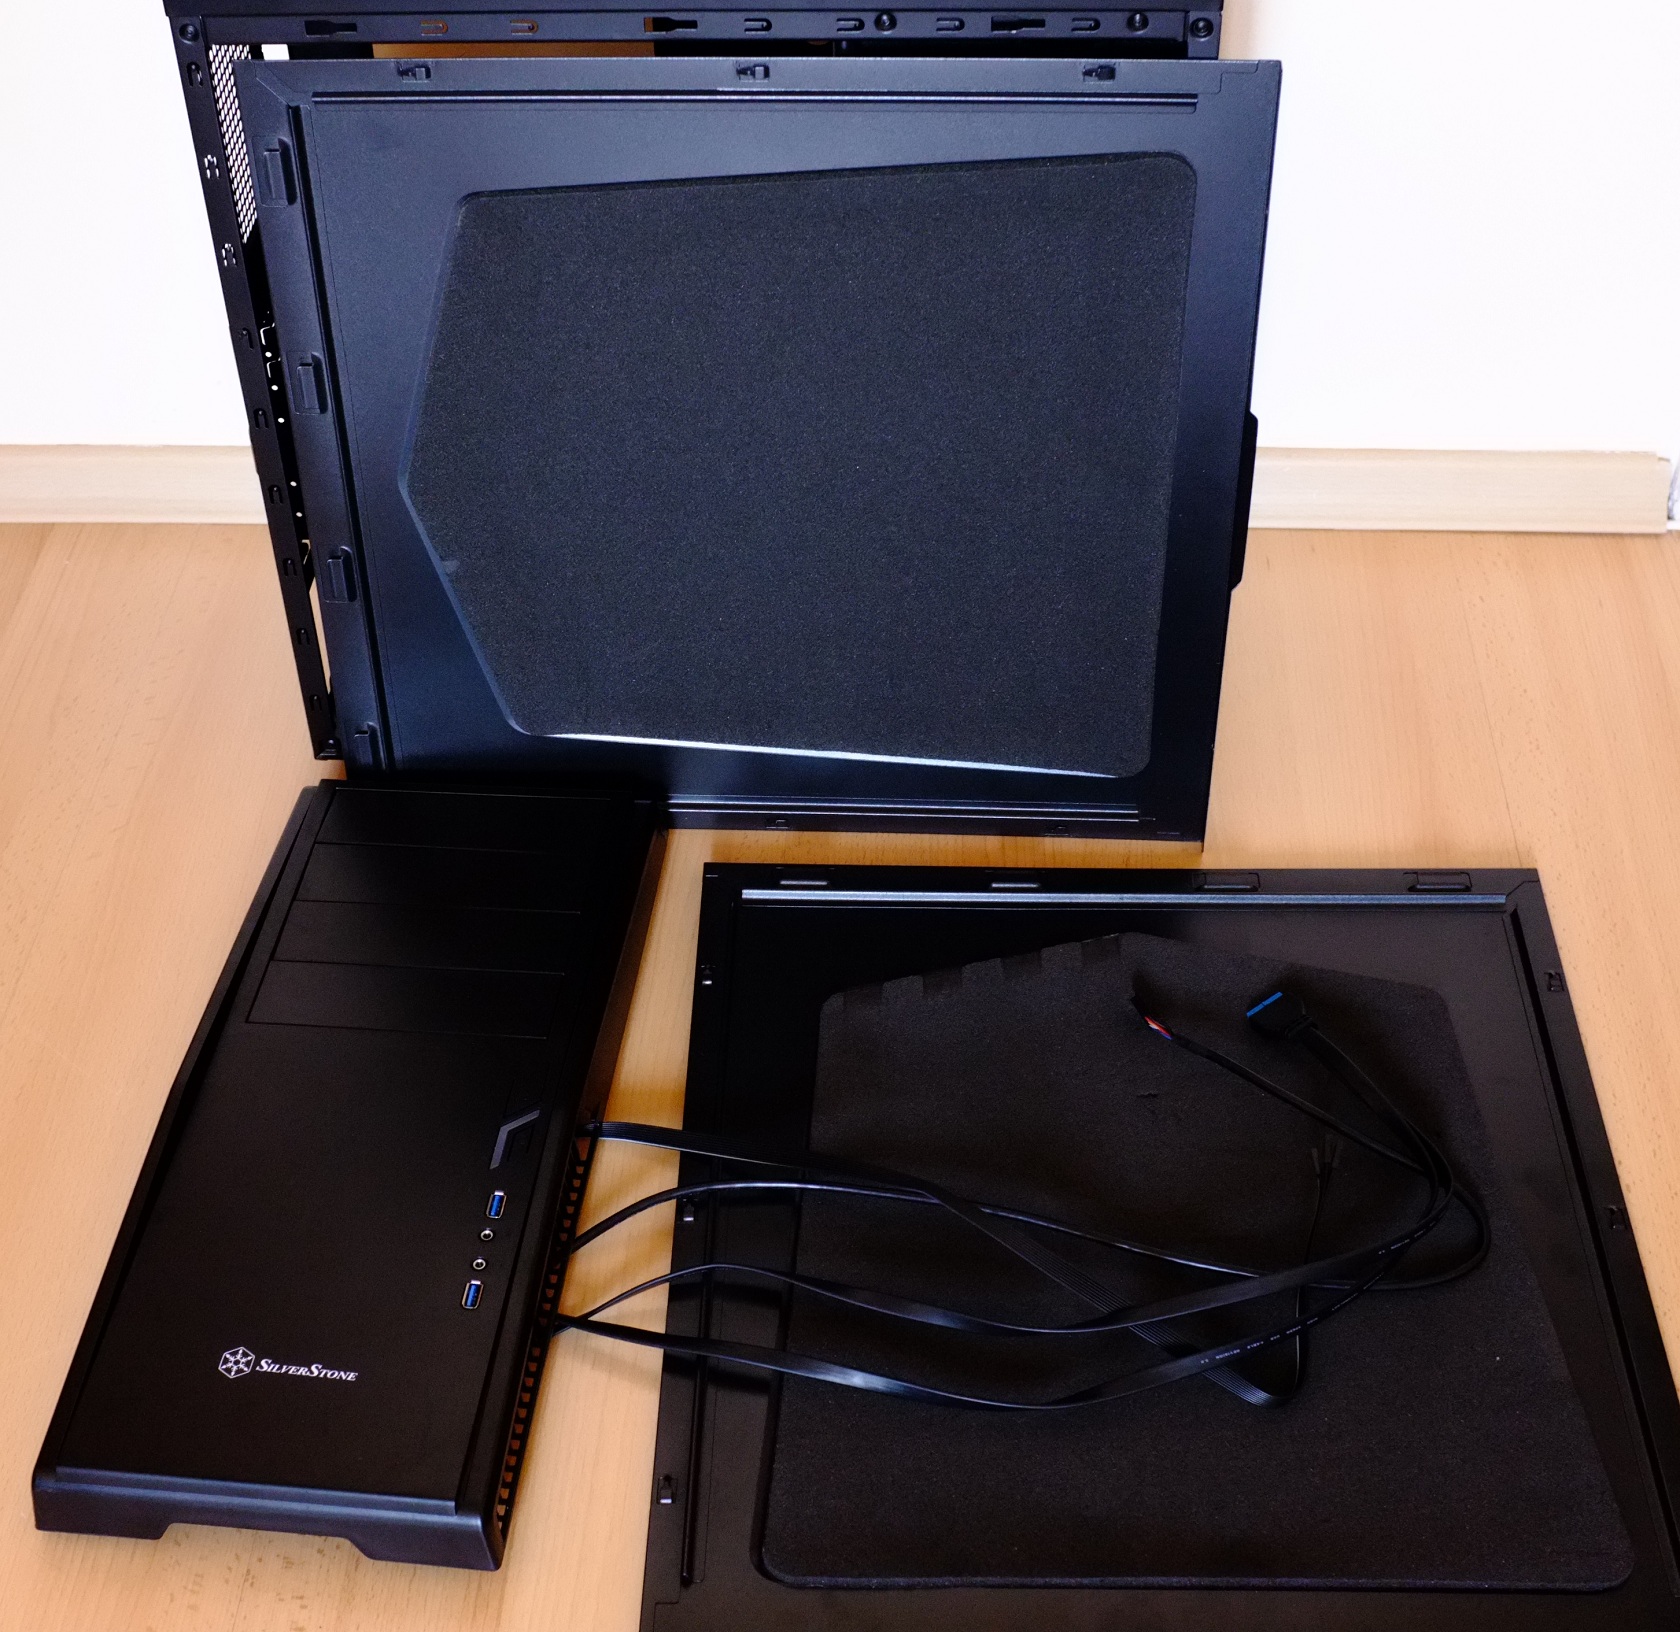
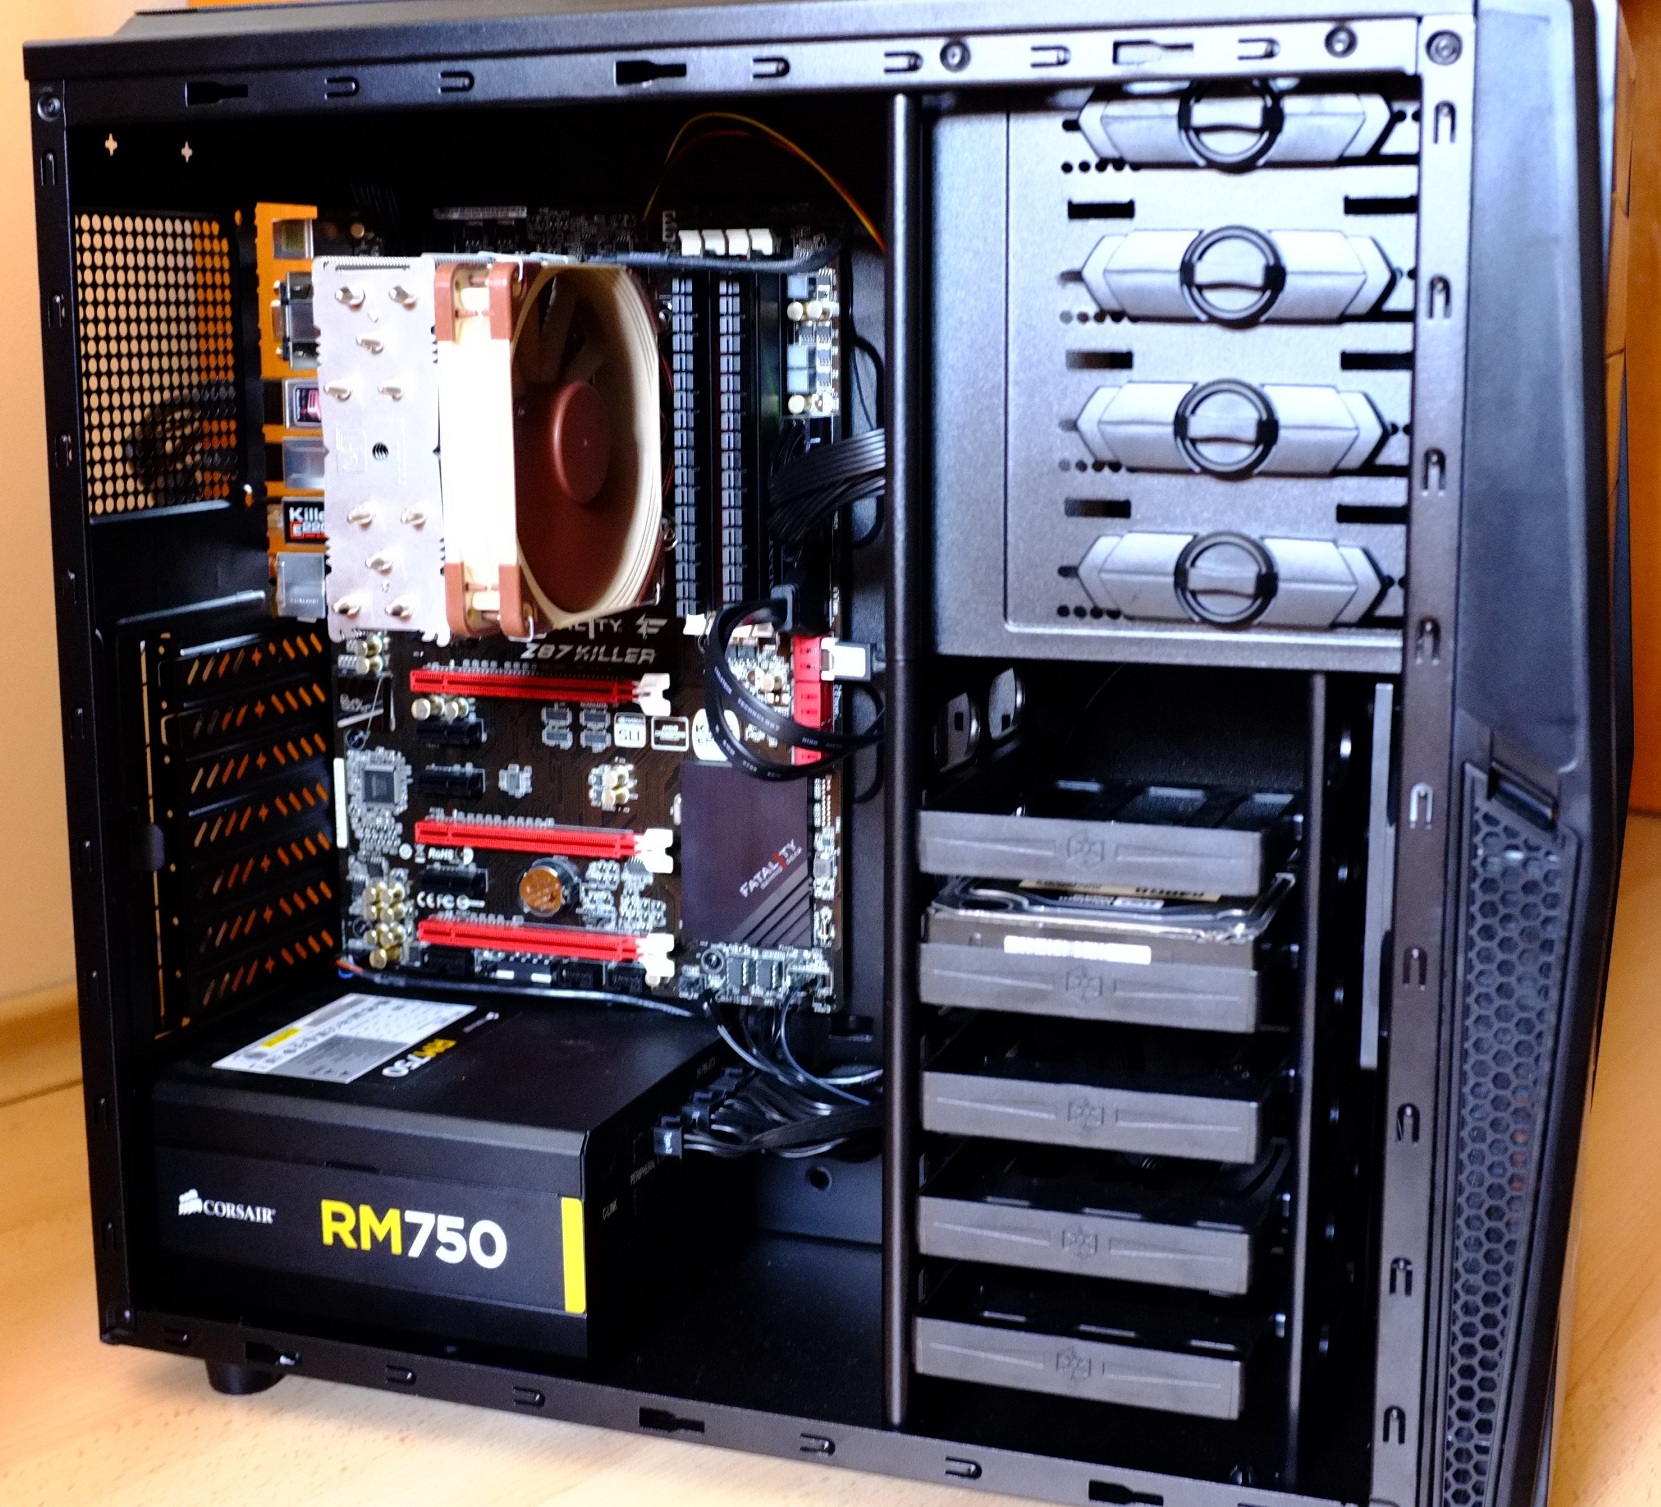
All of the interior is painted in black, which gives the case a premium look. Immediately after removing the side panel I noticed the sound dampening foam used in both the left and right panels. The foam is thick and soft, somewhat like a memory foam. It is glued to the panels and can’t be removed without damaging it thoroughly. Later in the test section I will see if the foam does its job with the noise absorbtion. We can see a large CPU cutout for easy CPU cooler installation/removal and lack of rubber grommets, which is a must have nowadays in almost every case. Also, since this is a Silent case, I would have appreciated some rubber pads on the PSU supports, but there are none. Let’s move on to the back of the interior and see what’s the situation there.
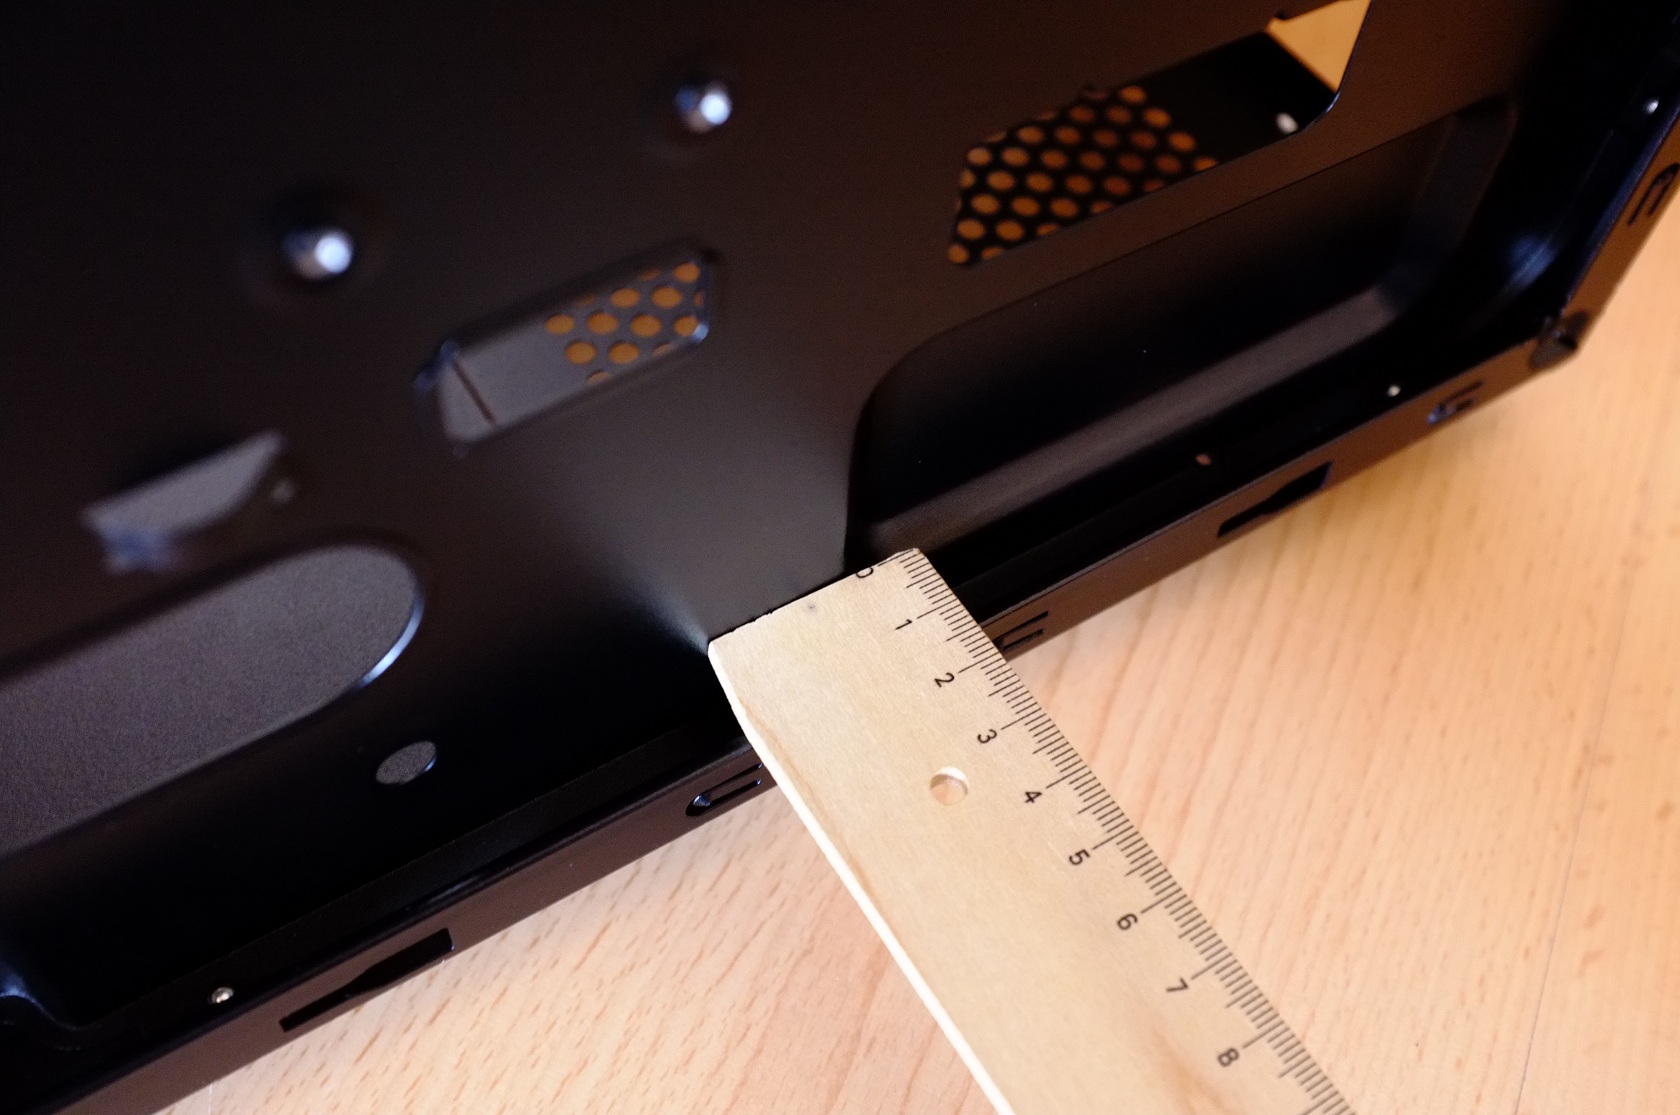
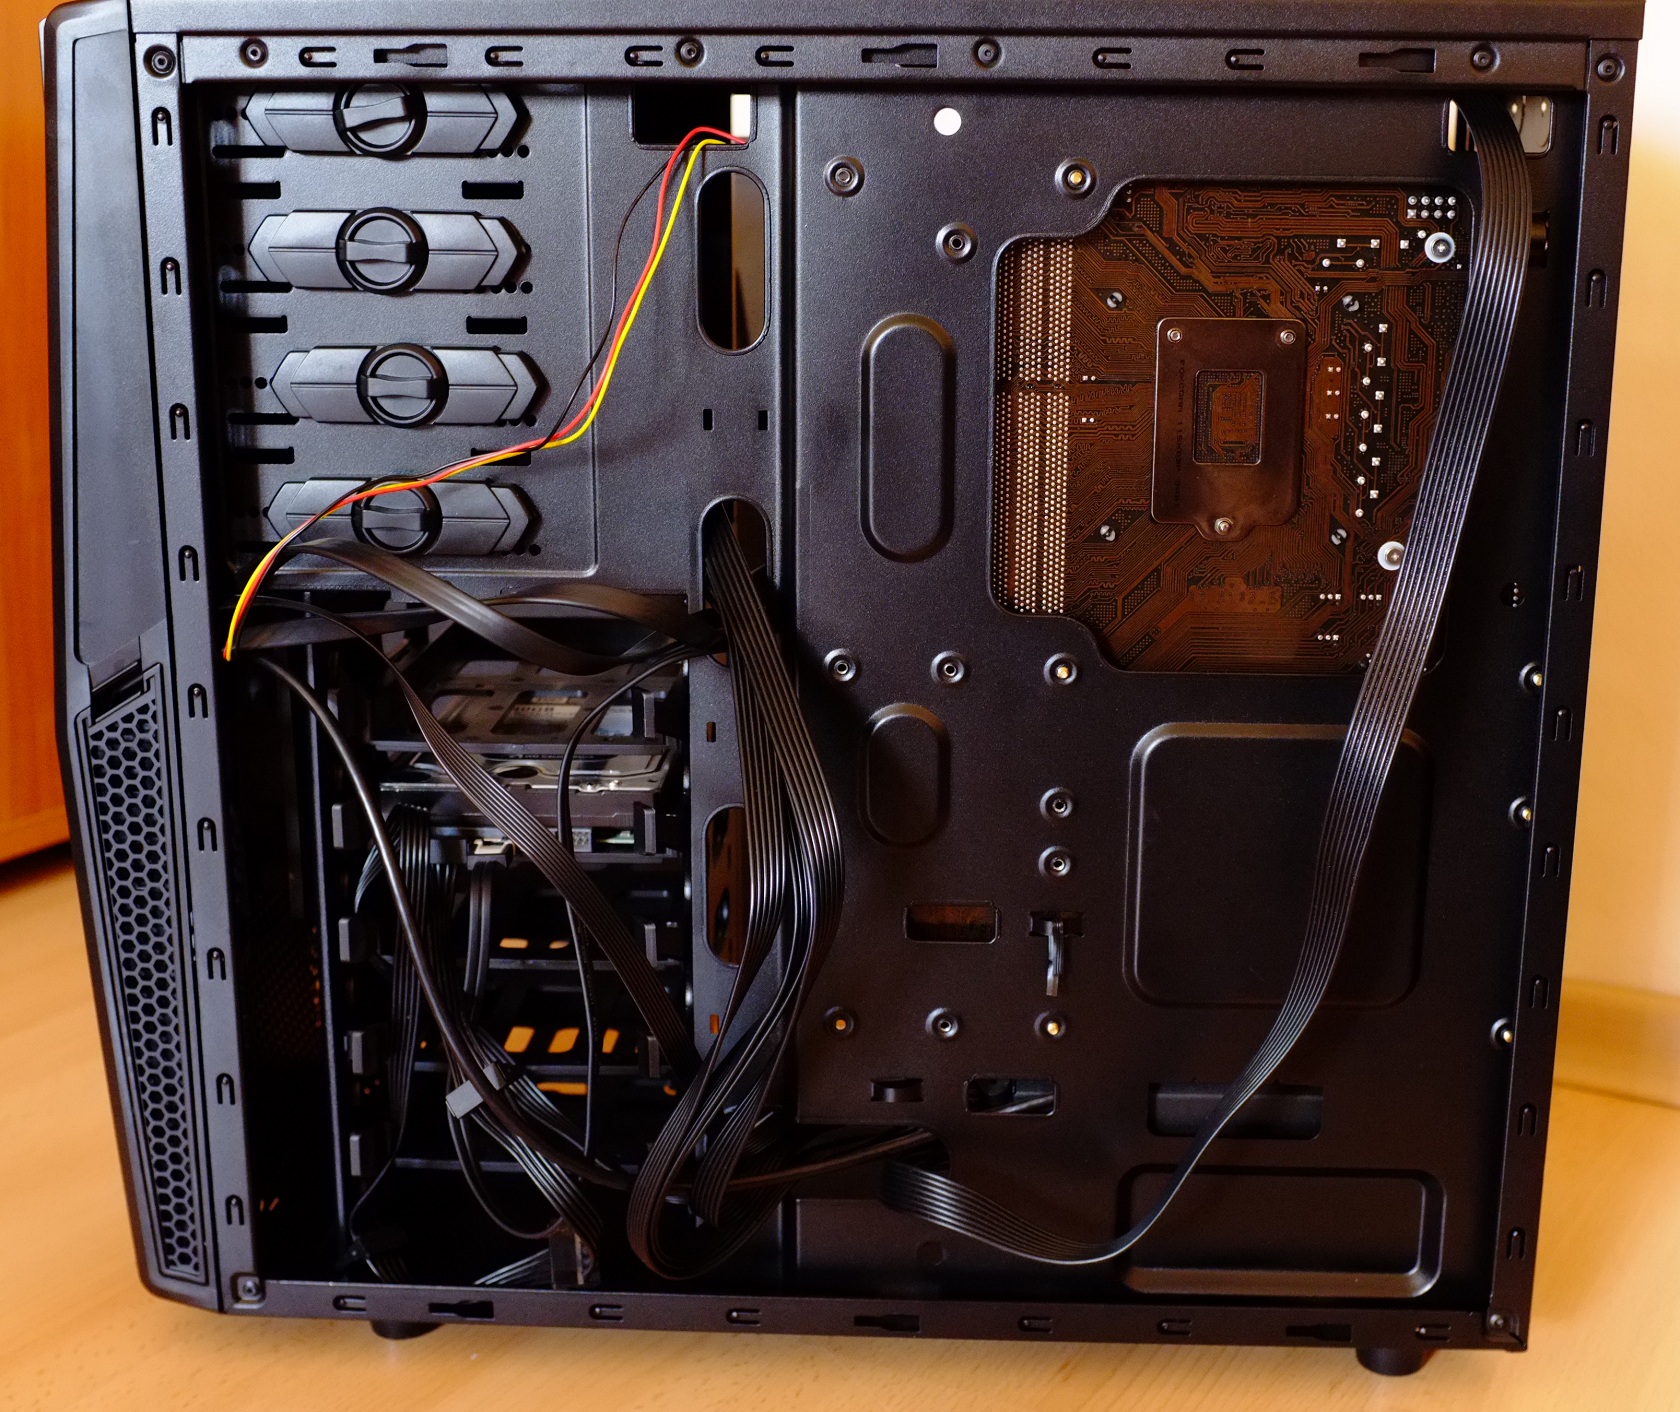
Silverstone left enough cable management holes where zip ties can be applied, although there are no zip ties included in the accessories. Cable management space is about 15mm (at its lowest point), which is okay, given the fact that the side panel is sticking out a bit, so probably you get around 20mm of space behind the motherboard tray. If you have non-modullar PSU I guess that you’d have to commit more time to the cable arrangement. I began to gradually remove all the removable parts of the case to see the structure of the chassis and then put them back together, before proceeding to the actual testing.
| Removed parts | Front and Side panels |
 |
 |
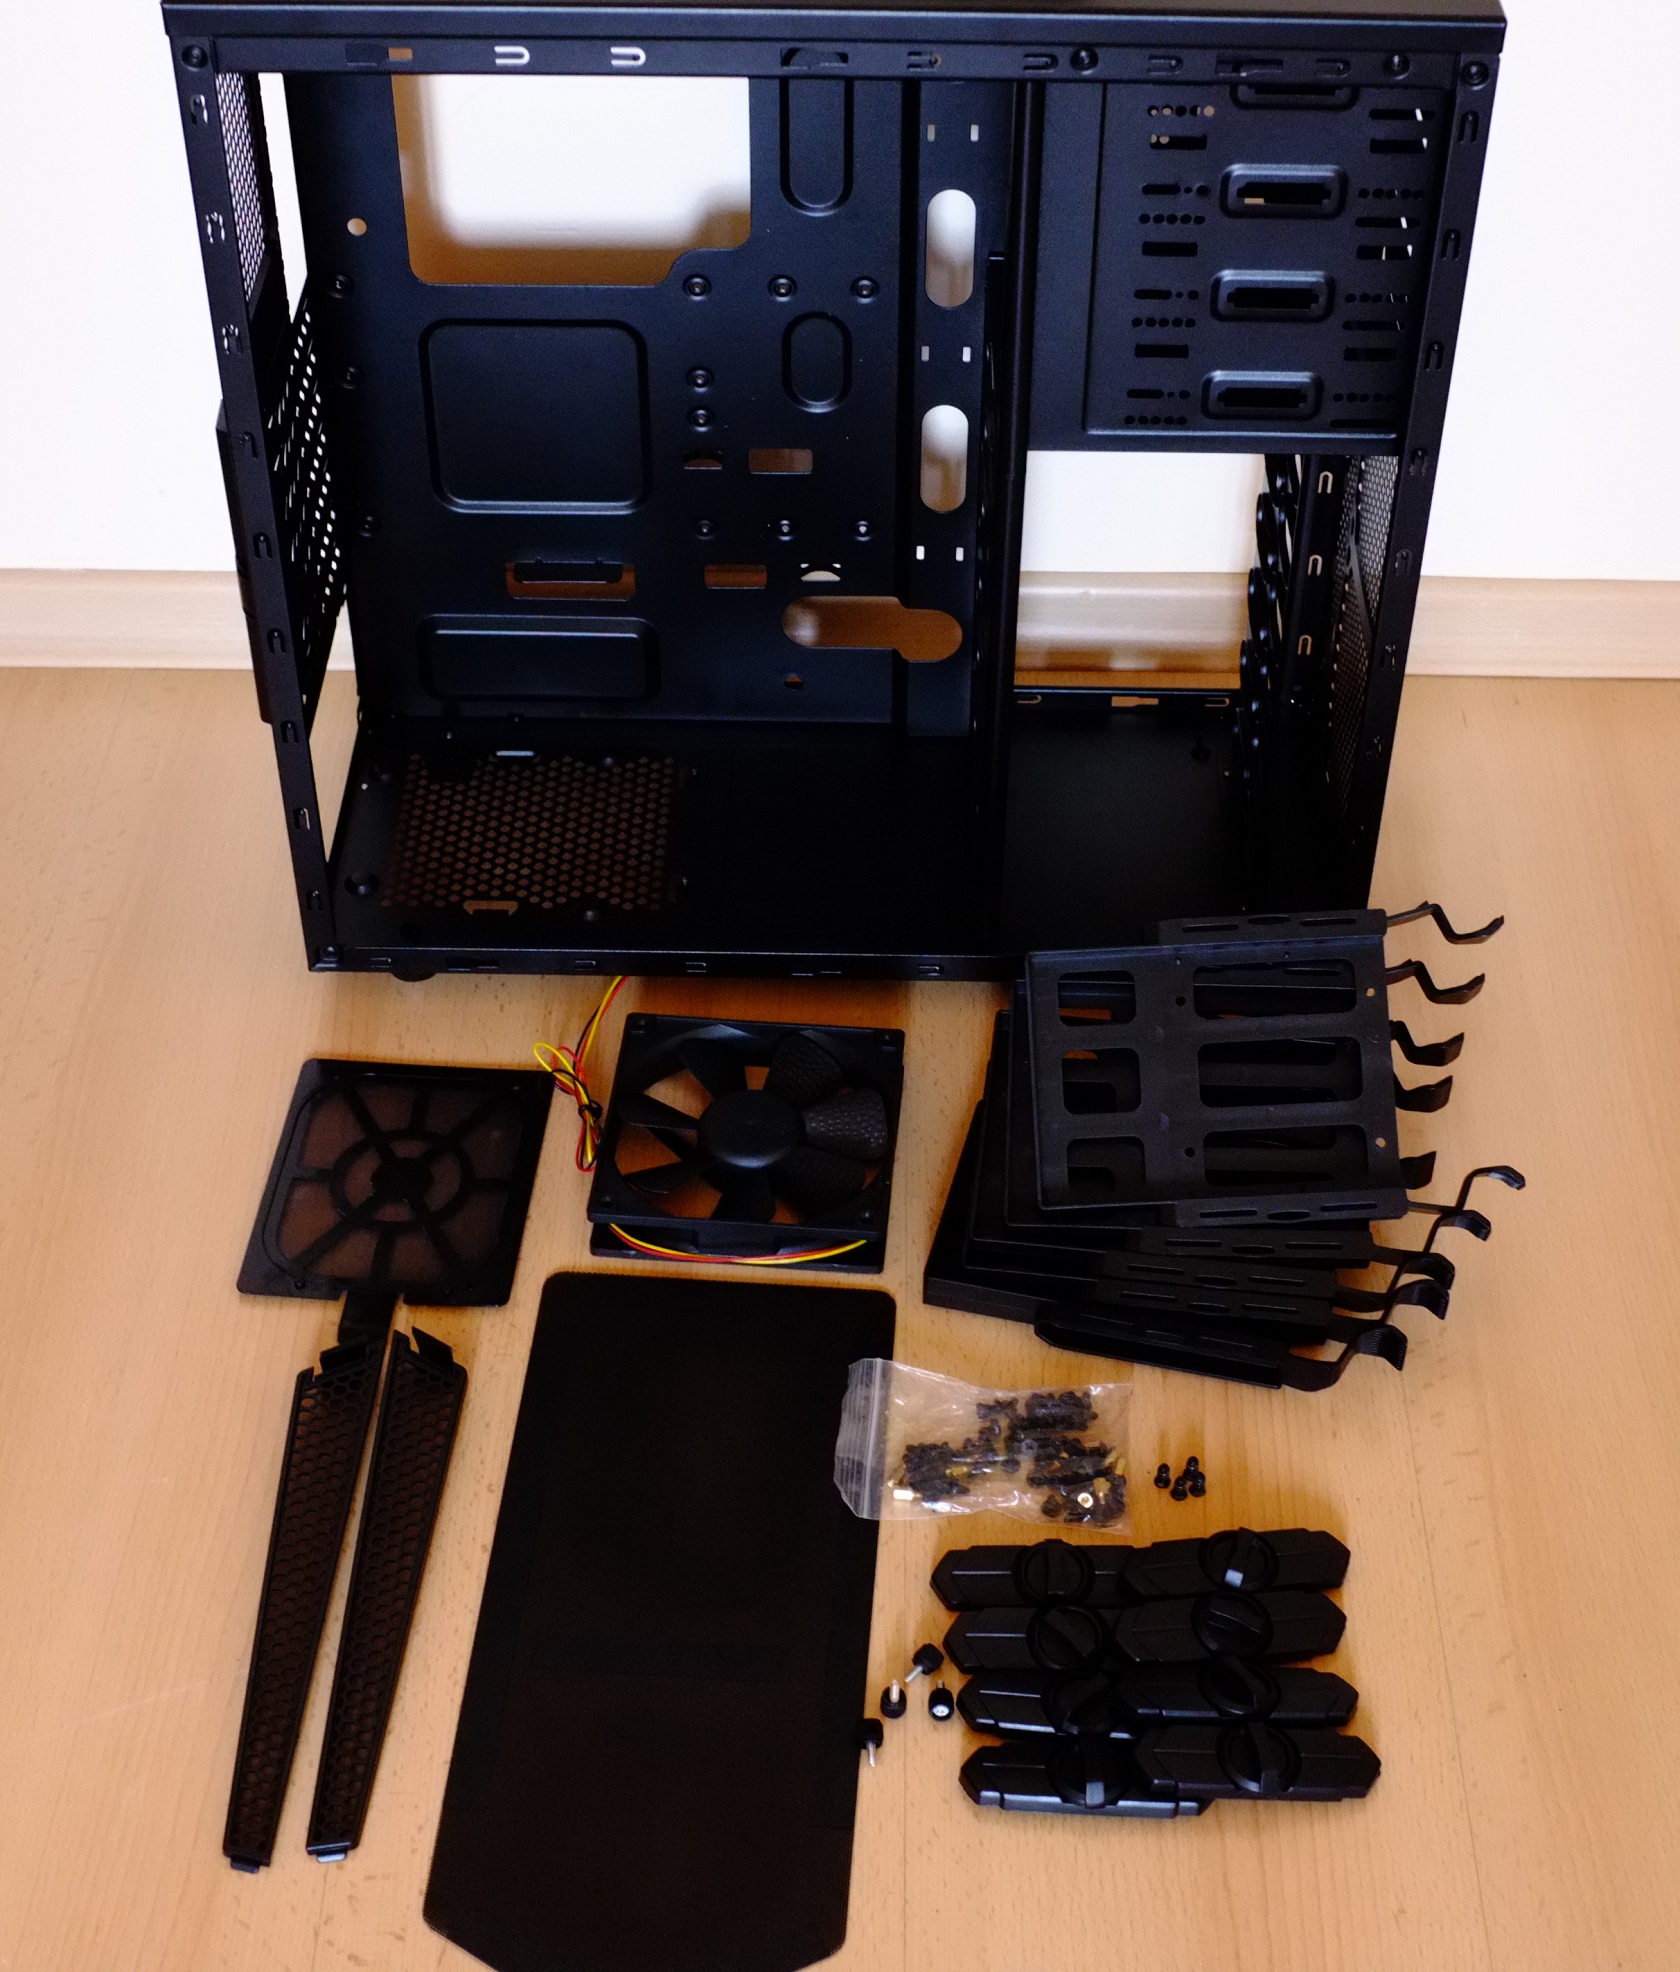
And these are all the parts that I was able to strip off the case:
- 1. Five plastic HDD brackets
- 2. One 120mm fan
- 3. Top dust filter (magnetic attachment)
- 4. PSU dust filter
- 5. Front panel side intake vents
- 6. Eight plastic brackets for the 5.25″ drive bays
- 7. Nylon bag with the necessary screws
- 8. Front and side panels
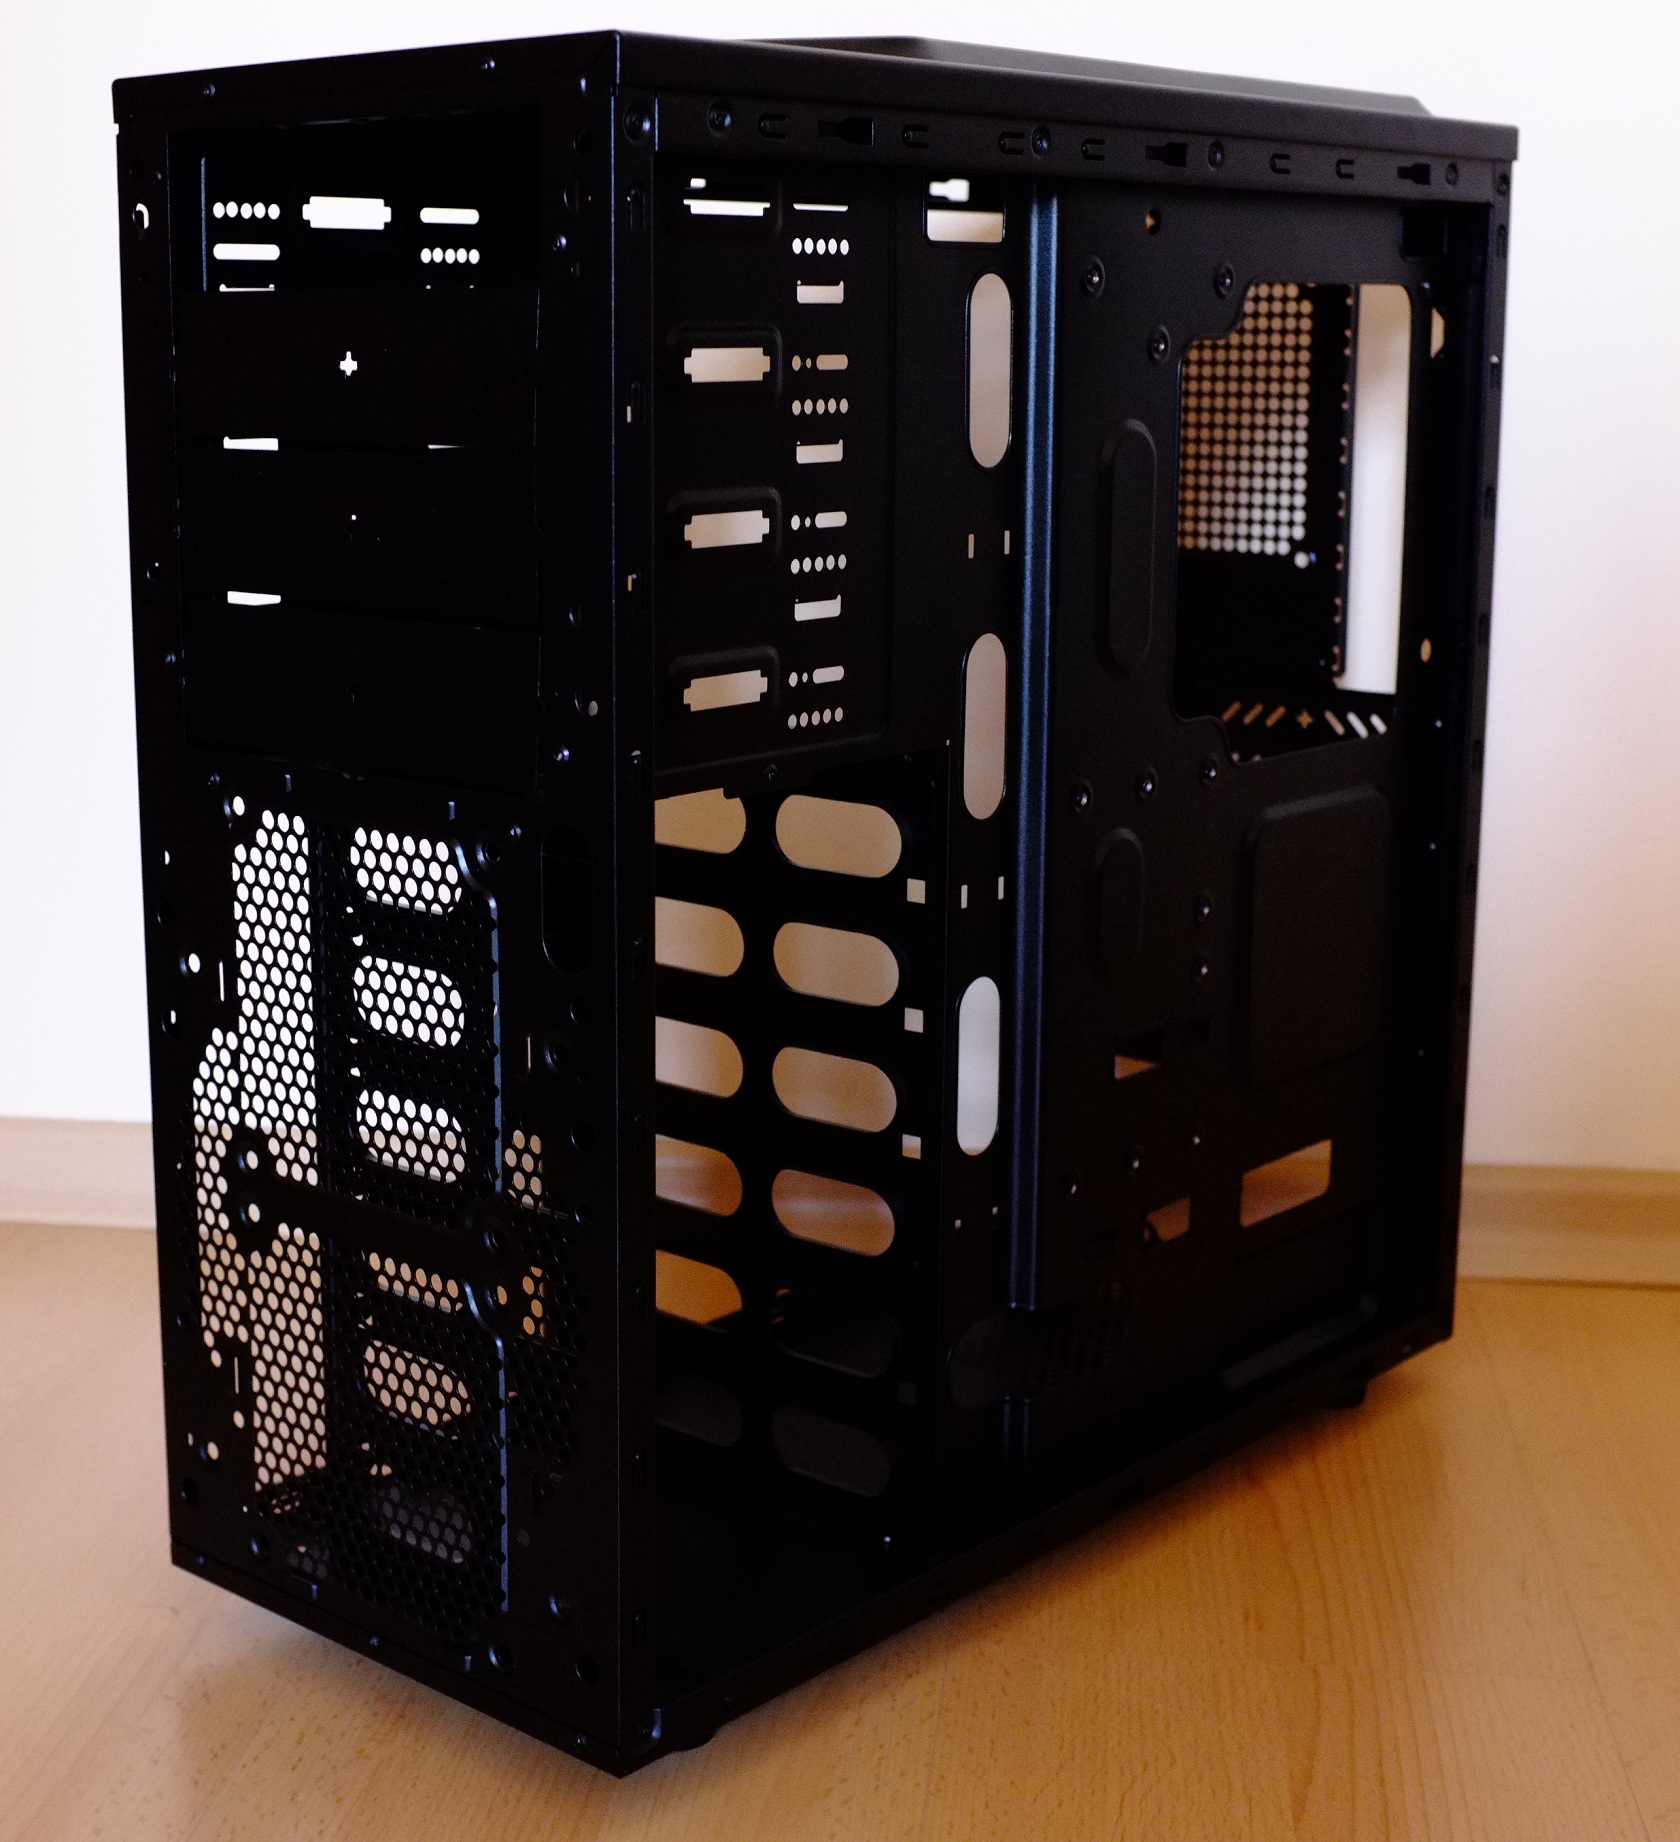
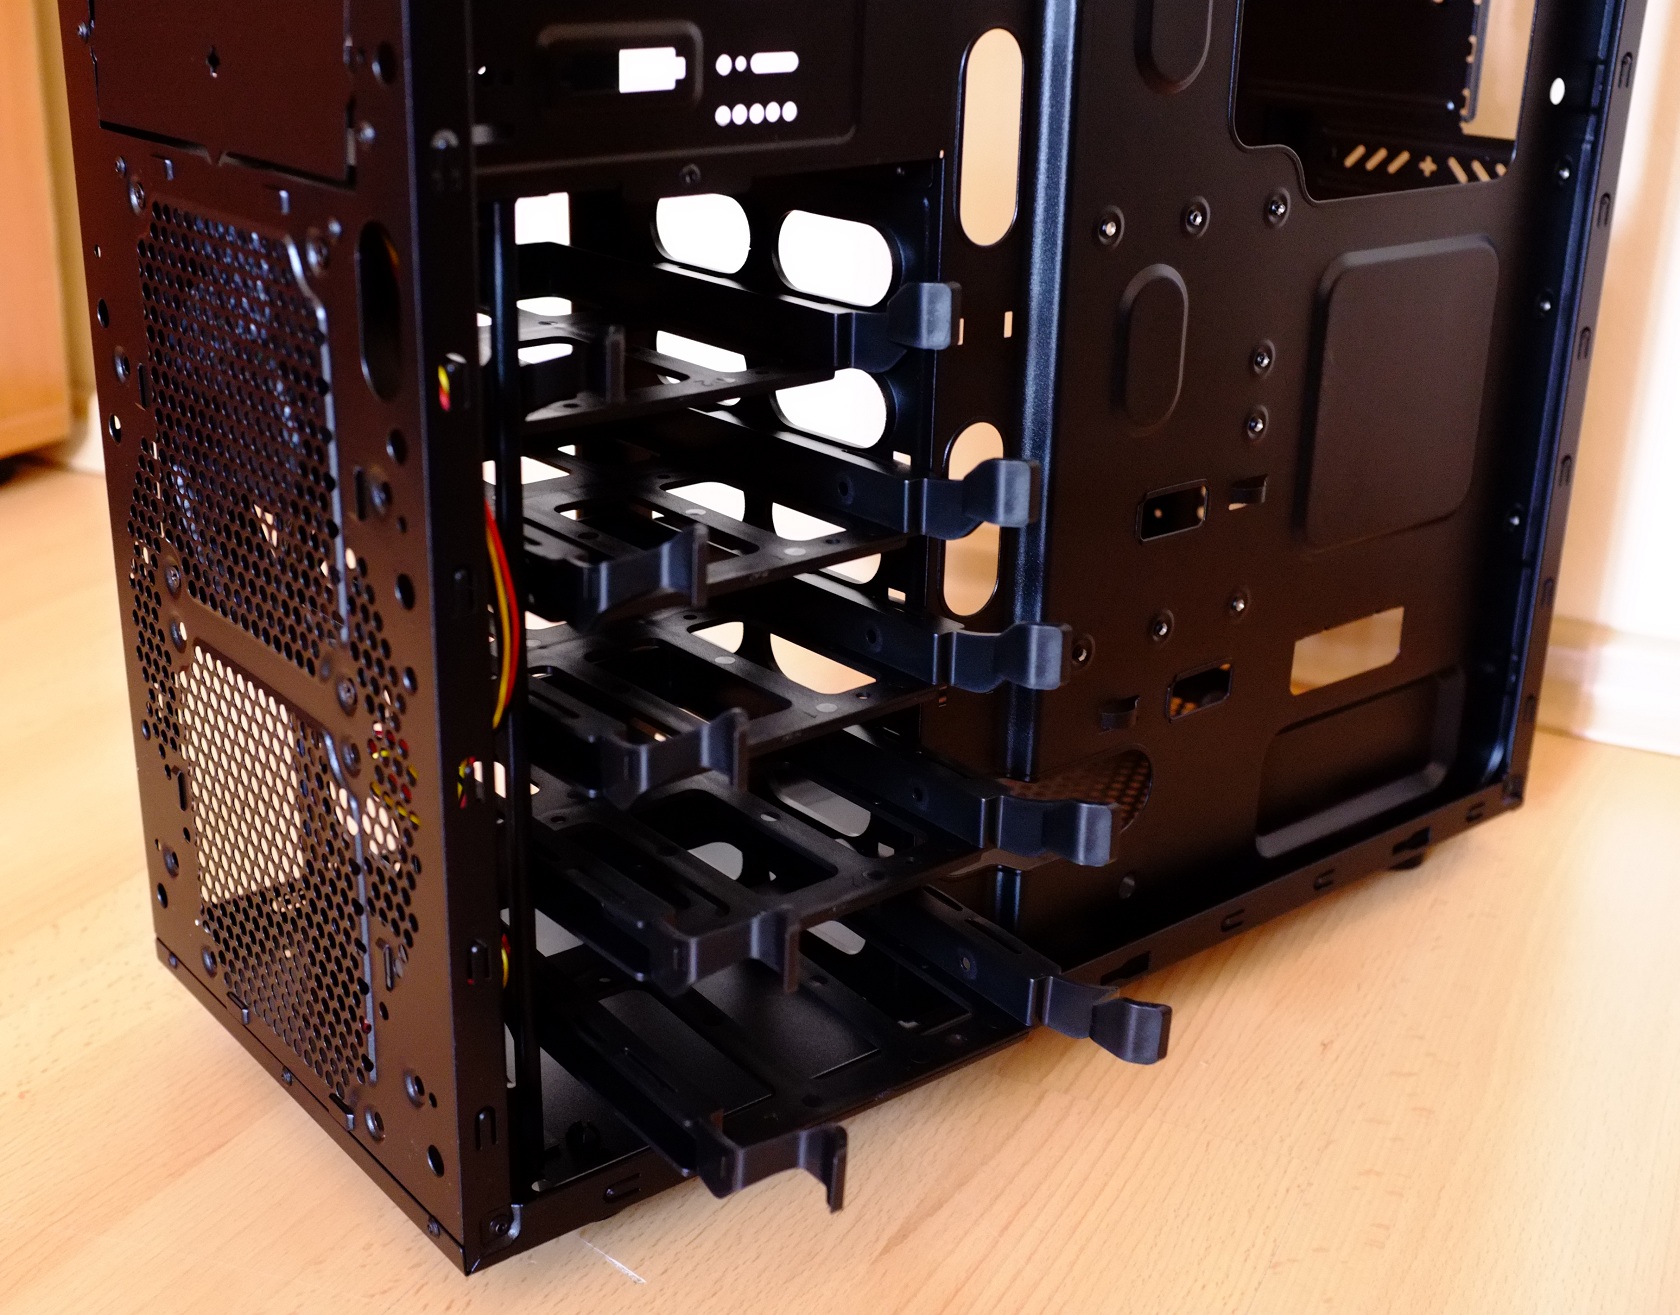
The stripped down case was very, very sturdy and I was surprised that it was so difficult to bend it in any direction. Although it is made from thin steel in places, it has a pleasant feeling that it has so much stability and rigidity. First thing I put into place were the HDD plastic brackets and the 120mm fan. The case has a total of five HDD/SSD bays, and every drive is attached to the bracket via four screws included in the packaging. Silverstone Precision PS10 comes only with one 120mm fan preinstalled on the front panel, but you can mount four more fans if you choose to do so. Fan slots are available at the front panel – two 120mm, two 120/140mm at the top panel and one 120mm at the rear of the case.
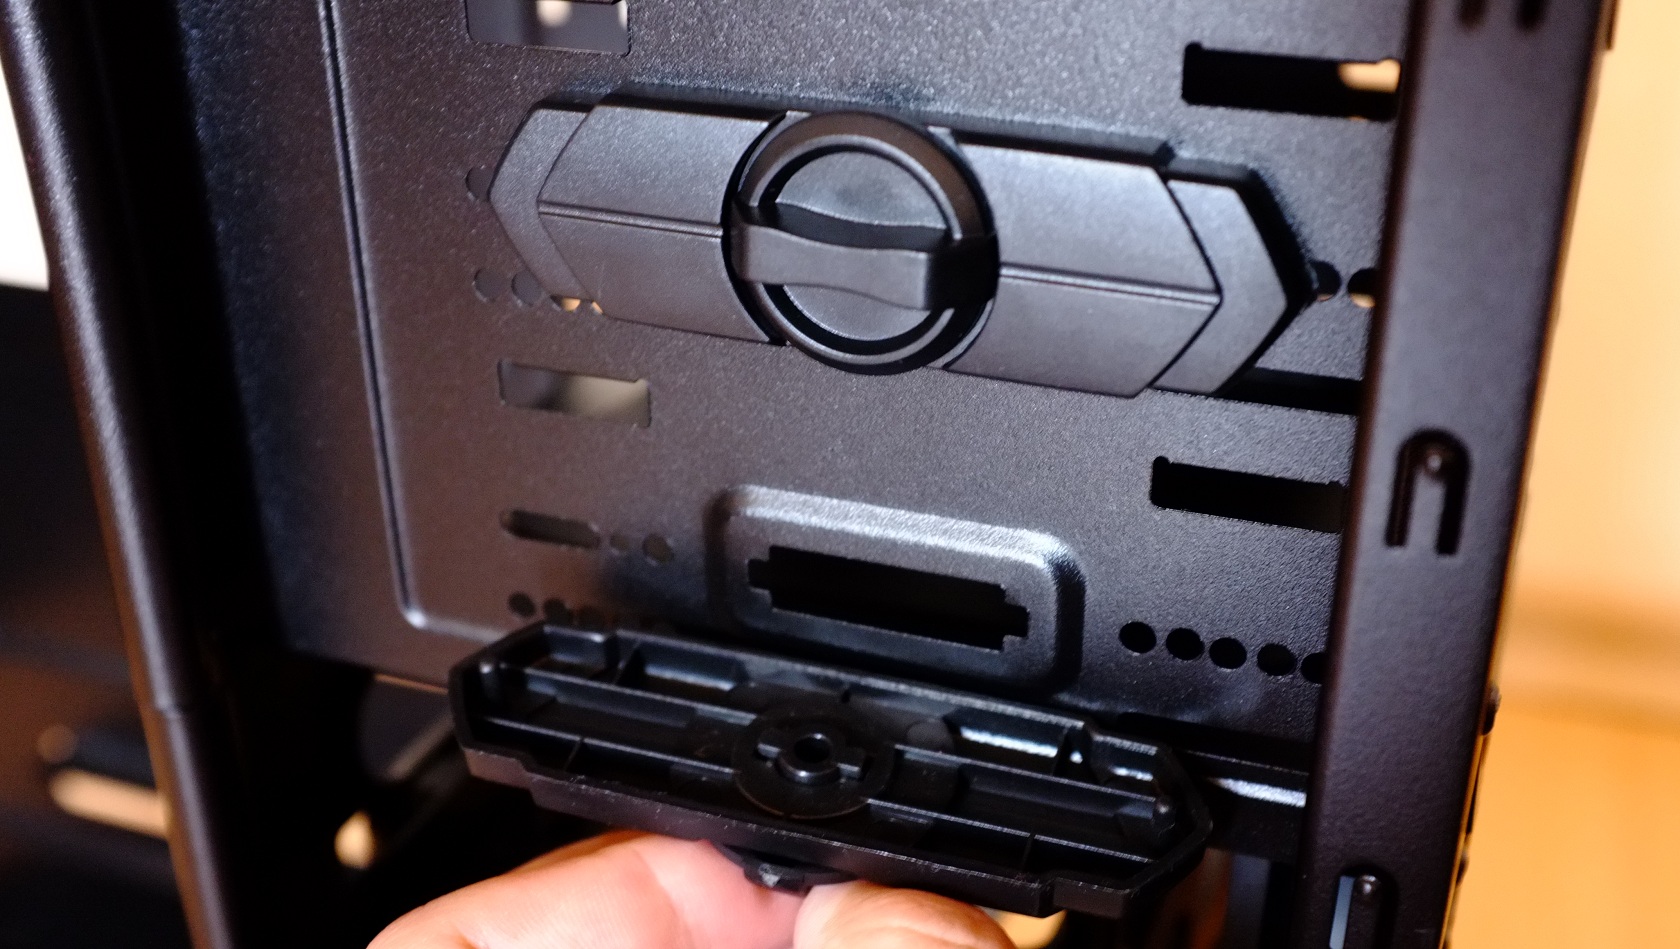
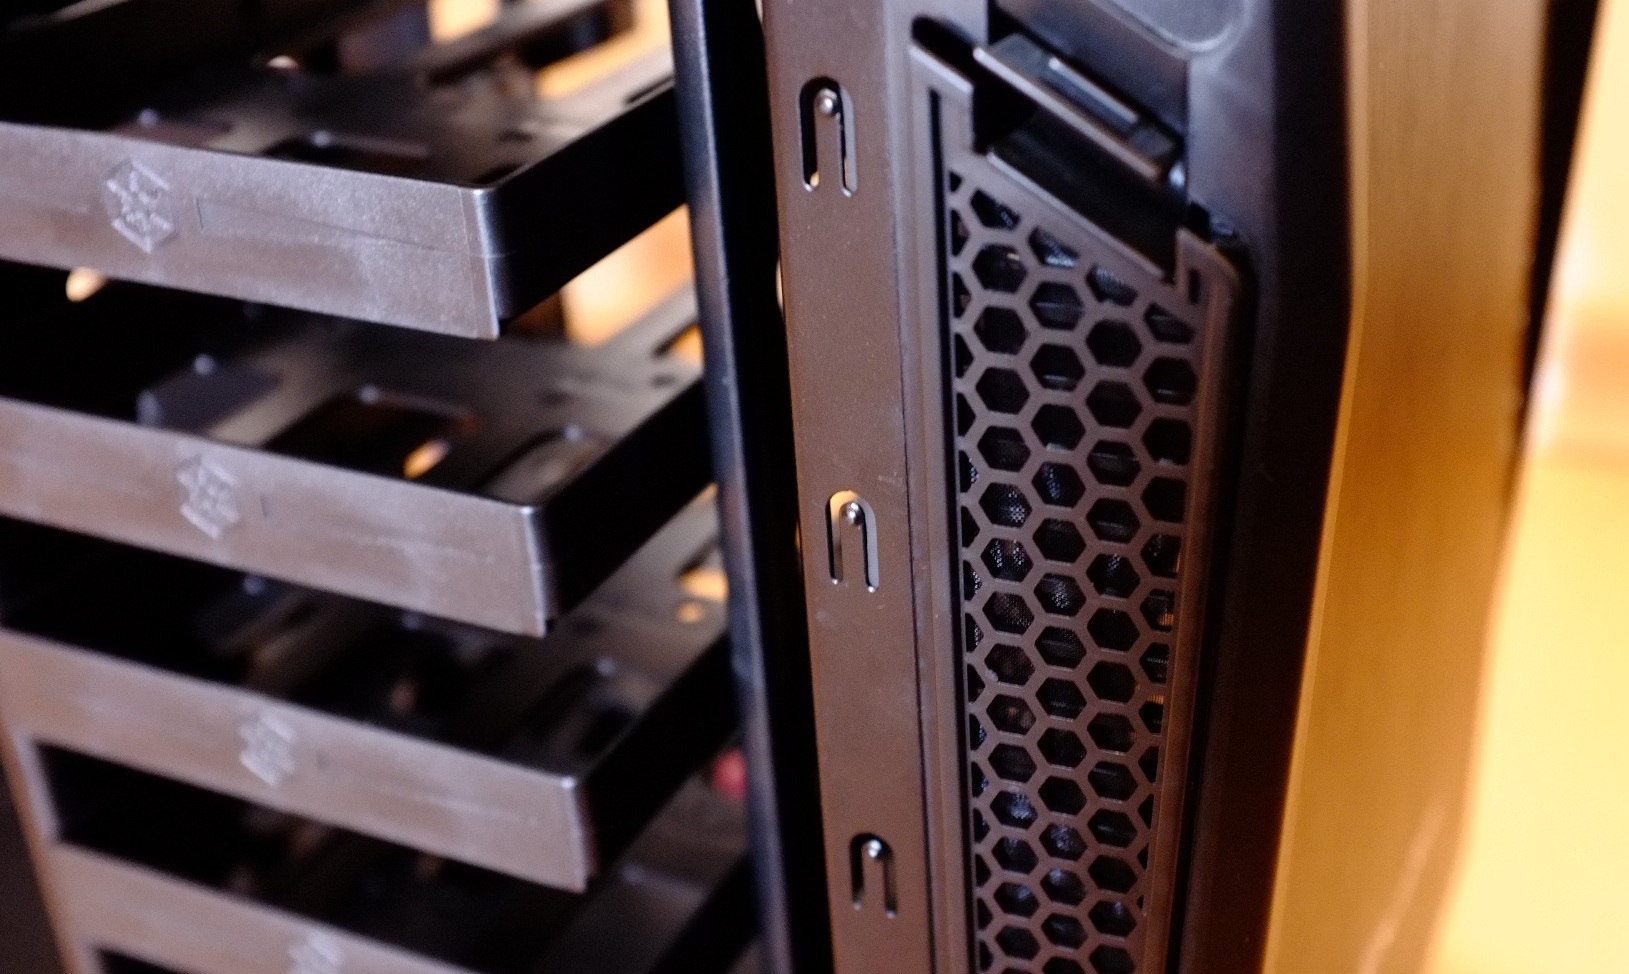
Earlier I told you about the four 5.25″ bays, which all feature tool-less design, just slide the drive and rotate the bracket in horizontal direction to lock it. Then I placed in their respective places the intake vents on the front panel, from where the front fan should be getting fresh air inside the case. These vents feature honeycomb mesh design and also act as dust filters and add to the whole appearance of the case, when viewed from the side. To remove them you only need to press the plastic that sticks out and they pop right off.
| 5.25″ locking mechanism | Front panel intake vents/dust filters |
 |
 |

Last things to put into place are the two included dust filters, located under the PSU and on the top of the case. It’s a nice touch to see that Silverstone decided to include so many dust filters, actually they are on every intake point of the case. Now, after the examination of the case, both internally and externally I believe it is time to assemble the test system inside and check out if it really is a silent case. While the process was going with full speed I really needed some additional cable management space behind the motherboard tray. Even with the additional space, created by the side panel I had issues with closing the side panel. Both the side panels are a bit weird to close, as they partially need pushing and sliding into position. But anyway, the system was put into place in no time, and I used no zip ties to hold the cables, due to the flat cables of the PSU I am currently using. I used the included screws to attach the HDD to the plastic bracket, and the interesting thing here is the fact that the brackets are available for removal/installation on the right side panel, not the way most HDD cages are designed. Finally I plugged in the front 120mm fan in its corresponding fan port on the motherboard and testes the system in idle mode and, of course in full load scenario.
| Installed system | Behind the motherboard tray |
 |
 |
Here are the parts inside the case. The system is still “under construction”, hence the lack of an adequate GPU. The test will be conducted in our standard fashion and will be explained below. Test system is currently:
- Motherboard: AsRock Fatal1ty Killer Z87
- CPU: Intel I5-4670K, Intel Turbo and Speedstep Technology are disabled. Load tests will be performed both in stock speeds and overclocked speeds.
- CPU Cooler: Noctua NH-U12S
- Video card: Intel HD4600
- Hard drive: Western Digital 640 GB Black Series
- Power supply: Corsair RM750 W, Fully Modular
- Memory: A-Data XPG 8 GB Dual channel, running at 1333 MHz, 9-9-9-24
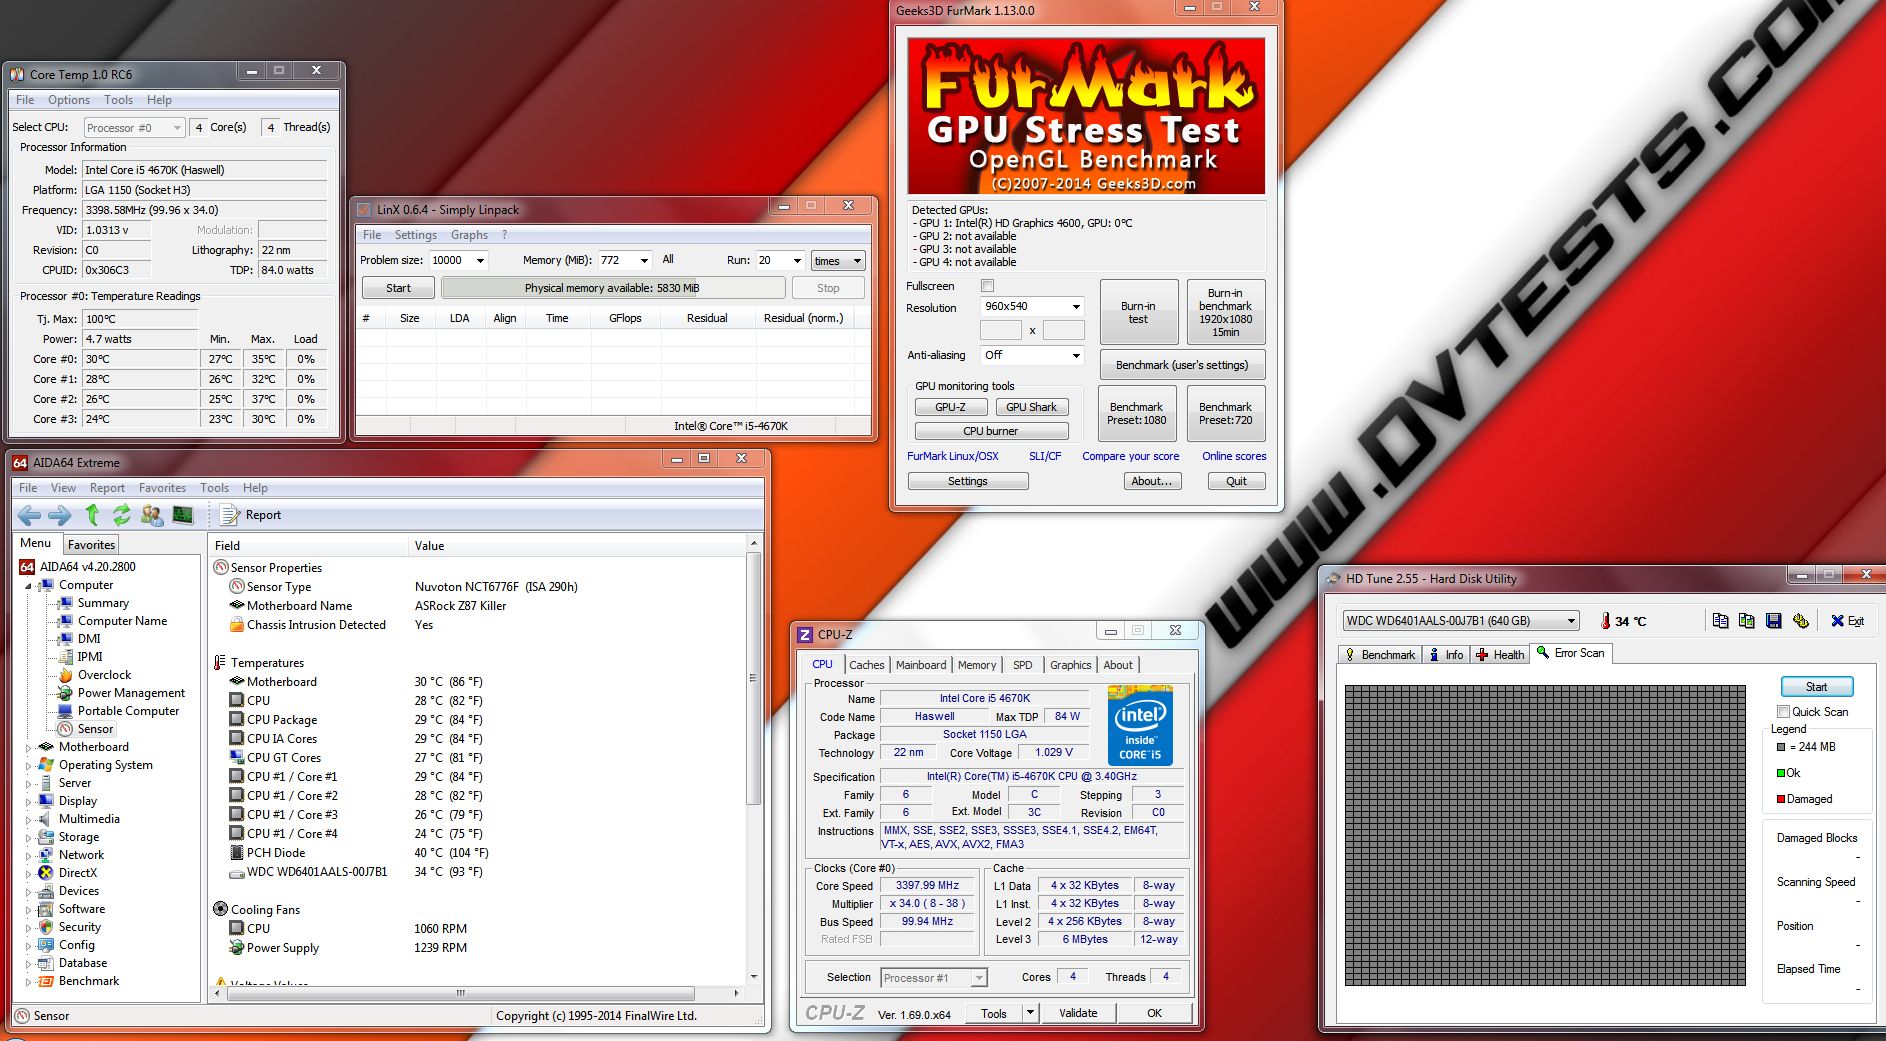
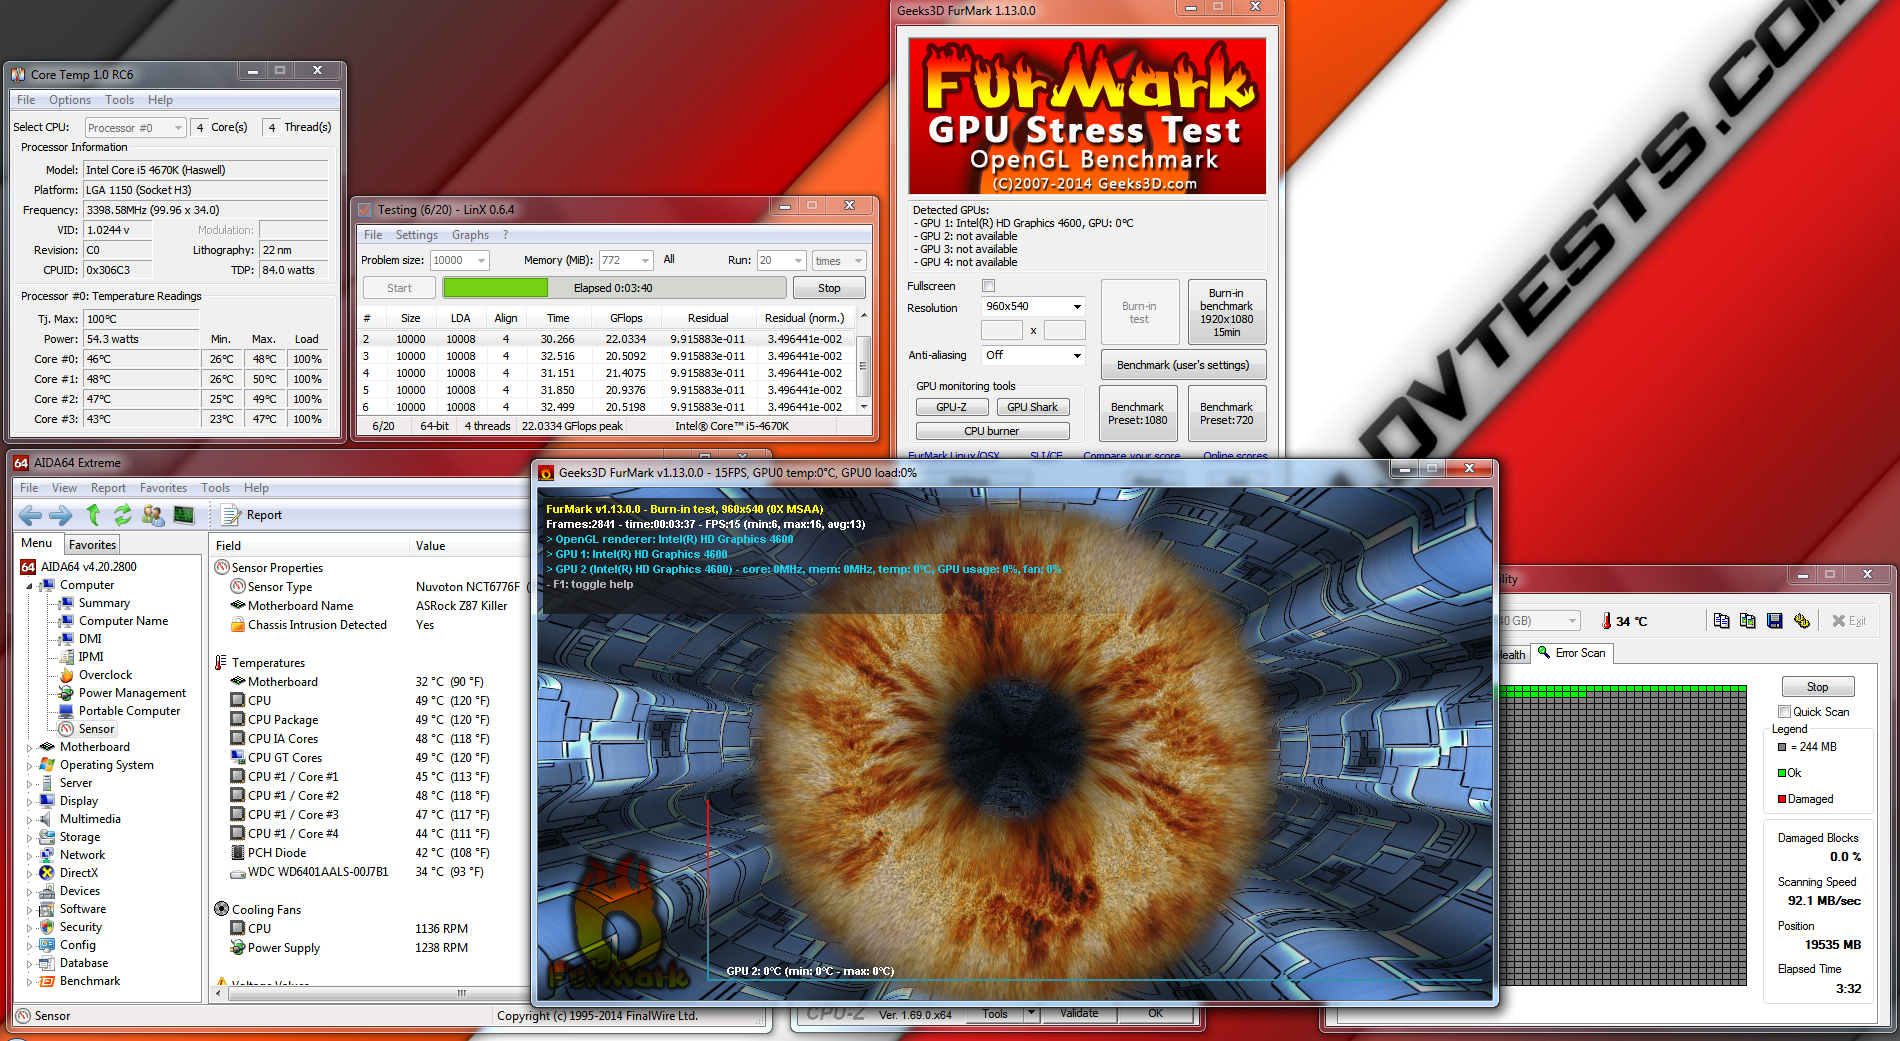
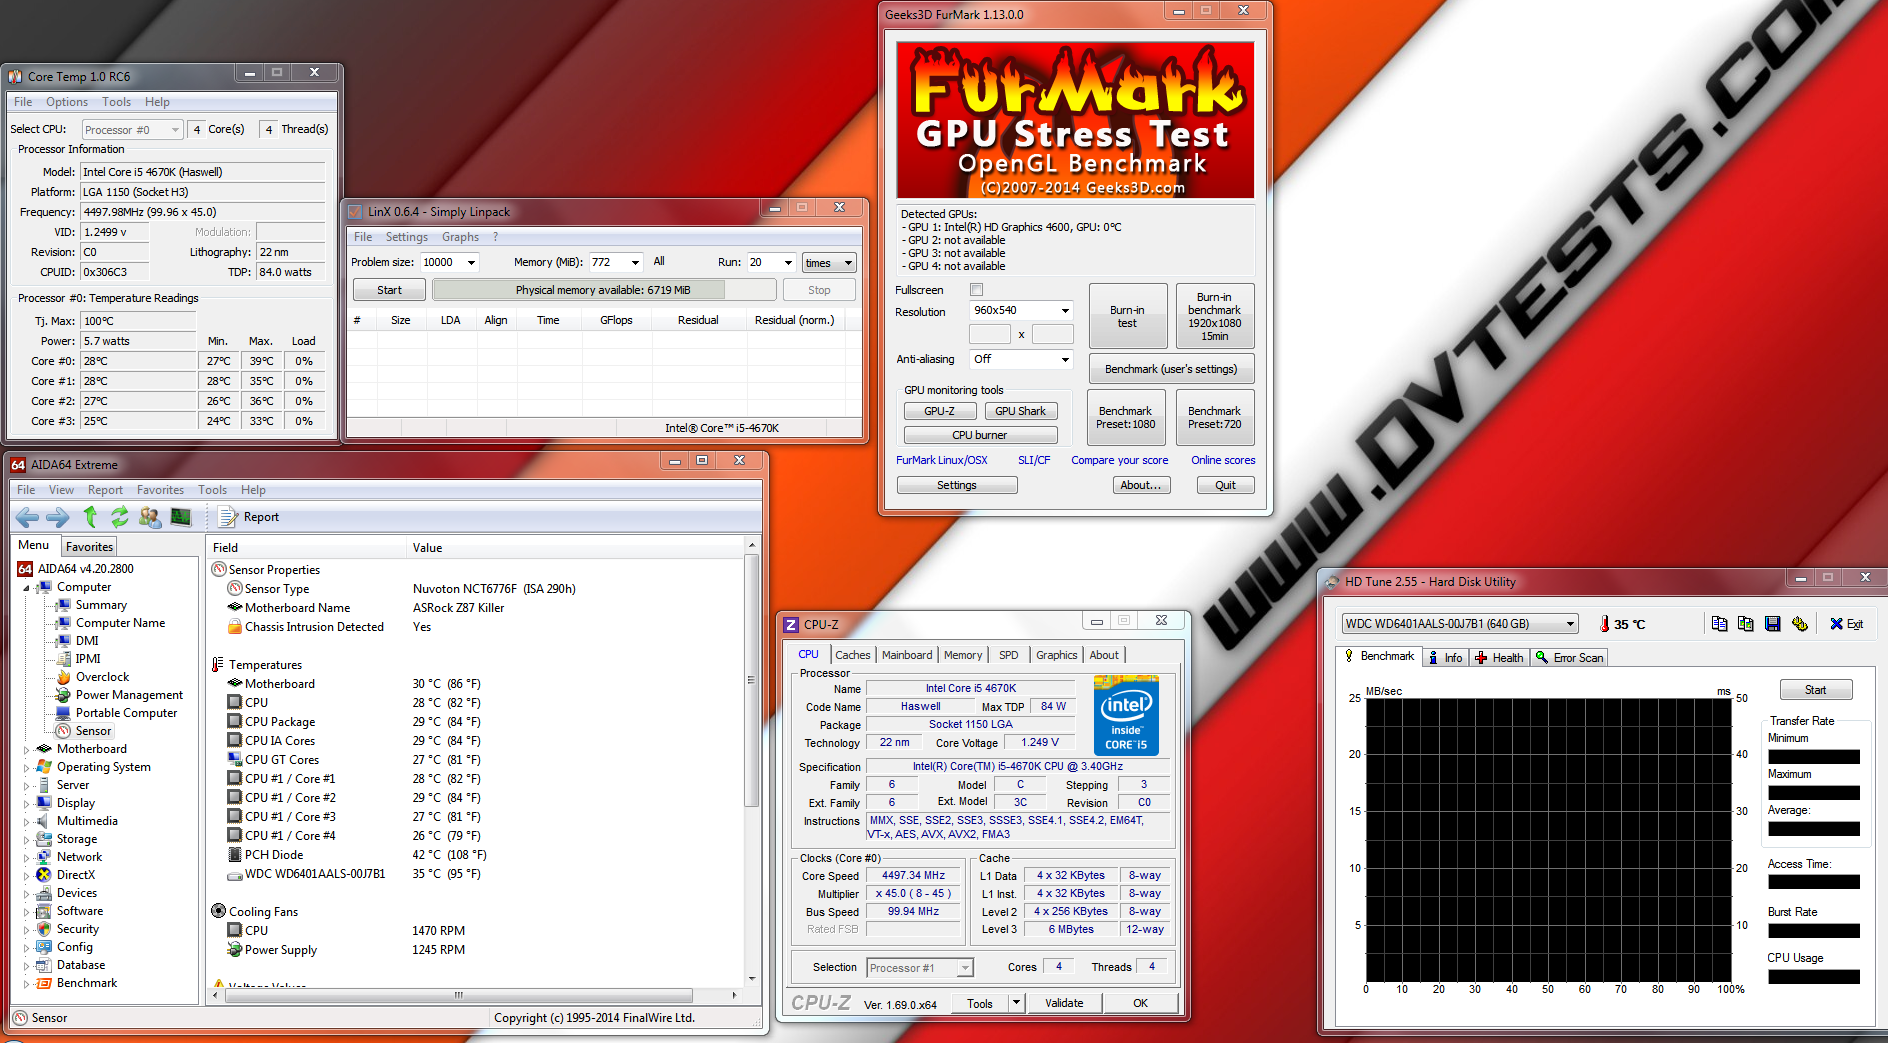
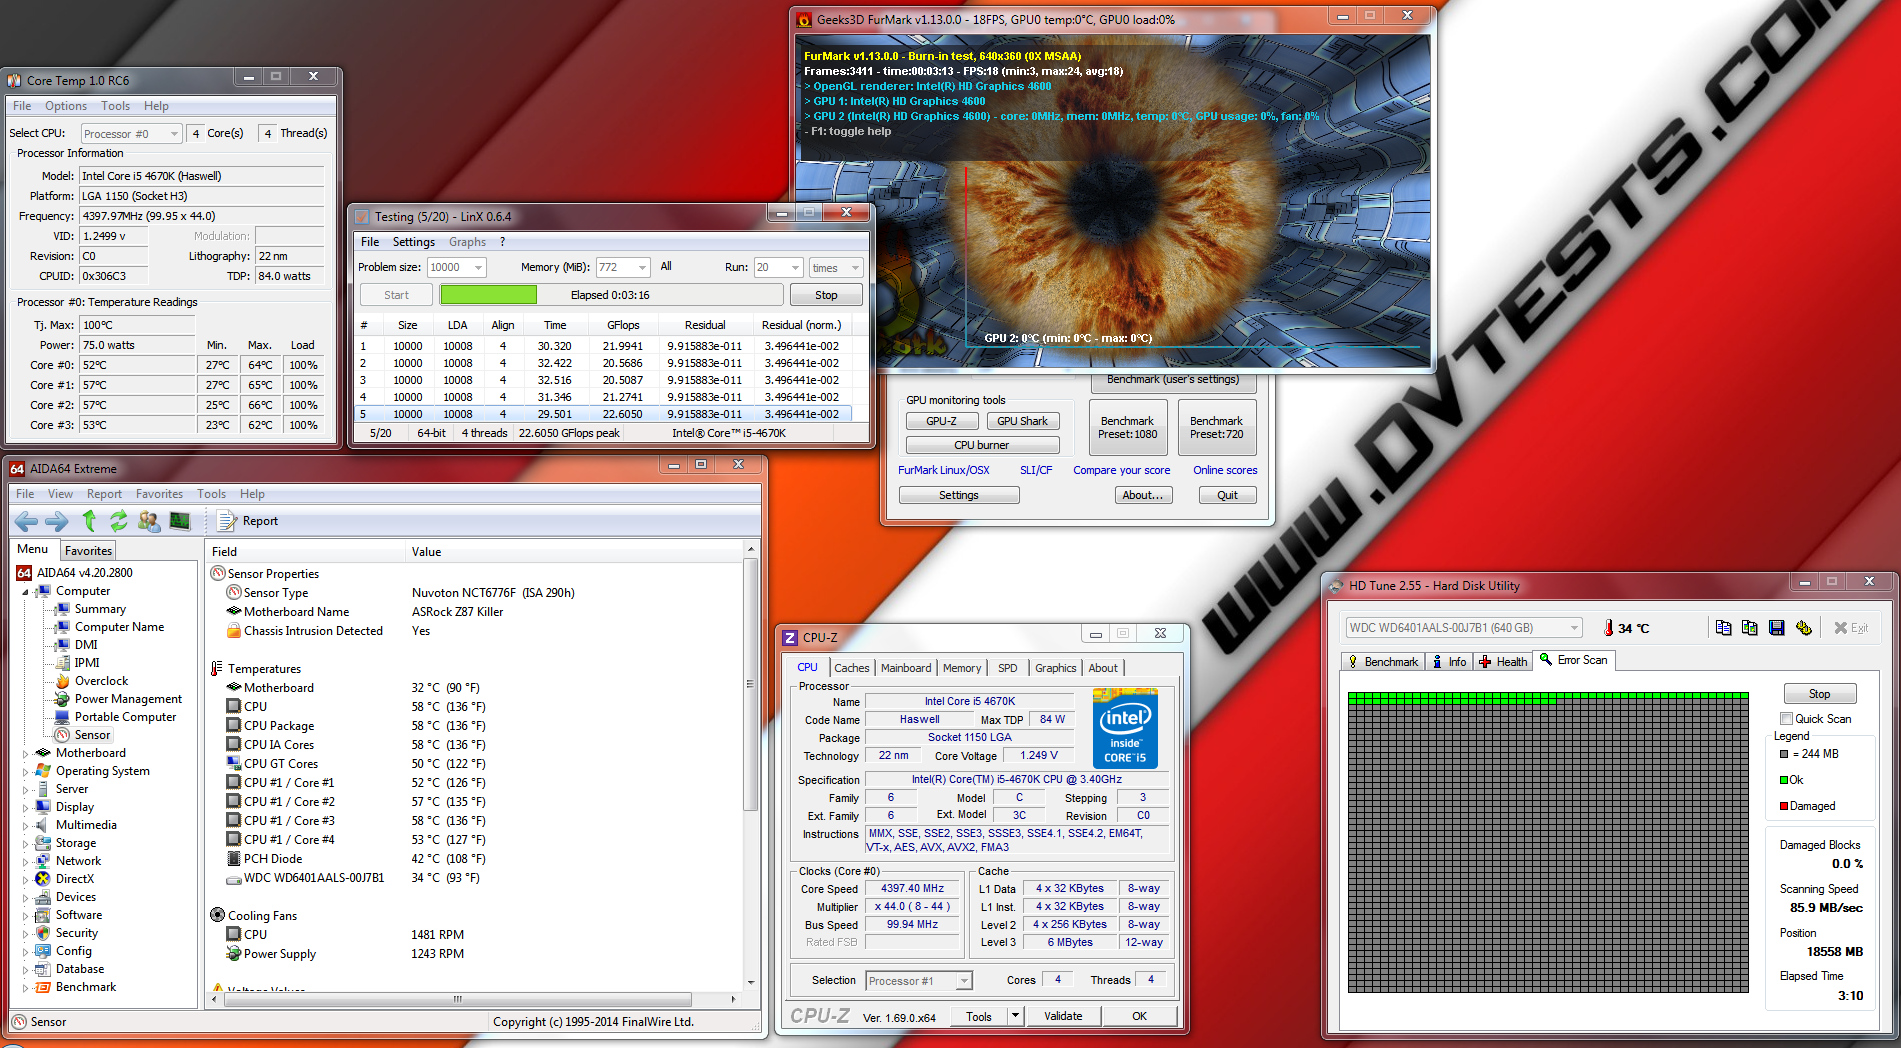
I believe now is the time to show you how the case performed in real world situation. The ambient temperature in my room was about 20-22 degrees Celsius. The case fan is set to 12 volts, the stock CPU cooler is PWM controlled via the motherboard. Here are the results from the testing: NB! You may notice that on the second Idle test the frequency of the CPU is 4.5 GHz, whereas on the second Load test it is 4.4 GHz, that is due to the fact that I was not able to achieve stability beyond one minute of stress testing with the current settings in the MB’s BIOS. Nevertheless the temps at idle are the same, whether the CPU is clocked at 4.4 GHz or 4.5 GHz.
| Idle @ 3.4 GHz | Load @ 3.4 GHz |
 |
 |
| Idle @ 4.5 GHz | Load @ 4.4 GHz |
 |
 |
Final thoughts and conclusion:
1. Silverstone Precision PS10 appearance – This particular case offers from Silverstone offers a bit mixed design with the flat front panel with integrated power and reset buttons, representing a clean design, whereas the side and top panels stick out from the chassis, giving it more “presence” and distinctiveness. The intake vents on the front panel also add to the “presence” of PS10, along with the top magnetic dust filter, which when looked from a distance gives the illusion of matte black part on the top panel. I regret the lack of rubber grommets, but I like the “silent” foam on the side panels.
2. Silverstone Precision PS10 performance – Performance wise I actually didn’t expect much from this case, since the only fan mounted from the factory is 120mm acting as intake. The temperatures shown while testing aren’t disturbing, but I would have liked to see one more fan on the top or back panel as an exhaust. Considering the probable price point of the case I guess it’s not an issue, but is a bit disappointing. Silverstone has left enough room for adequate cooling, nevertheless. With the additional fan mounts and some cash you could still have sufficient cooling in this chassis, which I say again is nothing to worry about even with the hot Haswell CPU inside, clocked @ 4.4 GHz.
3. Silverstone Precision PS10 noise level – Noise is not an issue with this case. Even at 12 volts the front preinstalled fan is barely audible and the foam on the side panels does its job. When I removed the left panel I could easily hear the CPU cooler, but when I closed the panel the air moved by the fan was transformed to a more perceptible, non-irritating noise with lowered decibels. Hopefully when more fans are present the foam will not lose its sound absorbing qualities.
I think Silverstone Precision PS10 deserves the following reward:  Official price (MSRP): Silverstone Precision PS10 – unknown
Warranty: 24 months
Special thanks to SilverStone for providing us with a test sample.

@Kenneth Verbeure – Currently we’re working on creating videos that would be part of the review process for the sake of every user that would like to hear the sounds and noises of a particular case, cooler or fan!
@Dimcho – PS10 is dust proof case indeed so expect minimal dust build up over the hardware inside.
Thank you for the comments!
I especially like the silent part since my case is too load for me.
only thing i miss here is maybe a video of the desktop running on full power to hear the ‘noise’ for myself
good review!
I love cases with dust filters – parts inside stay clear longer, and this black color is very smooth and stylish 🙂