
A few years back in time, Be Quiet introduced its first cooler series called Dark Rock, which now features some very serious coolers offering really good cooling performance and astonishing appearance. Before I start with the review, let’s pay some attention to the Dark Rock series history:
- DARK ROCK 2 – a single tower cooler entirely nickel coated in black, made of aluminum fins and copper contact plate and 6 x Ø6mm U-shaped heatpipes with dimensions of 97 x 138 x 166mm and weight of 860 grams with maximum TDP of 180W, cooled by a single 1 x 135mm SilentWings PWM fan.
- DARK ROCK PRO C1 – a dual tower cooler entirely nickel coated in black, made of aluminum fins and copper contact plate and 7 x Ø6mm U-shaped heatpipes with dimensions of 133 x 150 x 166mm and weight of 1240 grams with maximum TDP of 220W, cooled by 2 x 120mm SilentWings PWM fans.
- DARK ROCK PRO 2 – a dual tower cooler entirely nickel coated in black, made of aluminum fins and copper contact plate and 7 x Ø6mm U-shaped heatpipes with dimensions of 147 x 138 x 166mm and weight of 1250 grams with maximum TDP of 220W, cooled by 1 x 120mm SilentWings PWM and 1 x 135mm SilentWings PWM fans.
- DARK ROCK ADVANCED C1 – a single tower cooler entirely nickel coated in black, made of aluminum fins and copper contact plate and 6 x Ø6mm U-shaped heatpipes with dimensions of 95 x 122 x 166mm and weight of 840 grams with maximum TDP of 180W, cooled by a single 1 x 120mm SilentWings PWM fan.
- DARK ROCK 3– a single tower cooler entirely nickel coated in black, made of aluminum fins and copper contact plate and 6 x Ø6mm U-shaped heatpipes with dimensions of 97 x 137 x 160mm and weight of 976 grams with maximum TDP of 190W, cooled by a single 1 x 135mm SilentWings PWM fan.
- DARK ROCK PRO 3 – a dual tower cooler entirely nickel coated in black, made of aluminum fins and copper contact plate and 7 x Ø6mm U-shaped heatpipes with dimensions of 150 x 137 x 163mm and weight of 1197 grams with maximum TDP of 250W, cooled by 1 x 120mm SilentWings PWM and 1 x 135mm SilentWings PWM fans.
For this test and review I received the Be Quiet Dark Rock Pro 3, which is the newest, the biggest and according to the official technical details the best performing of all of the models in the series and I am pretty eager to test how it will perform with my really power hungry processor. So let’s get started…
| The front side of the package | The side/back of the package |
 |
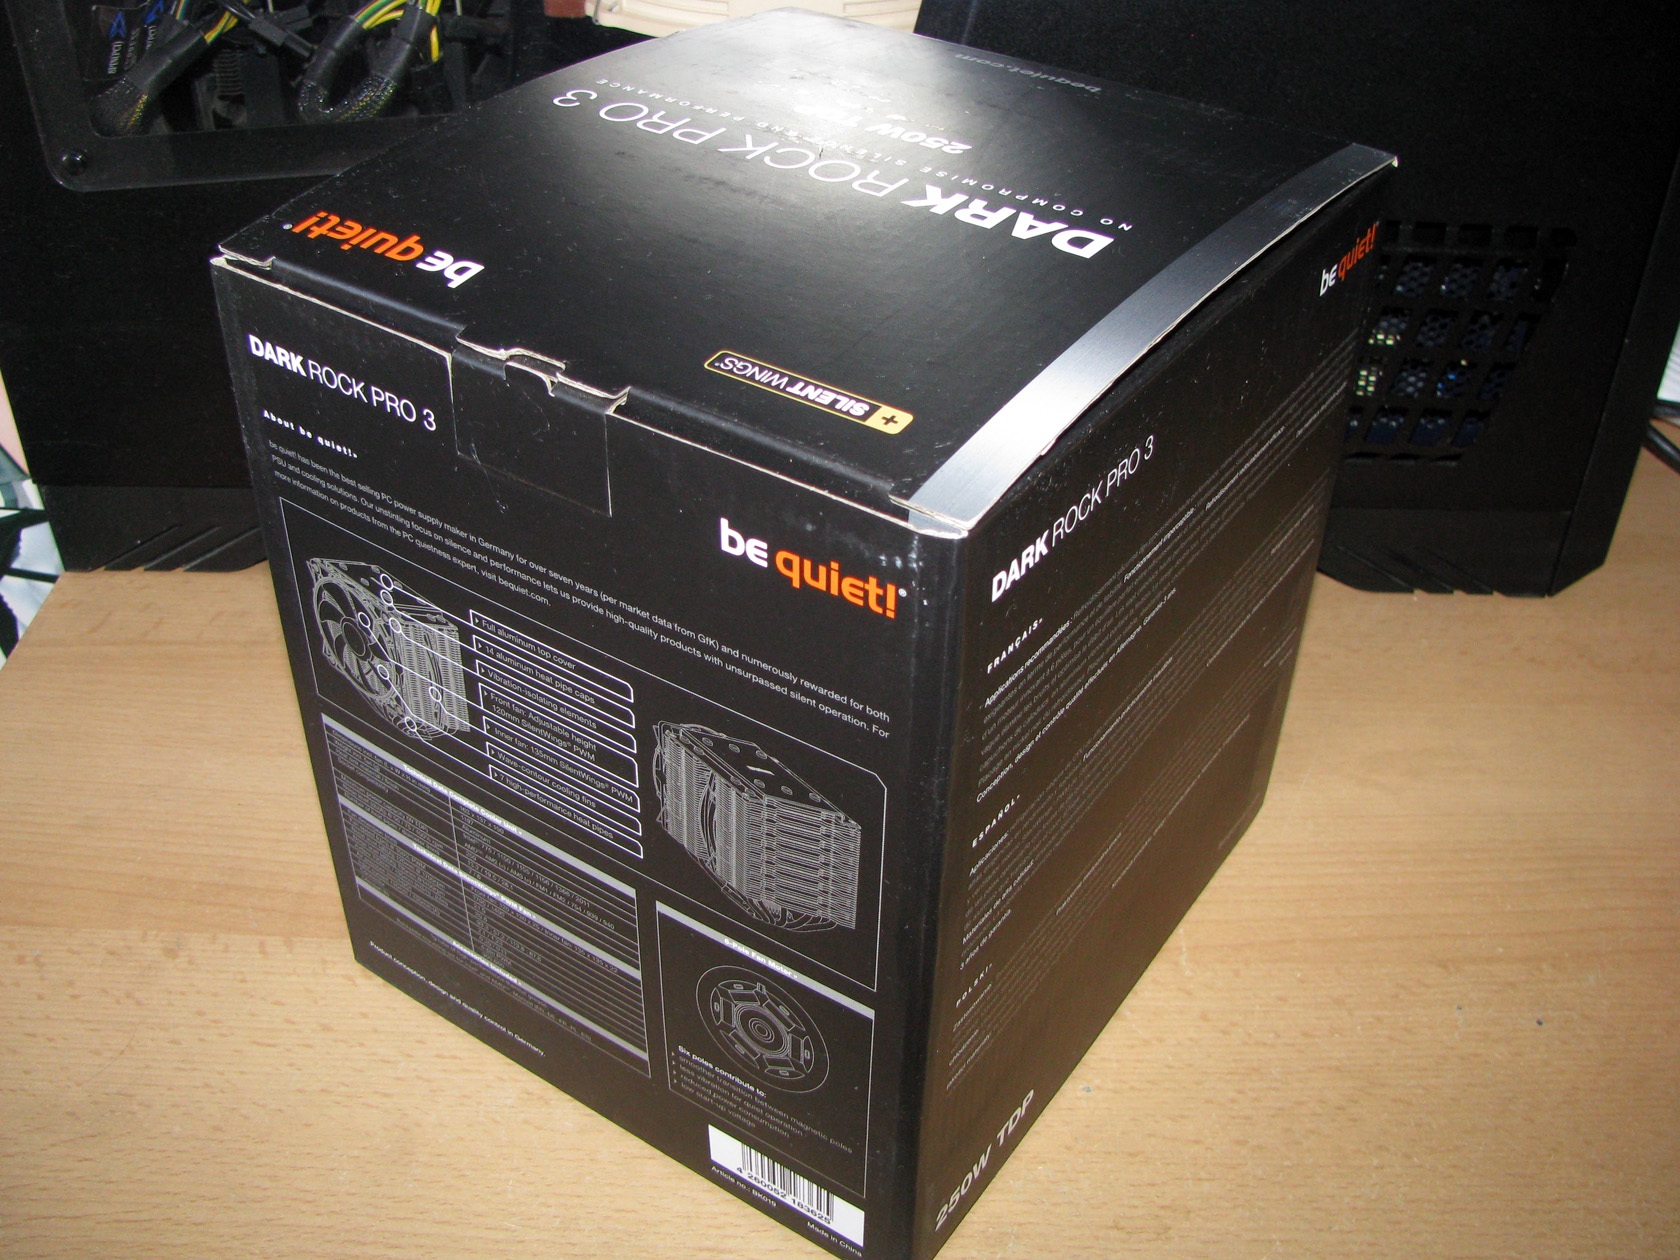 |
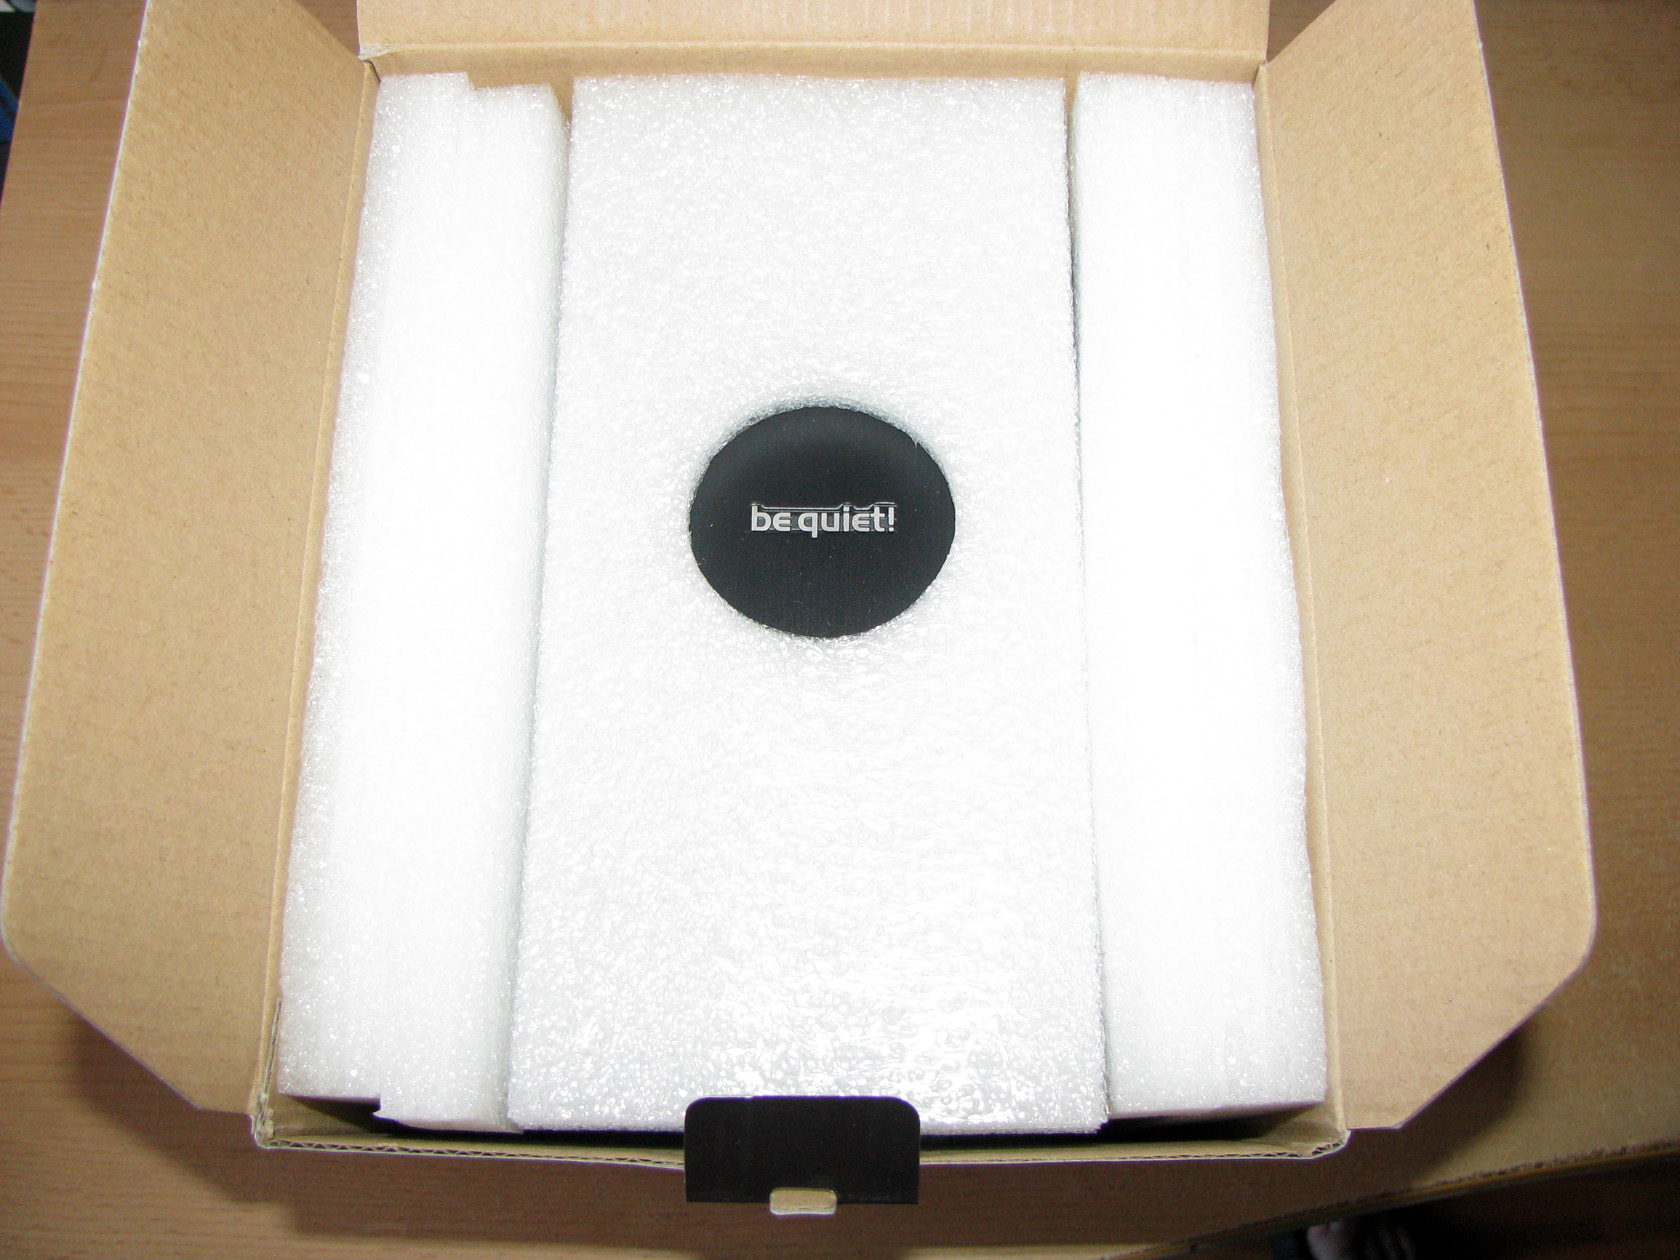
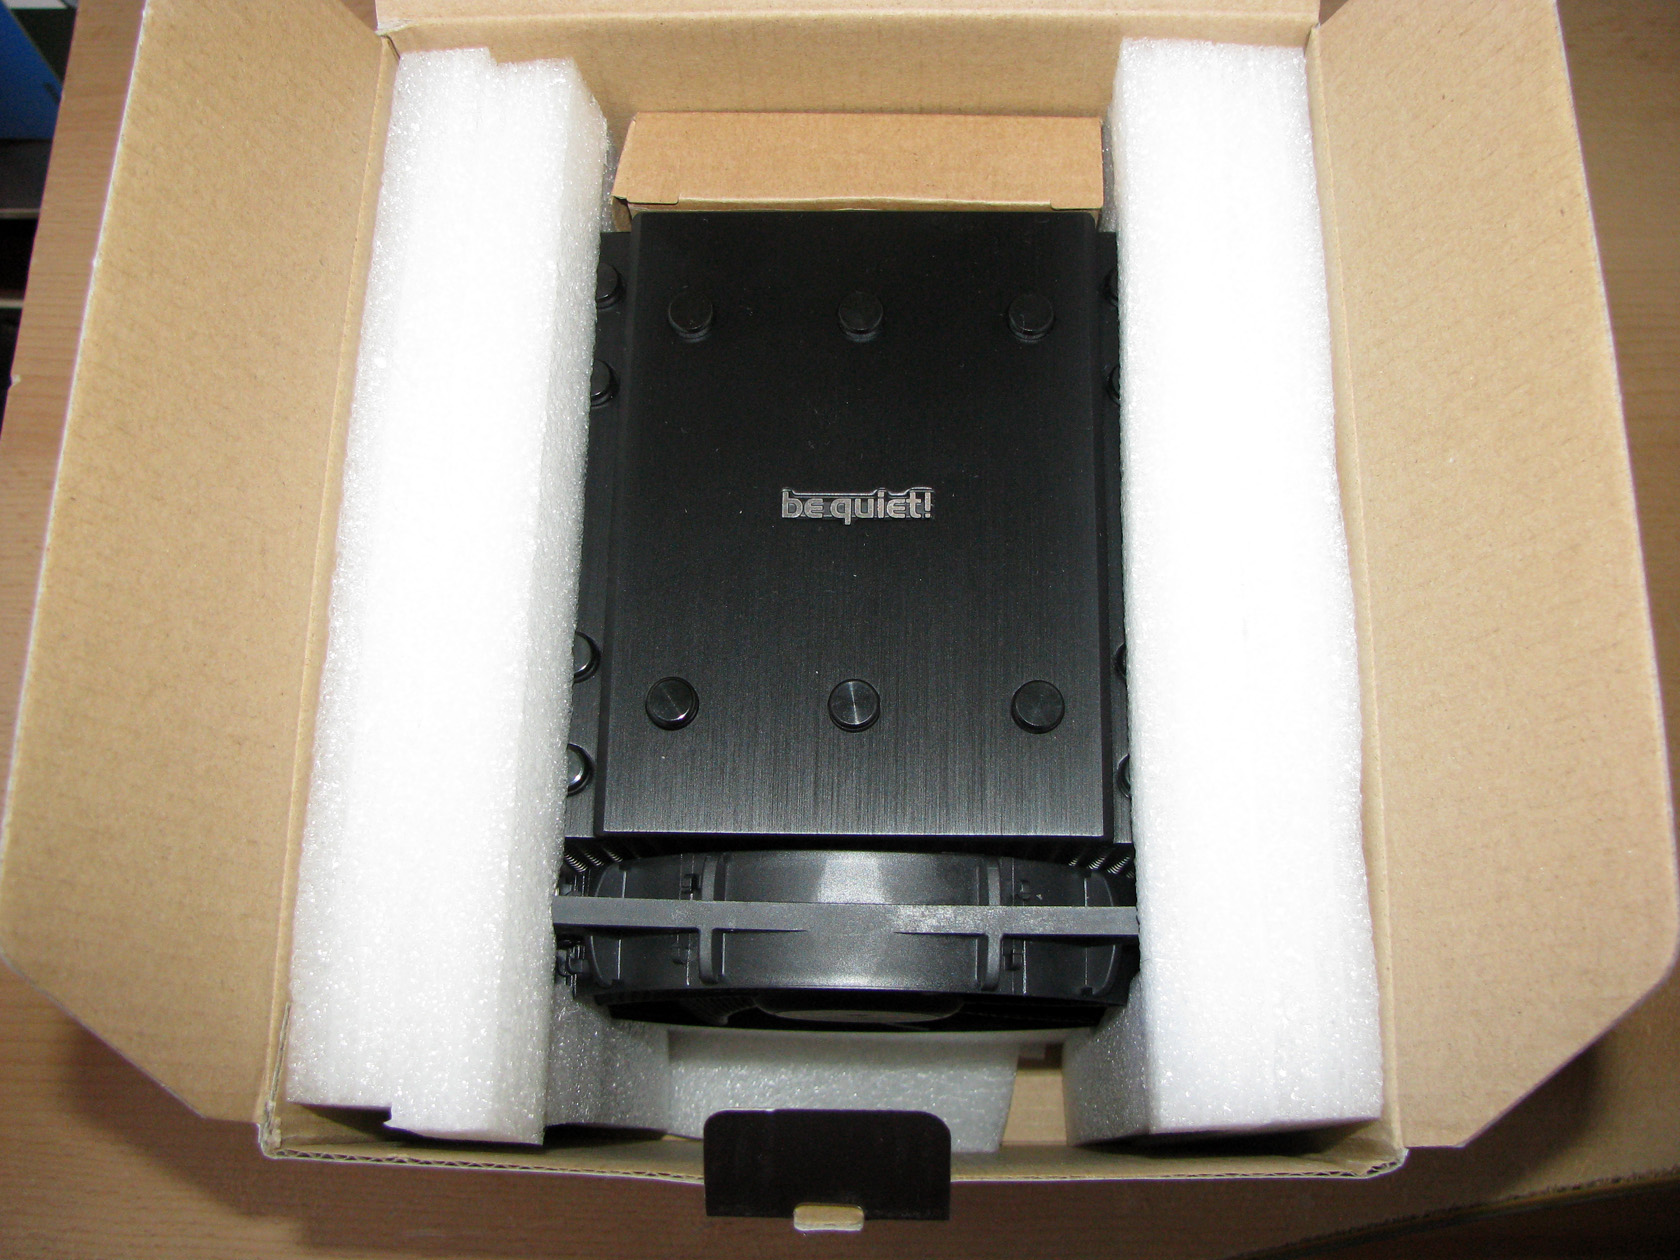
Be Quiet Dark Rock Pro 3 was provided to me in the pretty standard for the series, very big, entirely painted in black carton box with a big picture of the cooler, the maximum TDP of 250W and the name of the product on the front side of the box. Of course, on all other sides of the package there is plenty of information in several languages regarding the technologies used for the creation of this product and the full technical details of the cooler. So let’s open the box and check what’s inside… After I opened the carton box, the first thing to notice was just the company logo in silver on the top plate of the heat sink and the cooler carefully packed in a Styrofoam material protecting the overall structure from all sides. The cooler was in one piece and without even a scratch, so I should say job done.
| The protective material | First sight of the cooler |
 |
 |
After I removed the top protective part of the carton box and took out of the package a very serious in dimensions, entirely nickel coated in black matte cooler, a small carton box made of recycled paper and the installation manual to make some pictures, this is the view which I got.
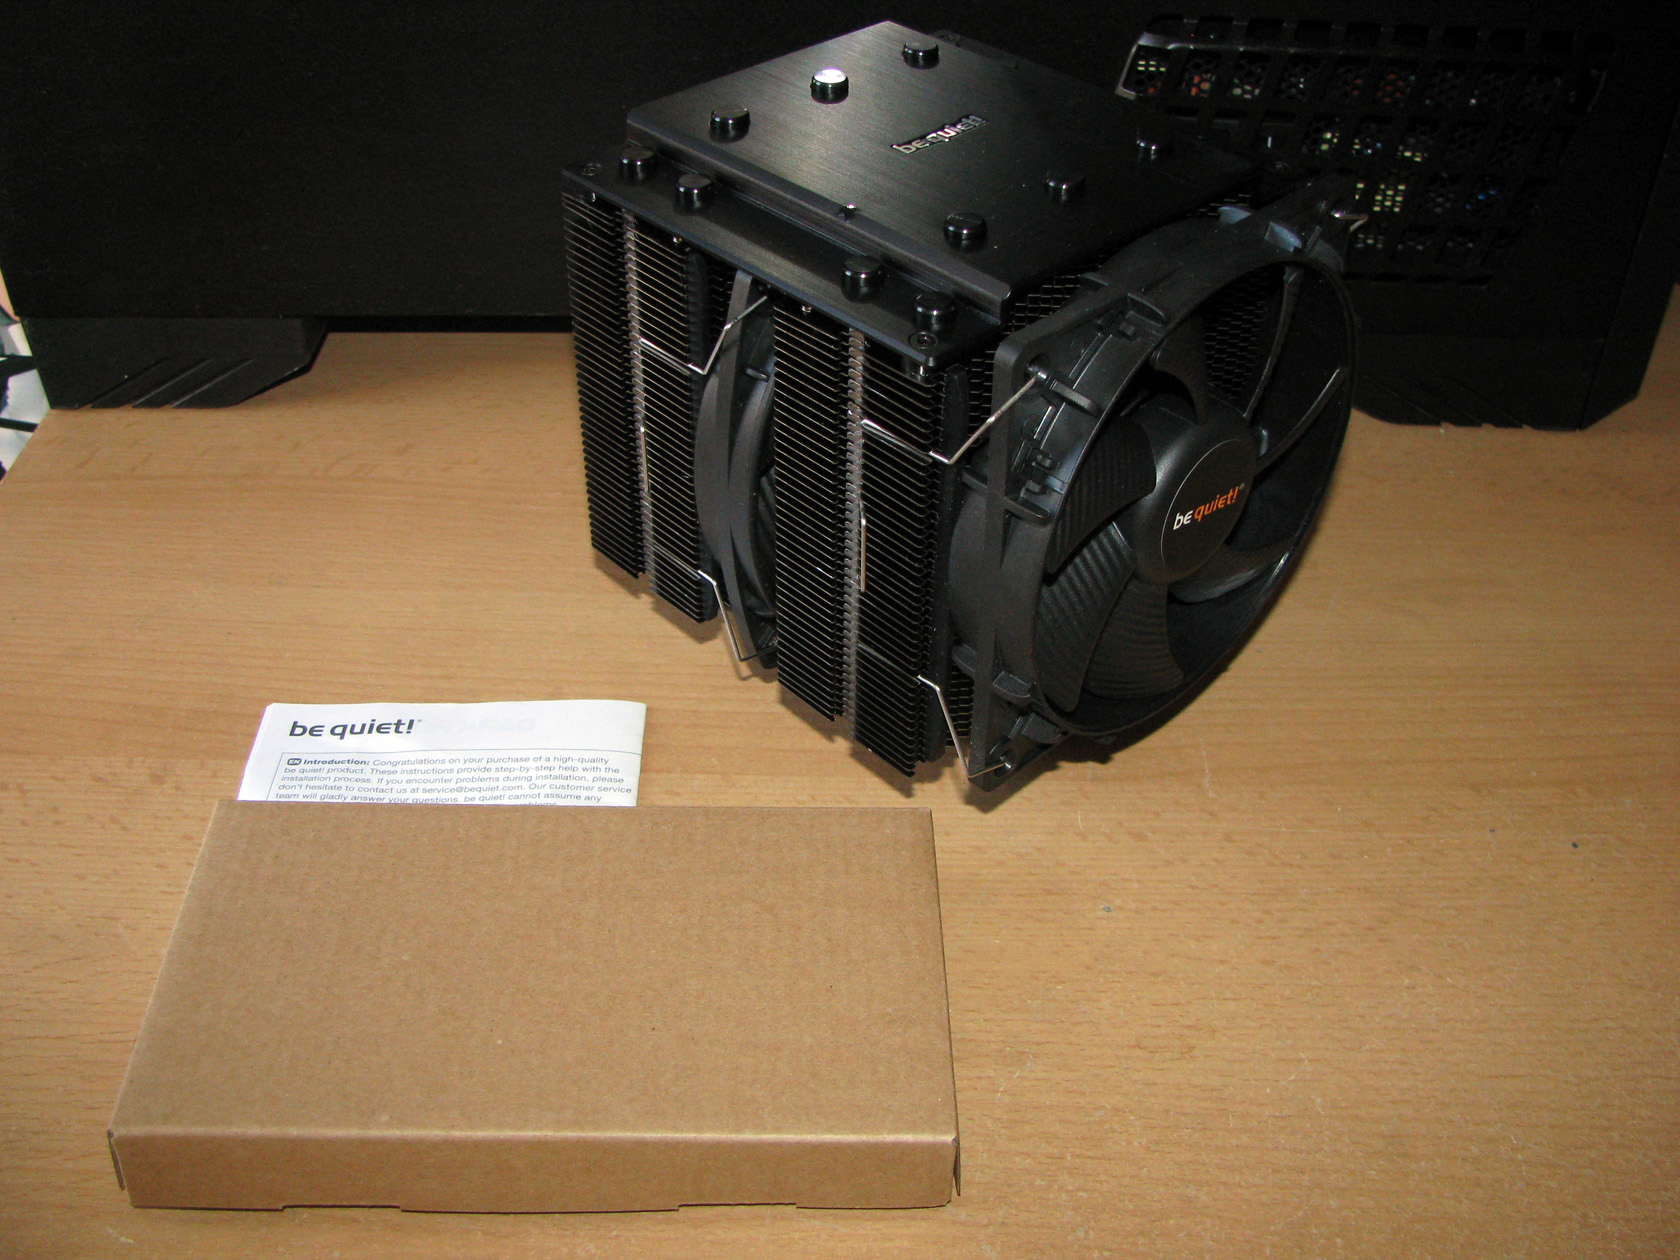
Be Quiet Dark Rock Pro 3 additional accessories
And as usual let’s start with what is inside the box holding the additional accessories. Of course, all of the additional accessories were packed in separate nylon zip bags to ensure all of the parts will arrive and to provide a clear view of what parts are needed for which socket. After I took all of the accessories out of their packages and carefully arranged them for taking some pictures, this is the view I got. 
The standard Be Quiet Dark Rock Pro 3 package offers:
- Painted in black metal back plate needed for both Intel and AMD sockets
- 2 x Silver metal brackets needed for installing the cooler on Intel sockets
- 2 x Silver metal brackets needed for installing the cooler on AMD sockets
- 4 x bolts and 4 x plastic caps for installing the back plate on AMD motherboards
- 4 x bolts for installing the back plate on Intel motherboards
- 4 x bolts for installing the cooler on Intel 2011 motherboards
- 4 x nuts for installing the front brackets for Intel sockets
- 4 x metal clips for installing up to two fans to the heat sink
- A small wrench
- Thermal compound TC-5121
- An installation manual
Pretty extensive packaging I should say. Now I believe the time has arrived to check out the cooler structure.
Be Quiet Dark Rock Pro 3 heat sink structure
Be Quiet Dark Rock Pro 3 like every other cooler announced on the market for the past few years is made of three important components which I am going to check one by one in this review and they are: the heat sink structured as two pretty massive towers, the cooling fans doing the magic and the mounting kit. As usual, let’s start with the heat sink. Be Quiet Dark Rock Pro 3 offers a CNC machined radiator made of dark nickel plated copper contact plate, 7 x Ø6mm black nickel coated copper heat pipes without direct contact with the processor, and of course black nickel coated aluminum fins grouped together forming the two-tower structure. The overall cooler dimensions are 123mm( L) x 133mm (W) x 163mm (D) without the fans and dimensions of 150m (L) x 137mm (W) x 163mm (D) and overall weight of 1.197 grams including the fans. Very serious dimensions I should say and pretty serious TDP, which according to the official technical details is rated as 250W. So nice!

First things first, so let’s start with the contact plate since it always has the most important role for keeping every processor running in a cool, quiet and stable way. Be Quiet Dark Rock Pro 3 offers a perfectly milled bottom contact plate made of copper with dark nickel coating holding in line the 7 x Ø6mm black nickel coated copper heat pipes without direct contact with the processor, so that the heat can pass through and get dispersed from the processor to the aluminum fins formed in a two-tower structure. Apart from that, the top of the contact plate is designed as a small additional radiator to boost the overall performance of the cooler.
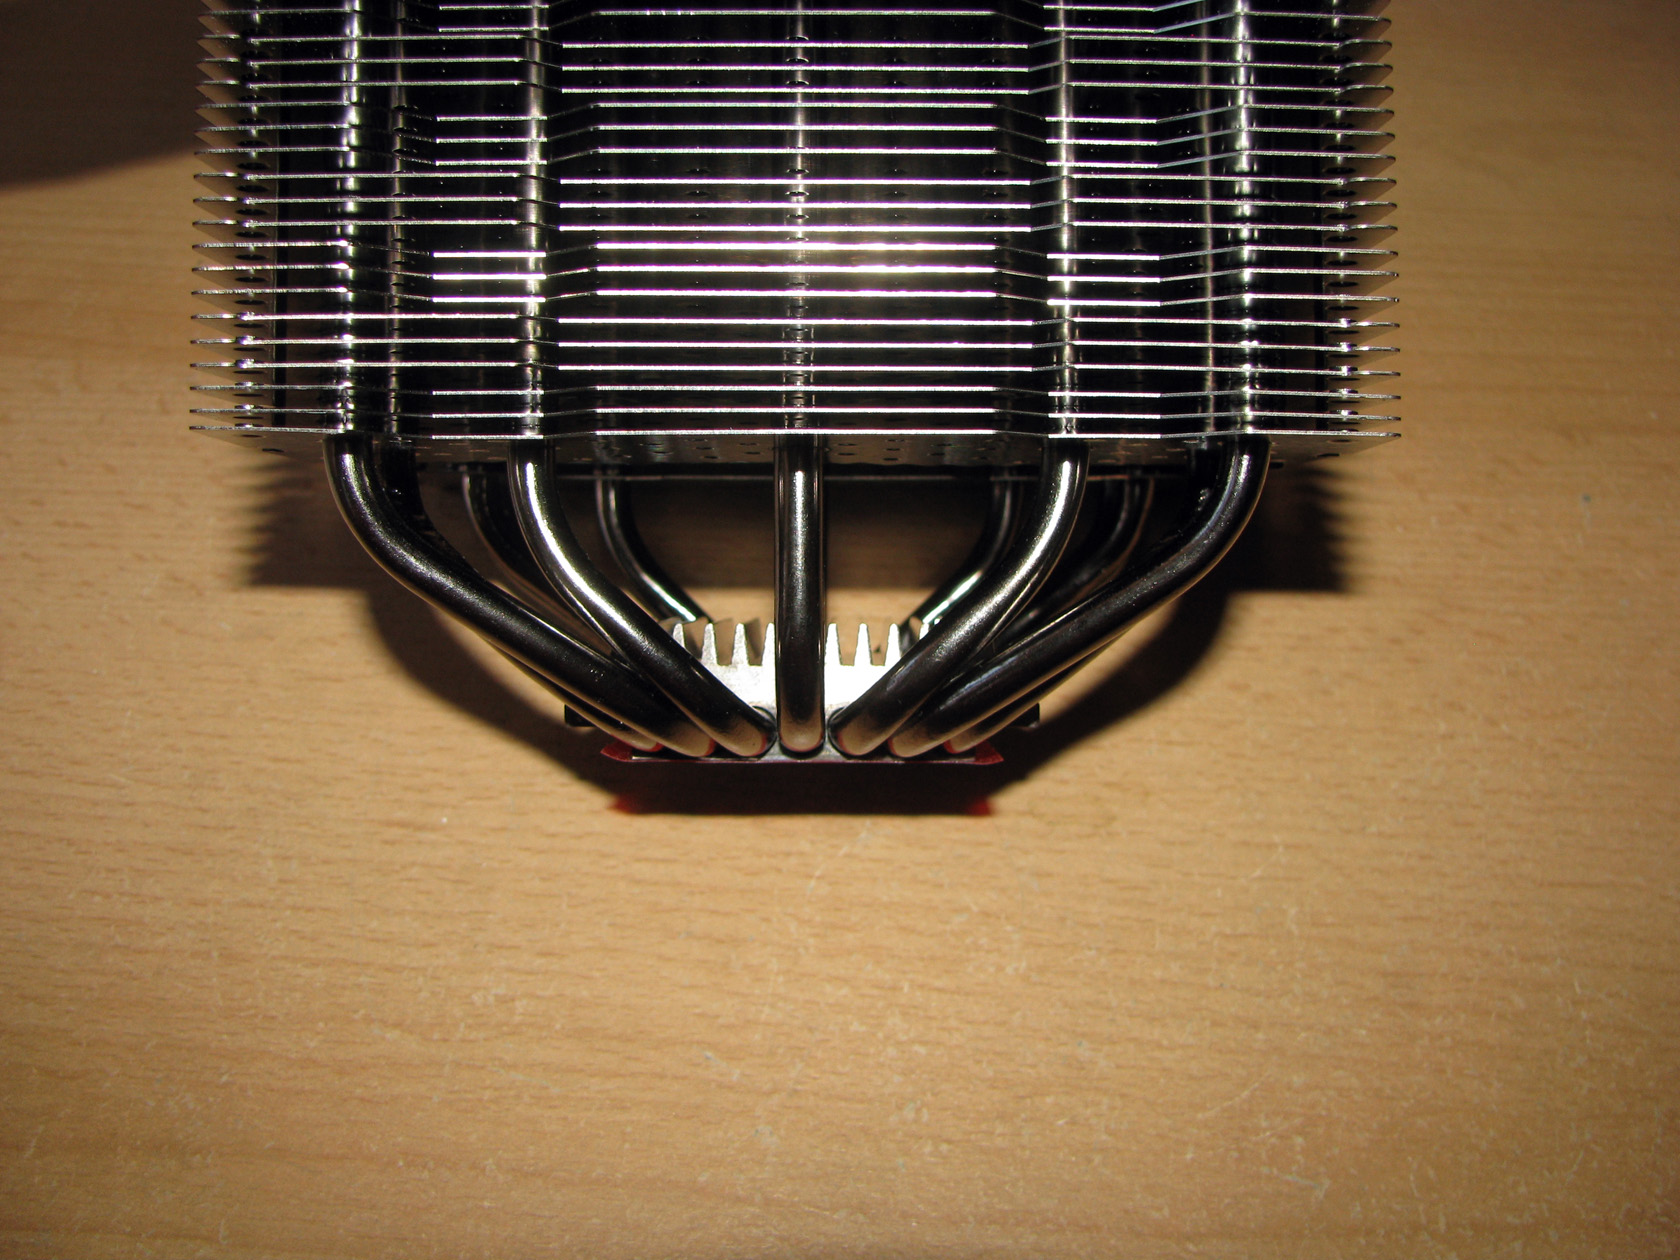
| The pipes seen from the front | The pipes seen from the front/side |
 |
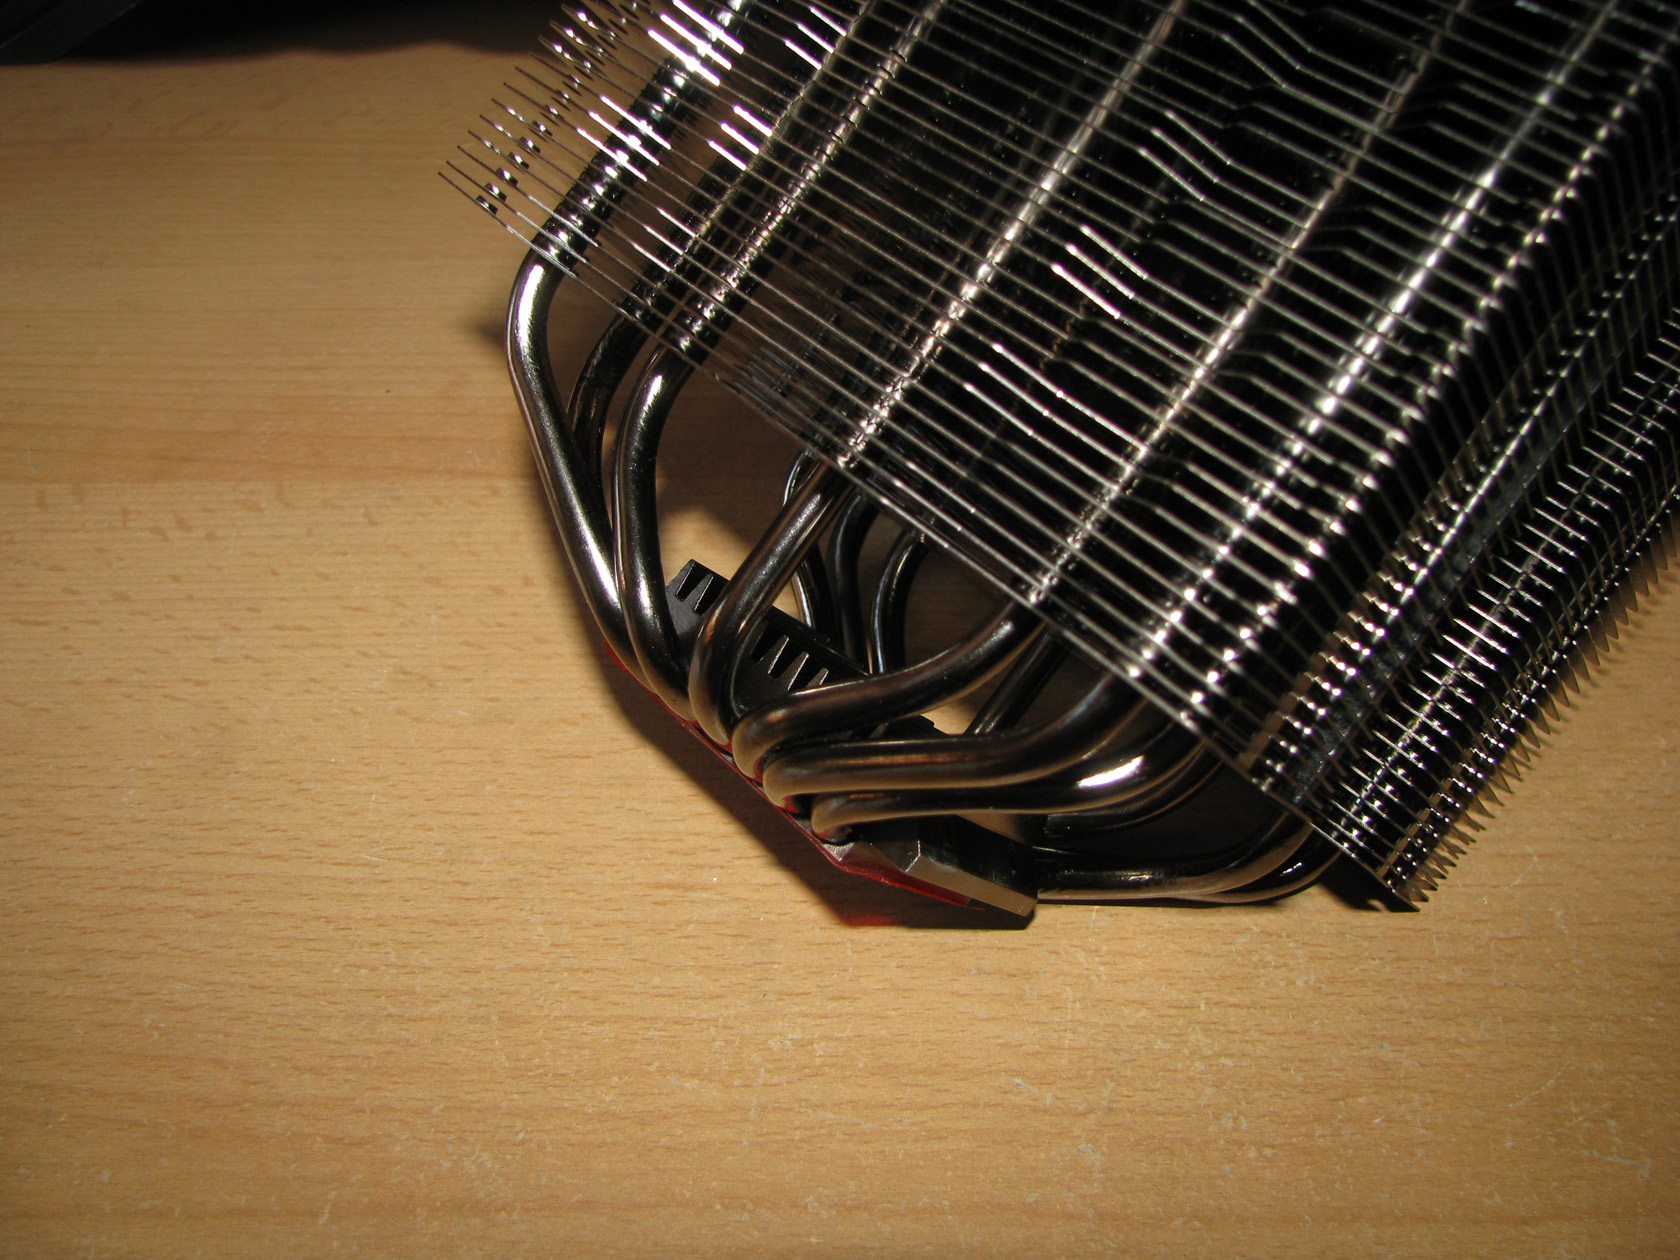 |
And here I want to point out something which I find very interesting. When the cooler is seen from its front side only 5 of the Ø6mm black nickel heat pipes are visible, but when the cooler is rotated a bit the two additional Ø6mm black nickel heat pipes can be seen. Very nice and stylish. Apart from that the cooler offers pretty interesting heat pipe arrangement which includes 3 central heat pipes going through all of the aluminum fins on each tower and situated on equal distance from each other, while the additional 4 heat pipes are on the outer side of the fins of each tower, two on each side . And speaking about the fins, let’s check what is interesting about them.
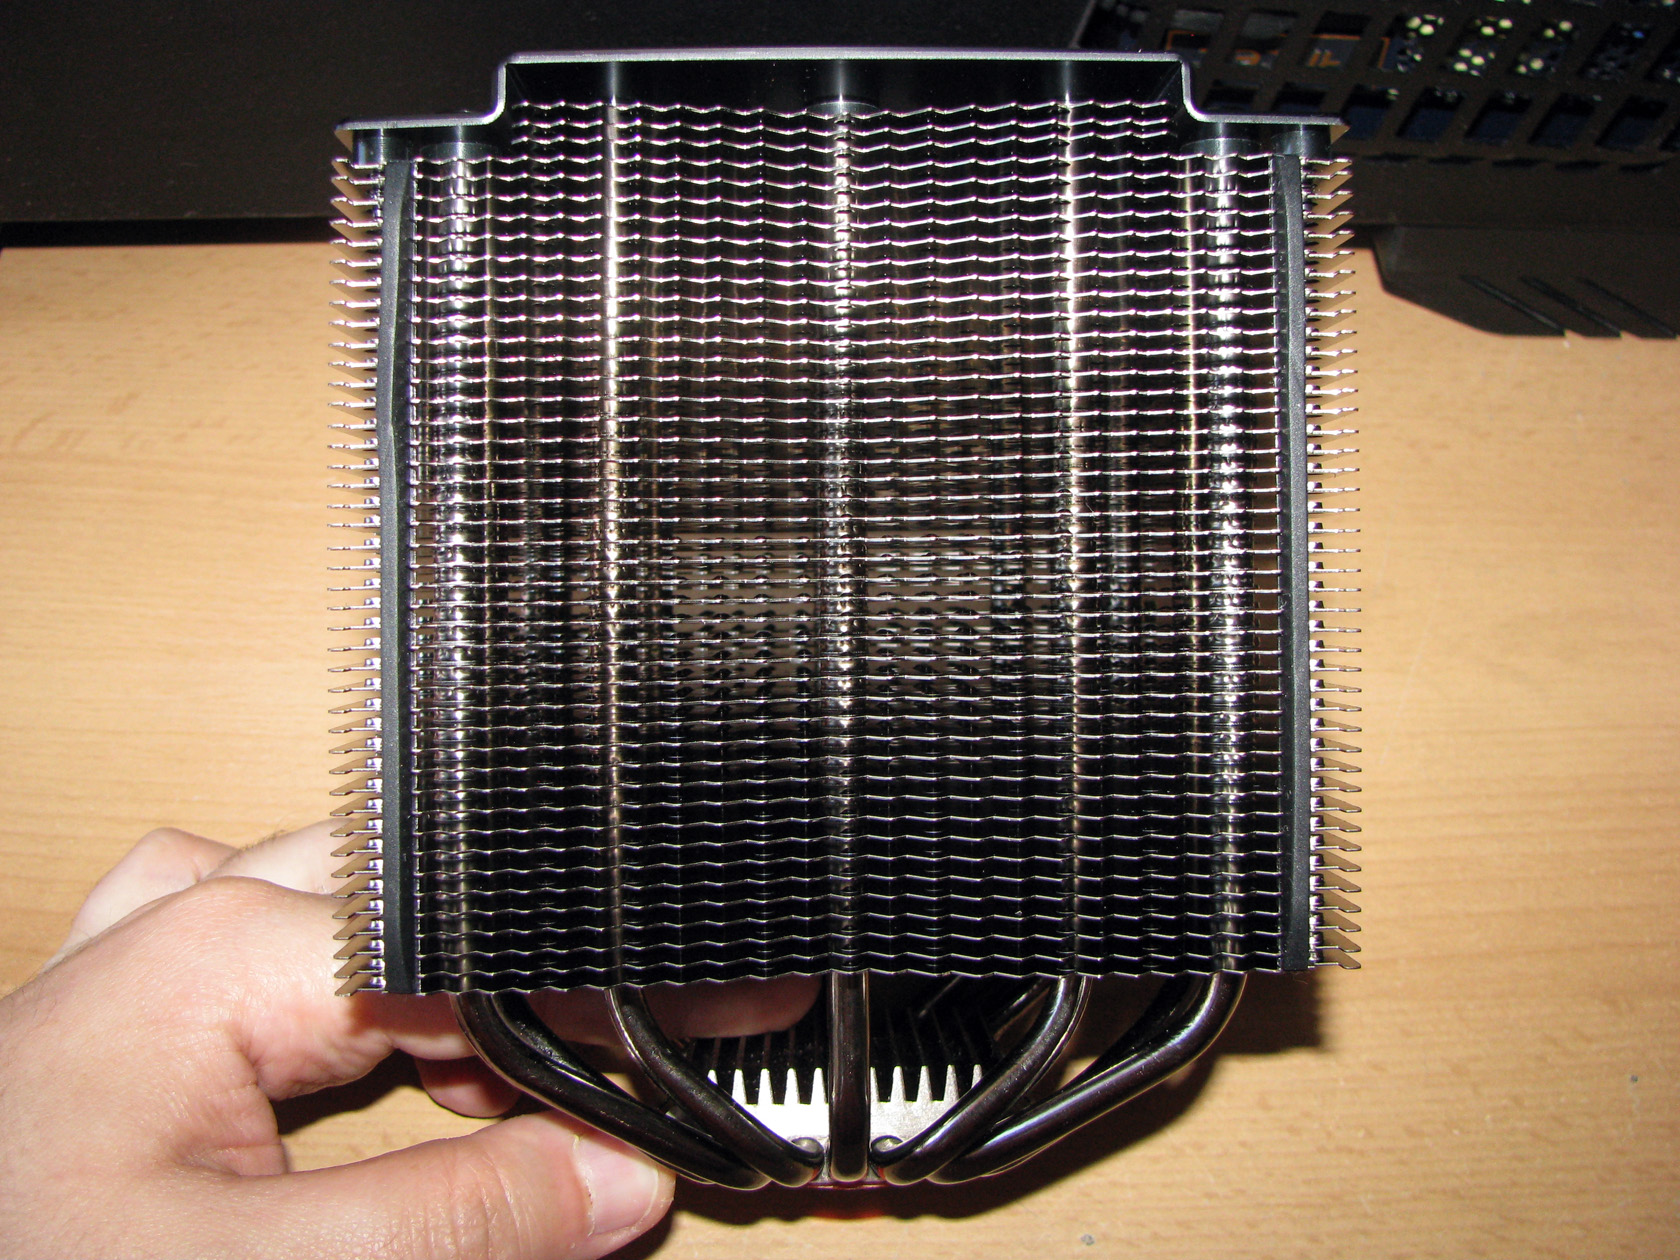
| Front fin structure | Back fin structure |
 |
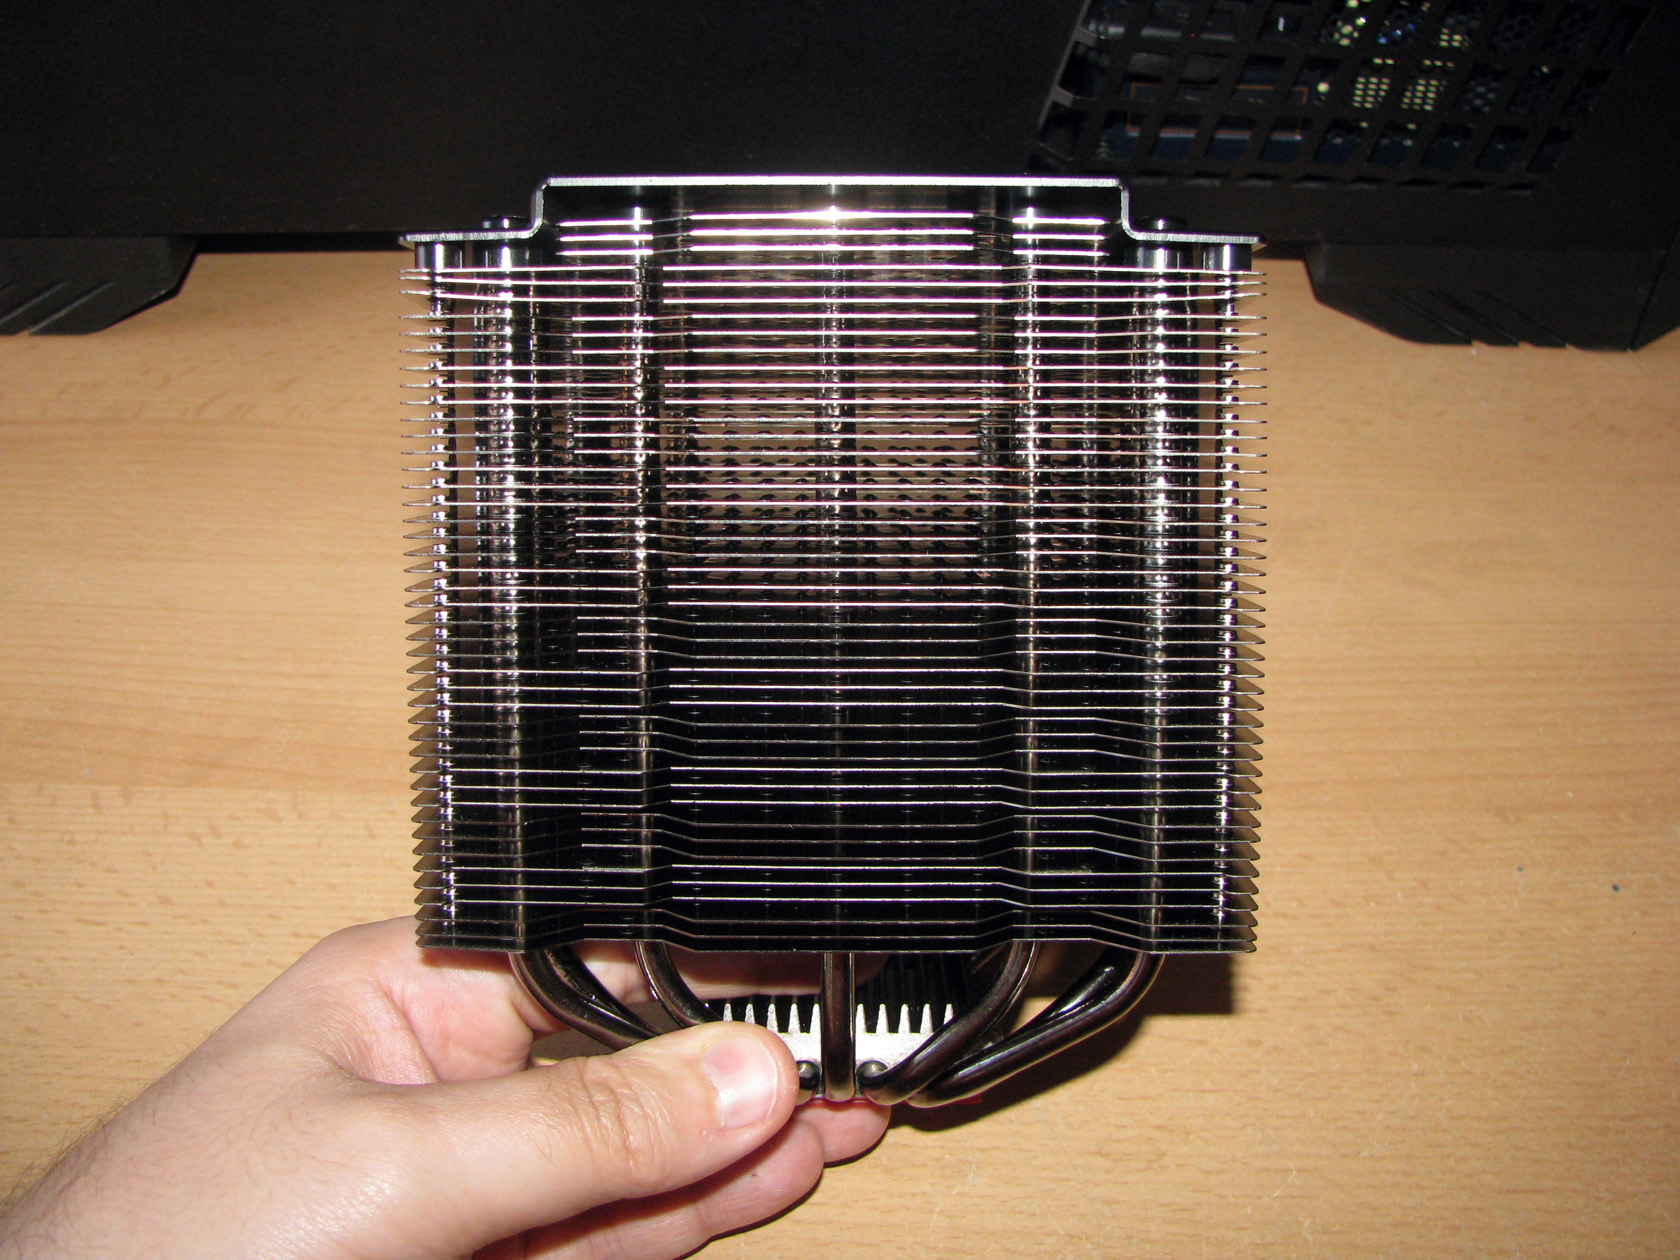 |
Be Quiet Dark Rock Pro 3 is made as a symmetrical twin tower radiator with an overall of 90 black nickel coated fins with the improved dynamic wave-contour technology with small dots on the surface to increase the air circulation and to contribute to a higher convection efficiency without raising overall noise. Something which I find very interesting and innovative… The towers feature 42 wider fins each, which can be seen from the front side of the cooler and 3 shorter fins which are just below the top cap of the radiator. Both towers offer a front fin structure as you can see on the left picture above, while the back side of the towers is done as you can see on the right picture above. So cute!
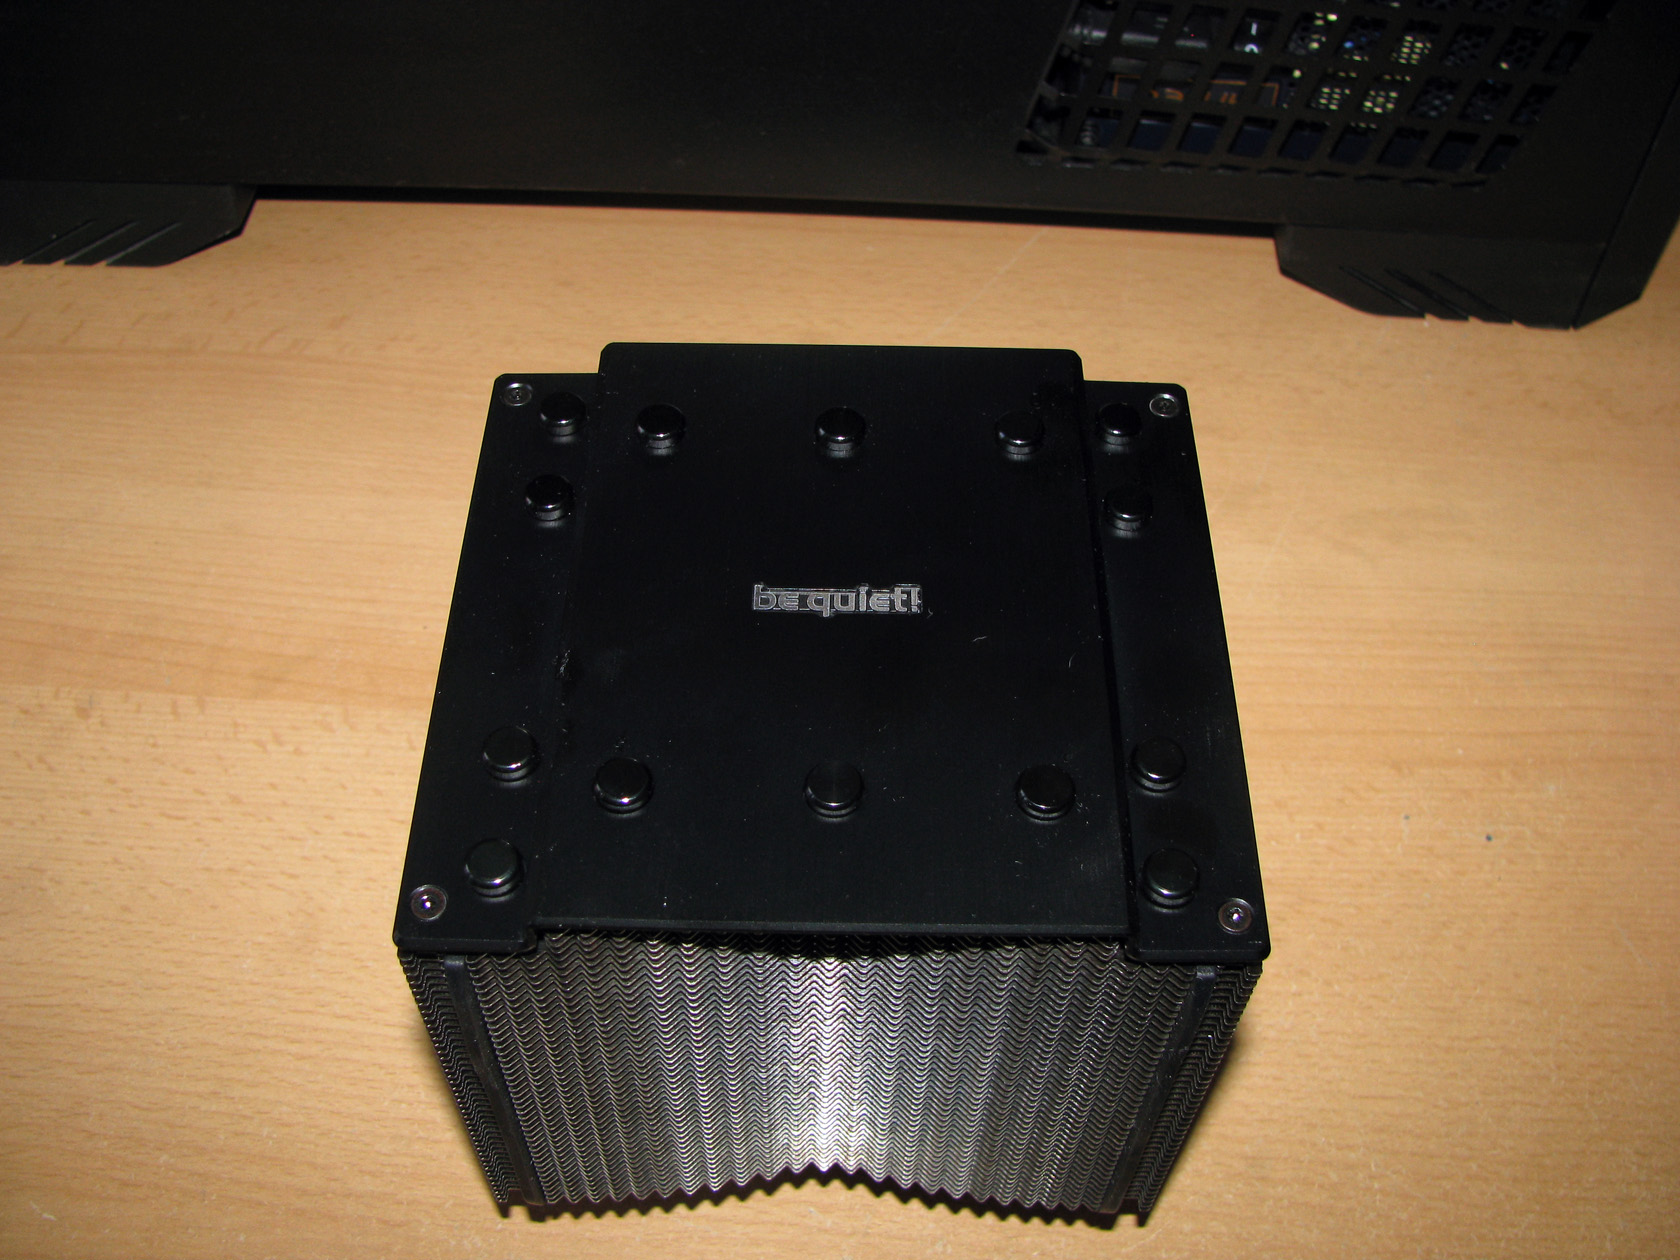
As I’ve already said, the cooler offers 90 performance fins split equally between both towers and additionally there is one more which is almost 3 times thicker than the regular fins and acting more like a metal plate made to improve the overall appearance of the cooler. The top plate is again nickel coated and entirely in black with just the company logo in the middle in silver. Apart from that, all 7 heat pipes are finished on top of the plate with plastic caps, again for boosting the overall appearance of the cooler. And here I should say that the top plate is a fingerprint magnet. So avoid touching it for better appearance.
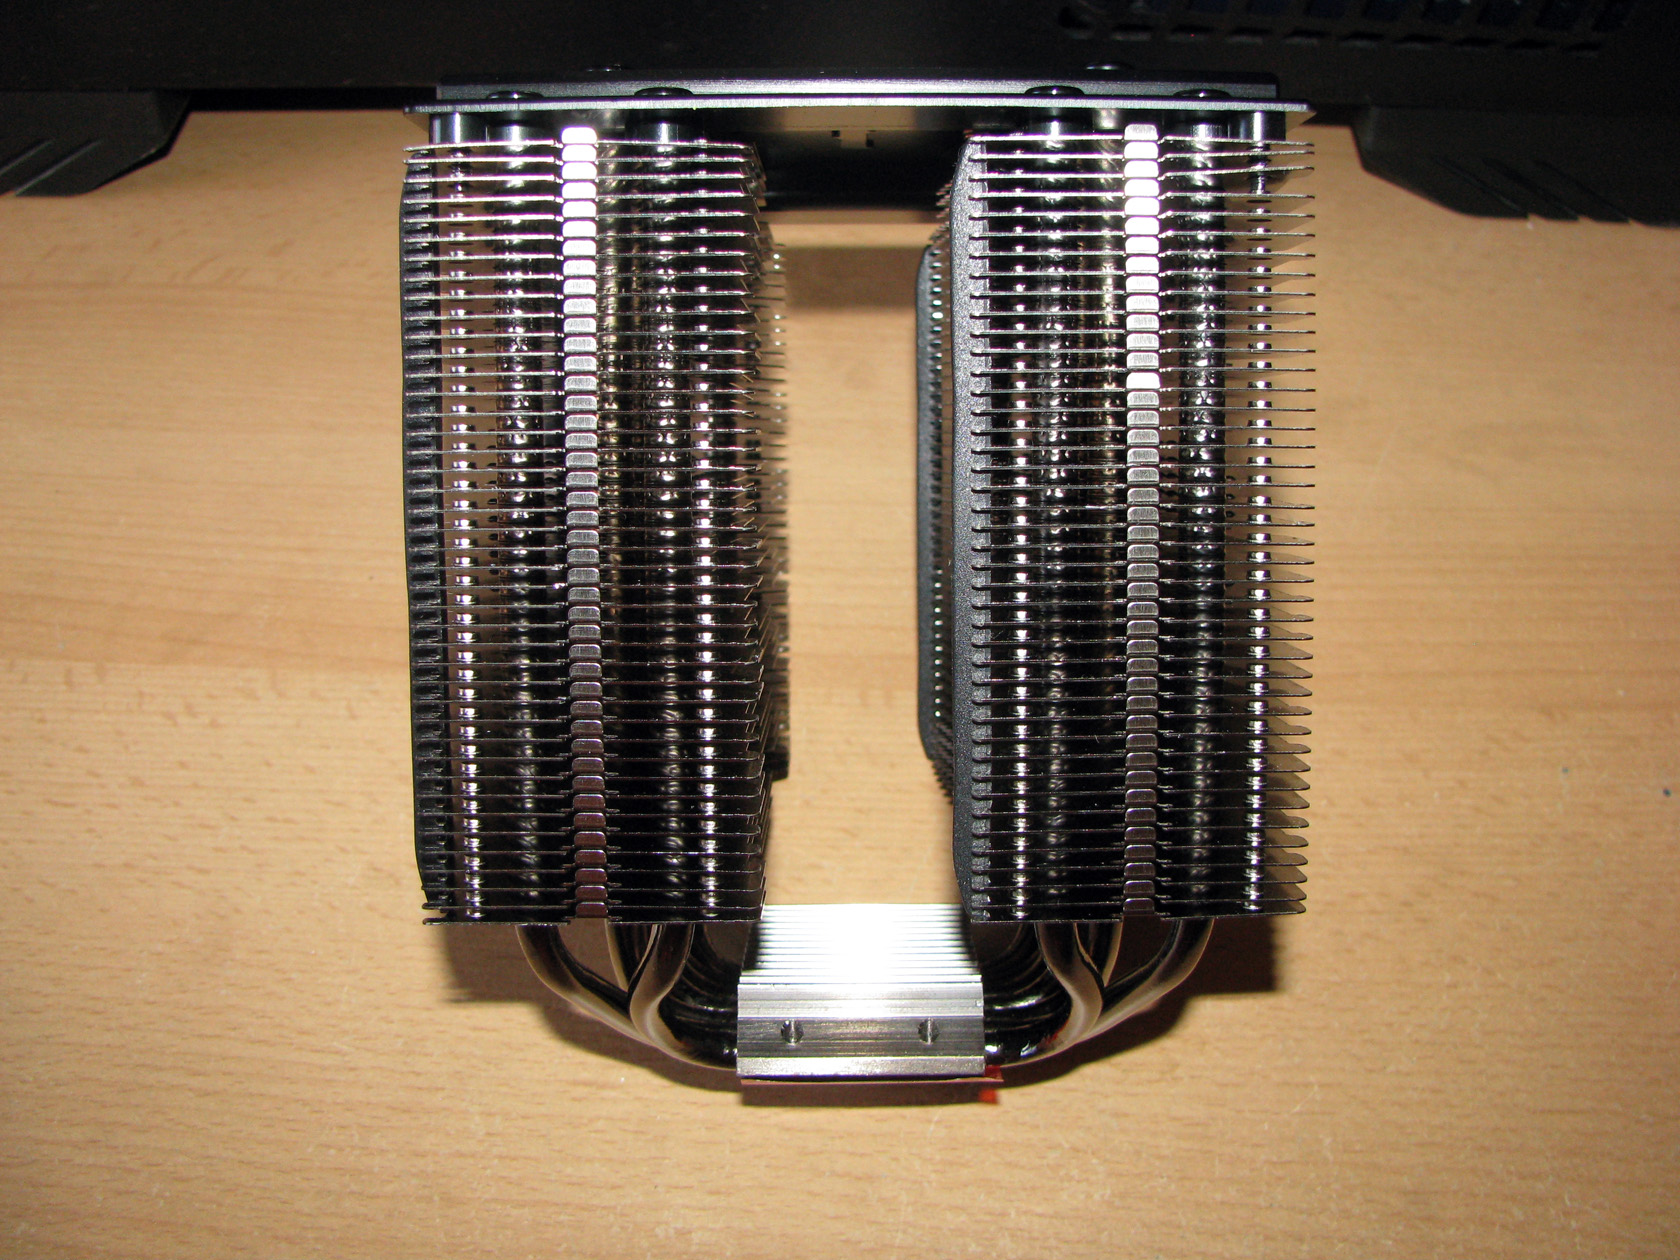
The next thing which really impressed me are the installed rubber dumpers on the front sides of the fin stacks made to reduce the vibrations of the two fans, which arrived with the cooler. Of course, if there are any vibrations, but I will check this a bit later. That is a pretty nice feature I should say. Seems the guys from Be Quiet thought of every detail. And by saying fans, let’s check out what the fans provided with the cooler have to offer to me and every possible customer worldwide.
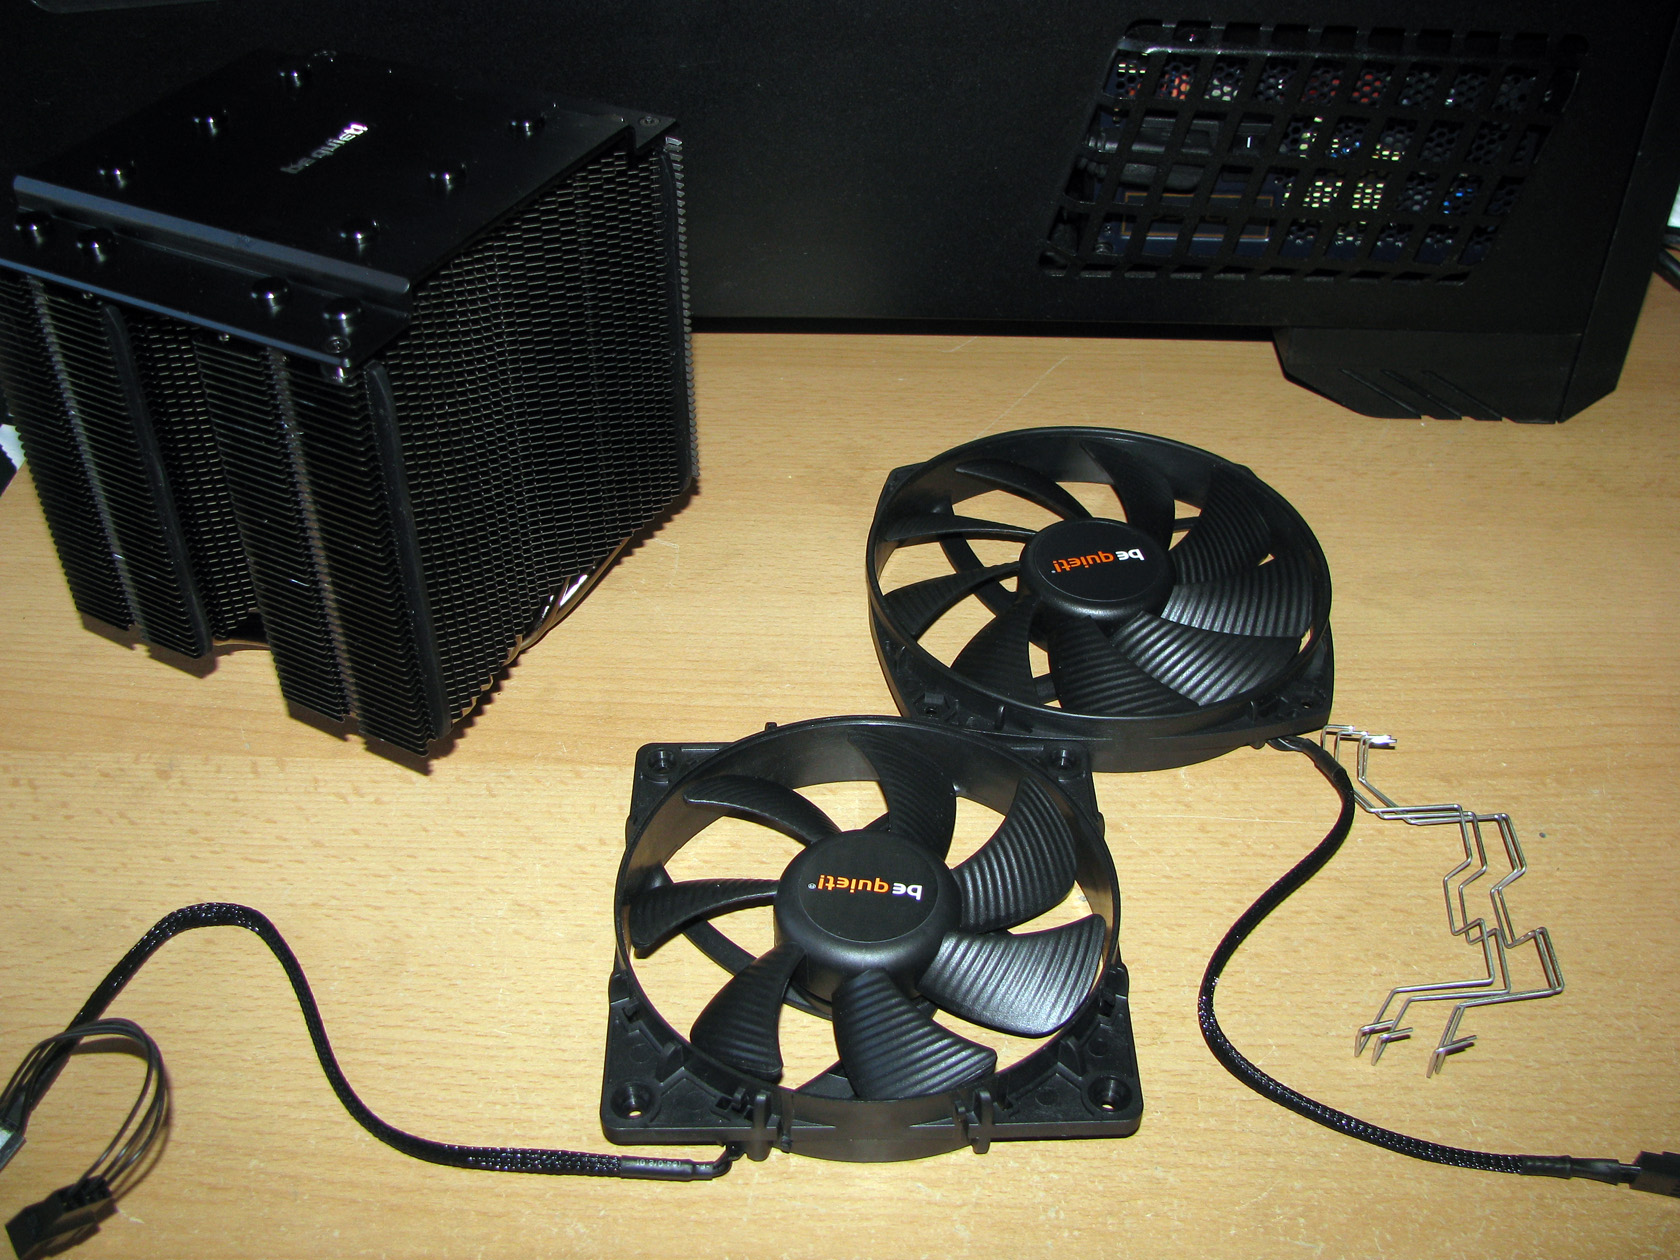
And this is what the two fans together with the mounting clips look like. The standard Be Quiet Dark Rock Pro 3 setup is comprised of 2 fans, of course entirely painted in black and with these technical details:
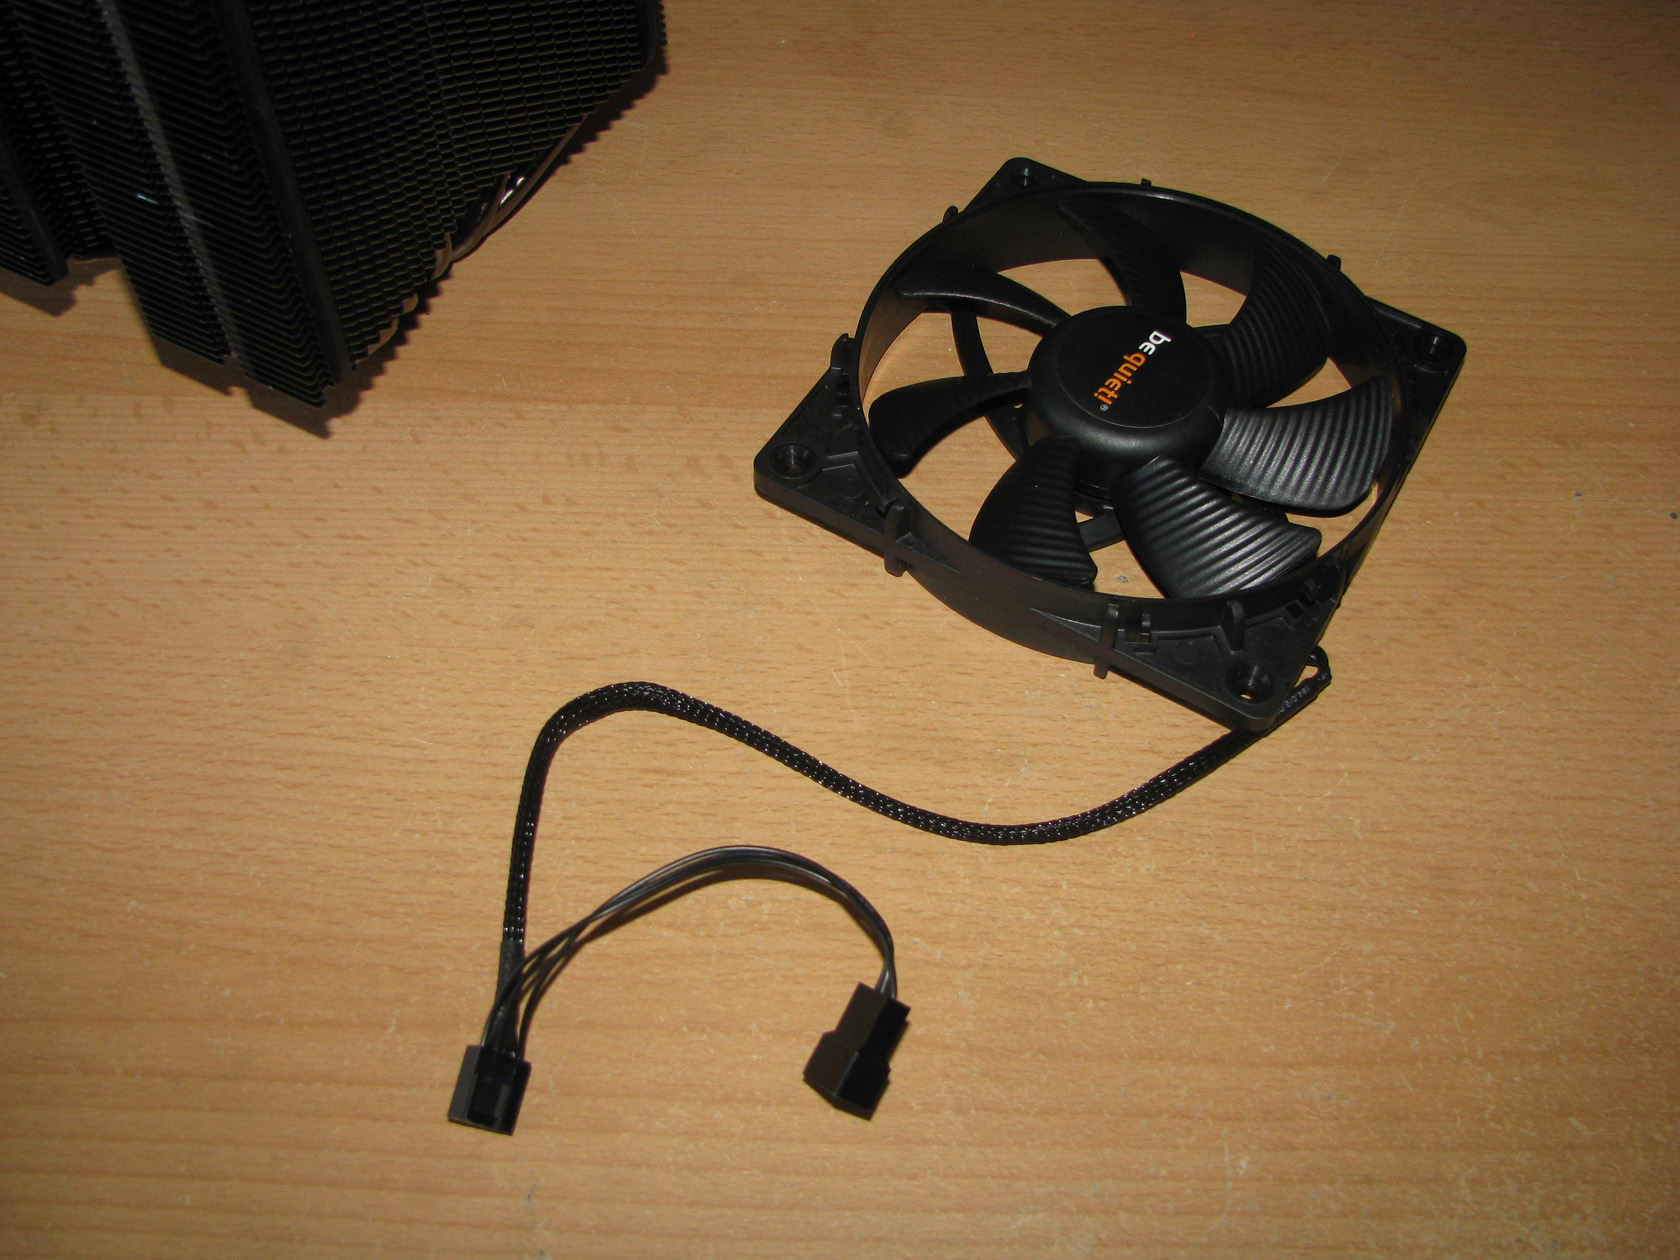
1 SilentWings PWM 120mm fan made of a square plastic frame with dimensions of 120 x 25mm, with the typical for the company frame design and mounting style, and propeller with 7 not very wide blades featuring airflow-optimized channels to improve the overall airflow and static pressure performance. The connection between them is done by Fluid Dynamic Bearing and the fan is made to work at a maximum of 1700 revolutions per minute, providing maximum airflow level of 93.3 m3/h, and static level pressure of 1.23mm H2O. The fan is powered and regulated by 250mm long, sleeved in black 4 pin PWM cable and connector.
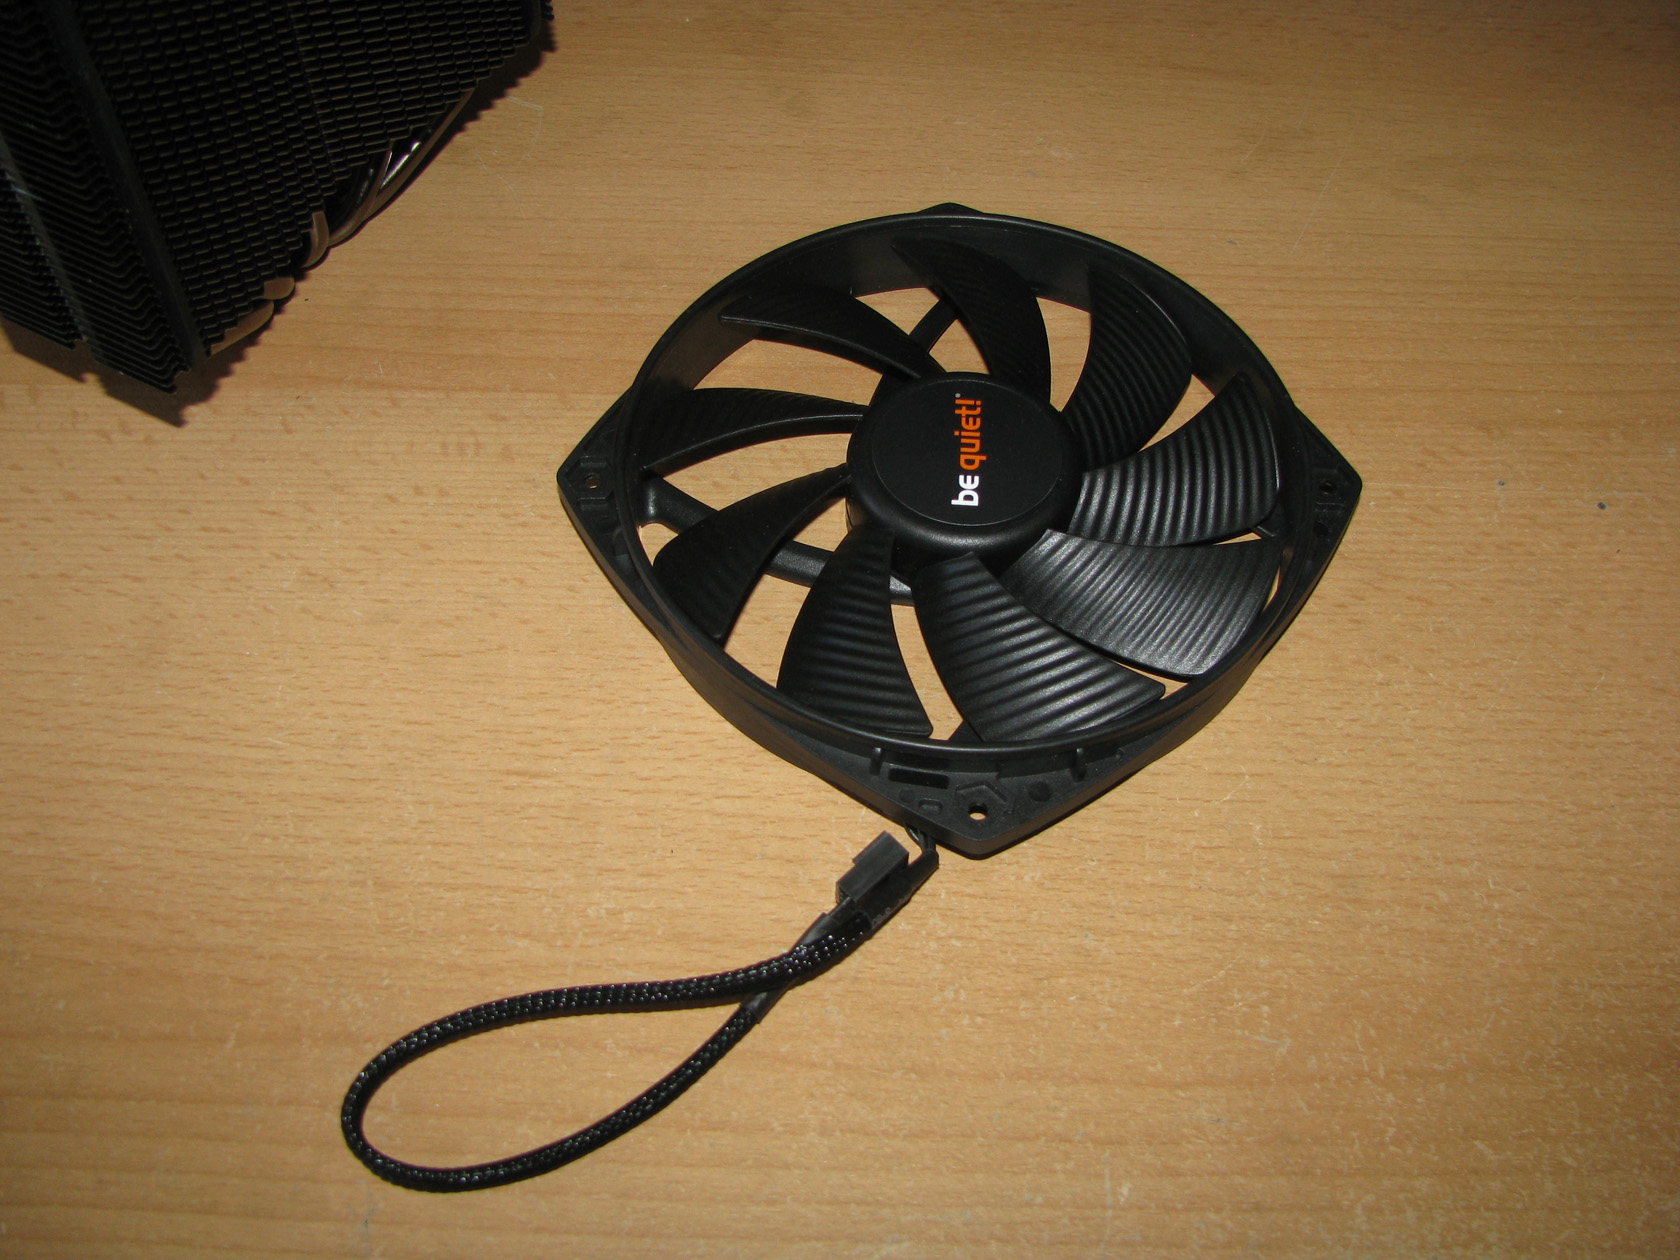
1 SilentWings PWM 135mm fan made of a round plastic frame with dimensions of 135 x 25mm, with the typical for the company mounting style, and propeller with 9 not very wide blades featuring airflow-optimized channels to improve the overall airflow and static pressure performance. The connection between them is done by Fluid Dynamic Bearing and the fan is made to work at a maximum of 1400 revolutions per minute, providing maximum airflow level of 113.8 m3/h, and static level pressure of 2.1mm H2O. The fan is powered and regulated by a 200mm long, sleeved in black 4 pin PWM cable and connector. According to Be Quiet, when both fans are working at maximum speed they should provide a maximum of 26.1dB(A), which is a pretty serious statement. And here comes the interesting part. When only the 135mm fan is used between the towers it should be powered and regulated directly to the CPU fan header on the motherboard. When the 120mm fan is installed as well it should be attached to the CPU fan header on the motherboard, while the 135mm should be connected to the second connector coming out of the 120mm power cable. And since I described the fans I believe it is time to install the fans on the radiator and later install the cooler on the motherboard to do the tests.
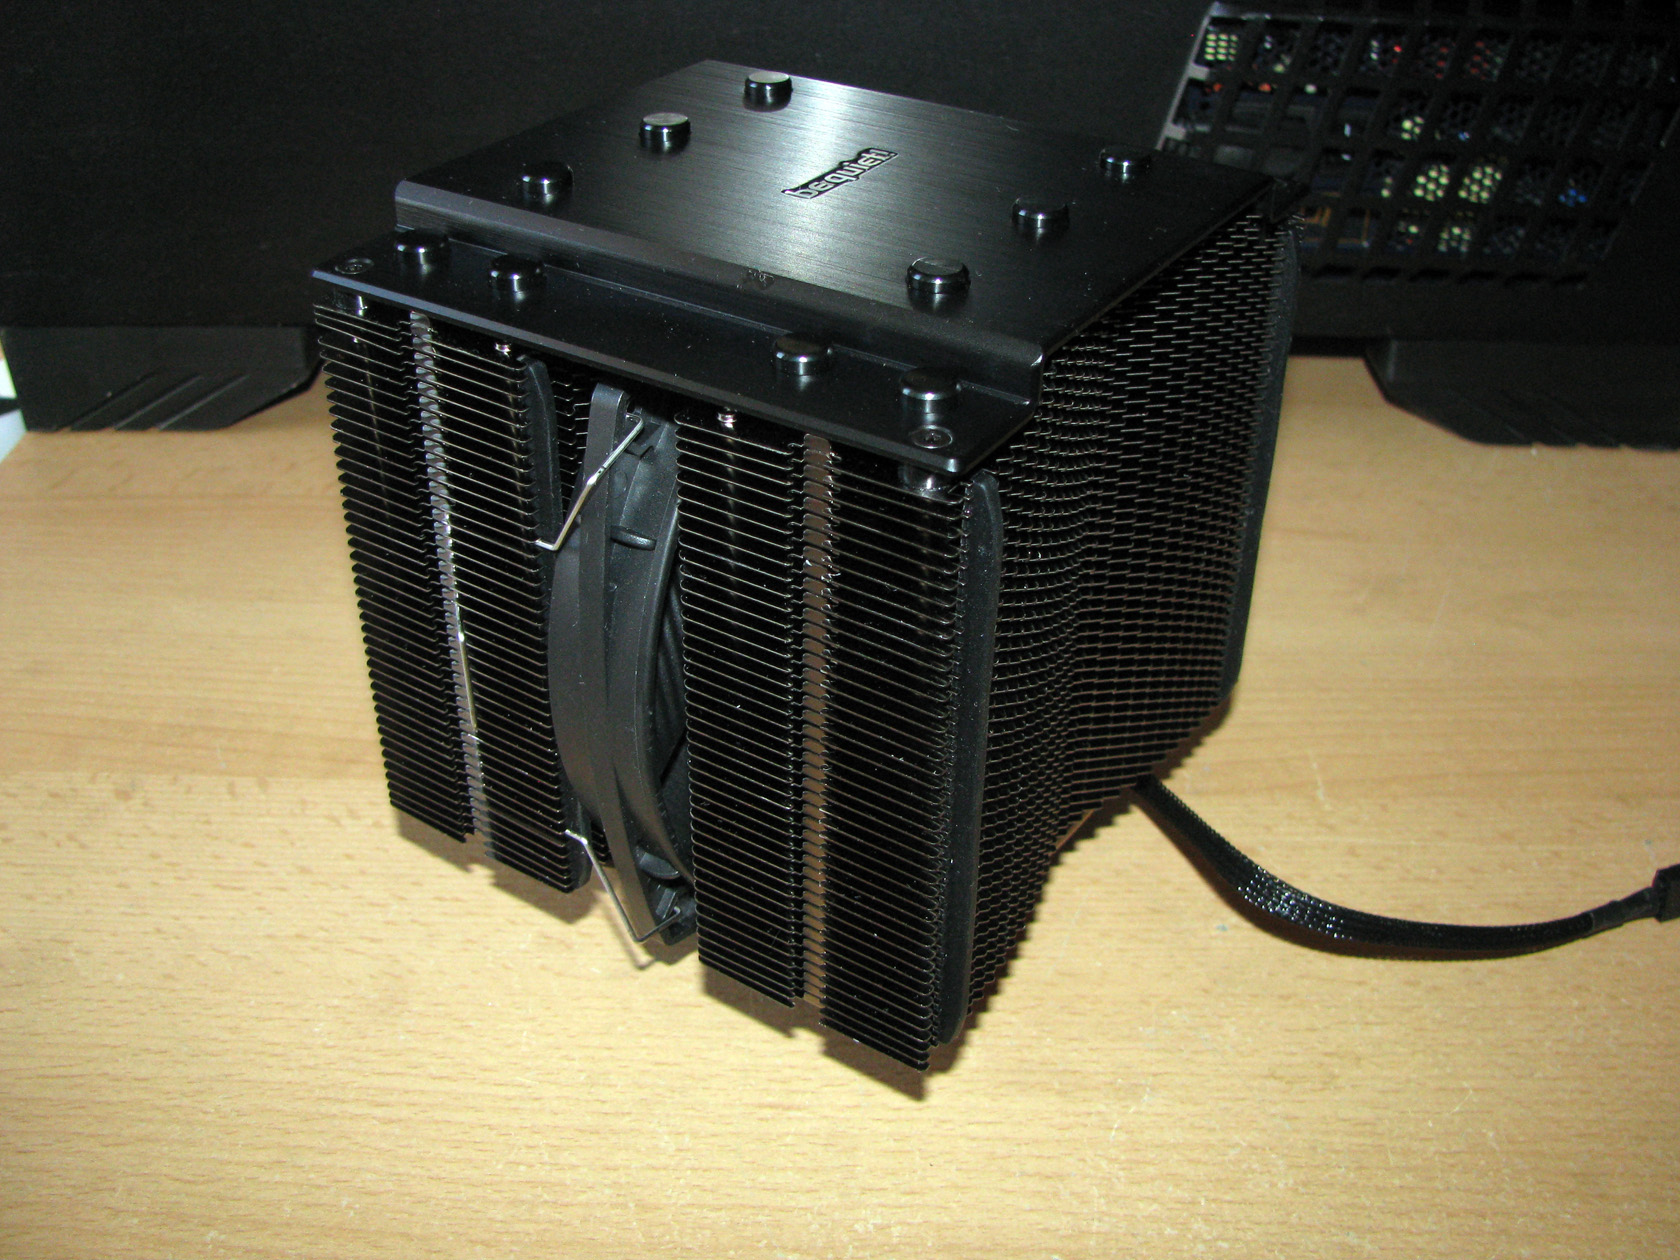
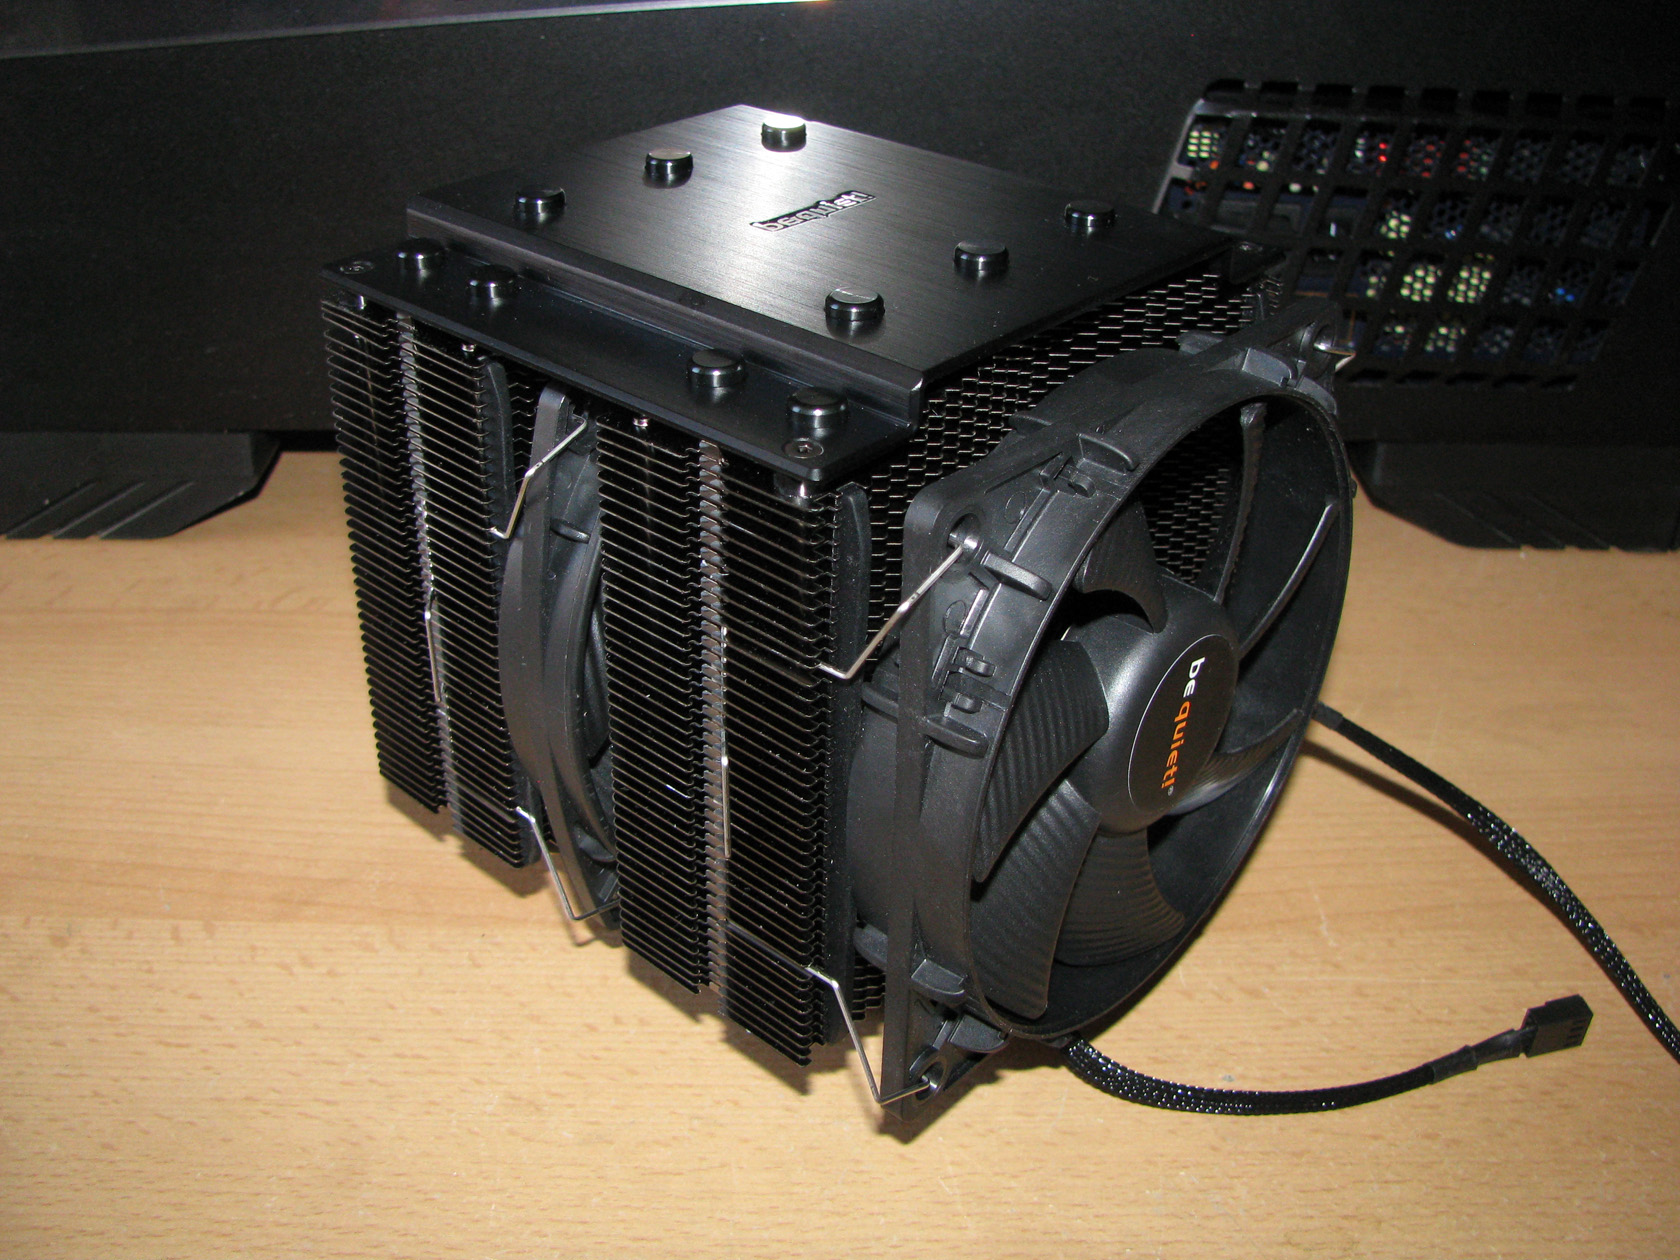
And this is what the 135mm fan looks like after it was installed on the heat sink. And this with both fans installed.
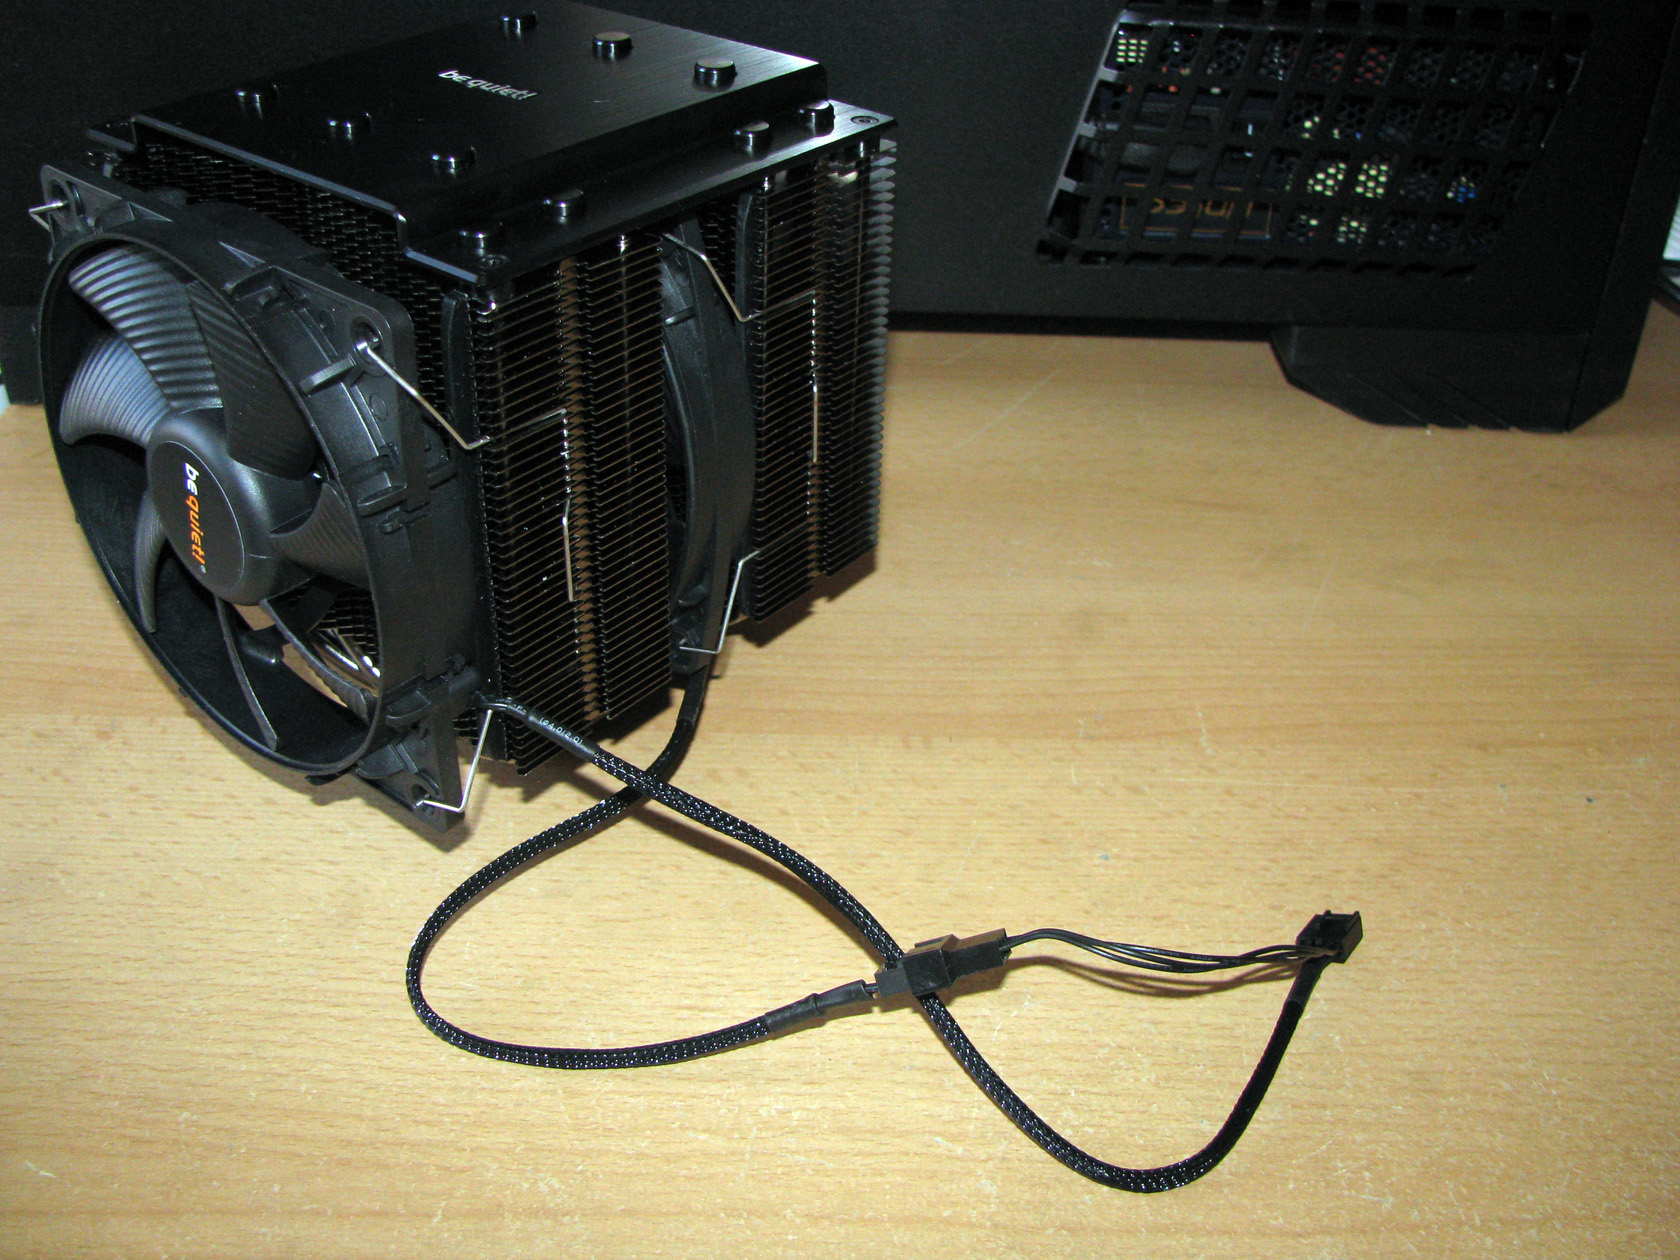
And this is how the fans should be connected to each other and later to the CPU header on the motherboard.
After I’ve finally reassembled the cooler structure, the CPU cooler appeared as pretty massive and really stylish, entirely in black, with just the silver logo on top and it should provide very serious cooling performance. Of course, to test this I will have to install it on my motherboard with the provided mounting kit. According to the official details provided on the company web page, the cooler uses the same backplate provided with it for the following CPUs:
- Intel sockets: LGA 775/1150/1155/1156/1366/2011
- AMD sockets: AM2/AM2+/AM3/AM3+/FM1/FM2
Of course, for doing the tests I will use the AMD brackets and these are the parts needed so the cooler can be installed on the motherboard:
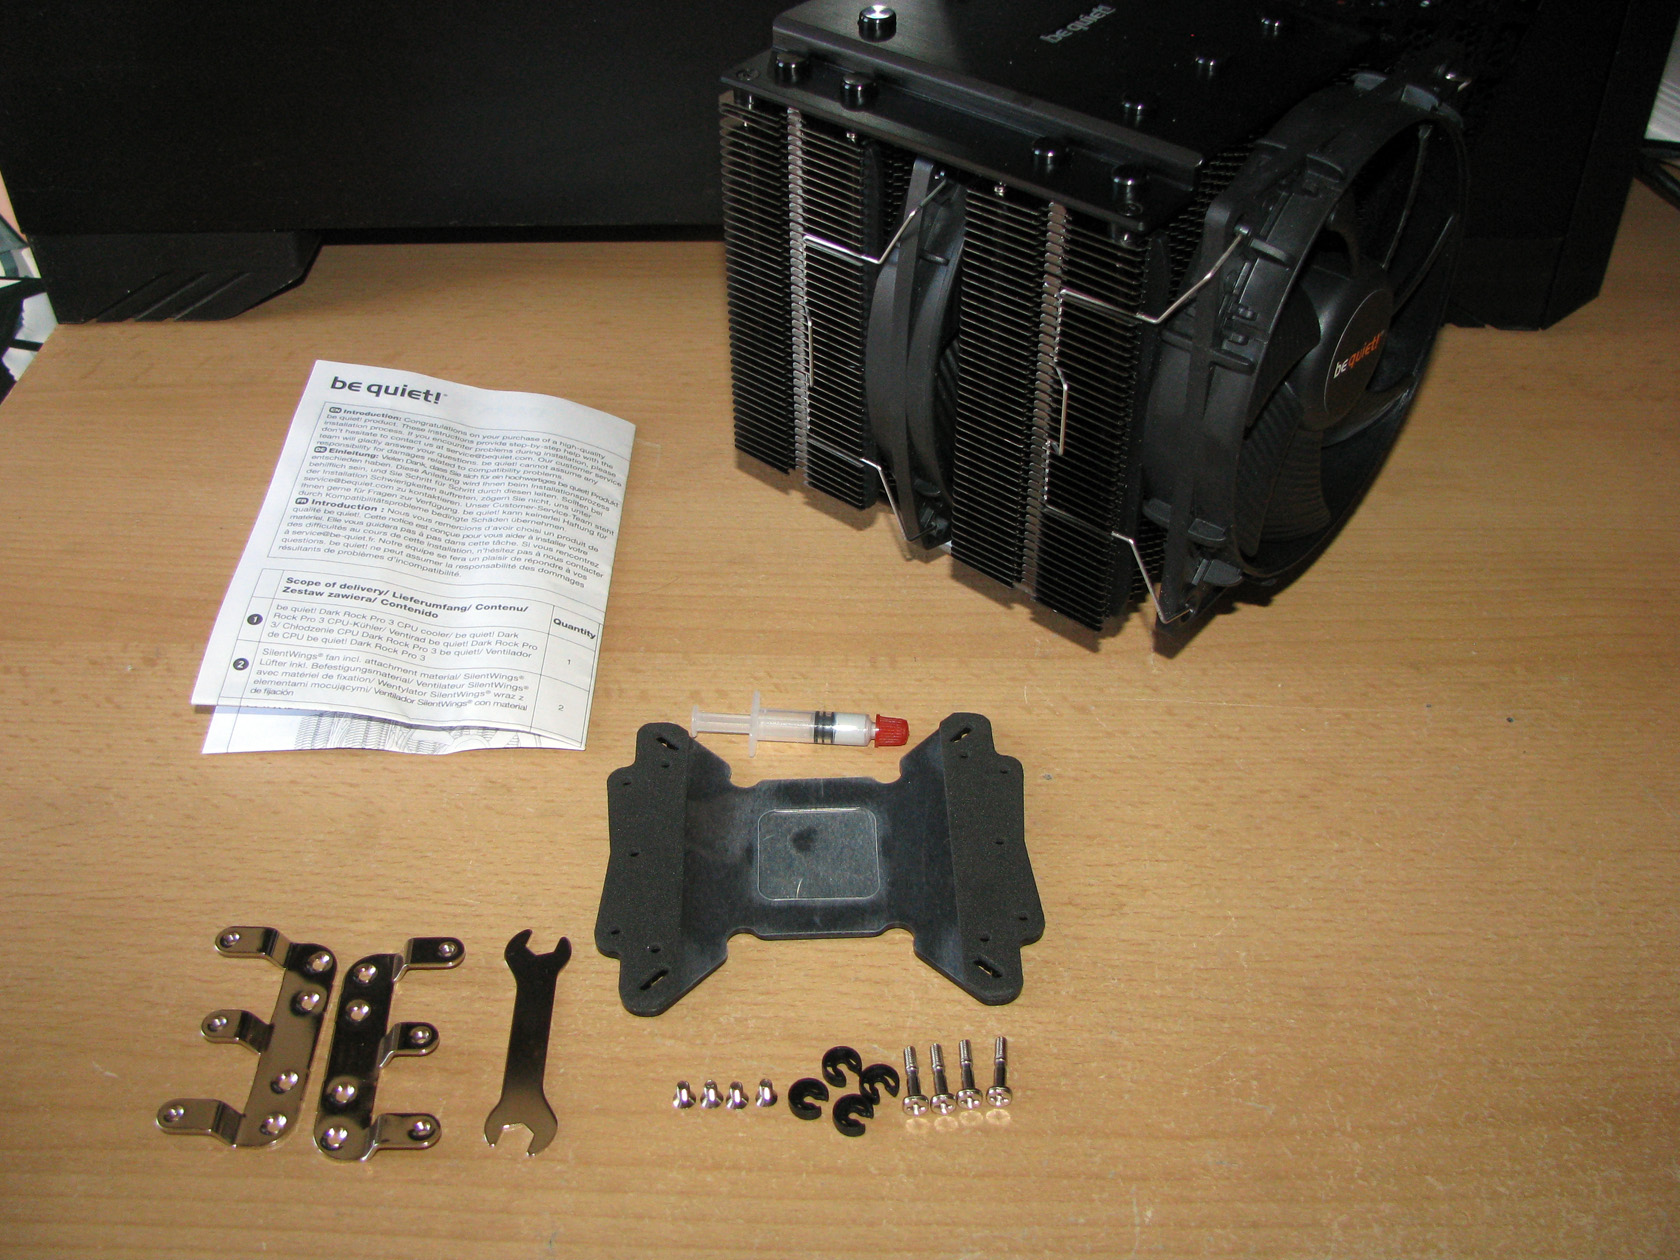
As always the first thing to do is to pay some attention to the installation manual, read the instructions carefully and pick up the right accessories for the actual socket… And later to prepare the backplate before attaching it to the motherboard.
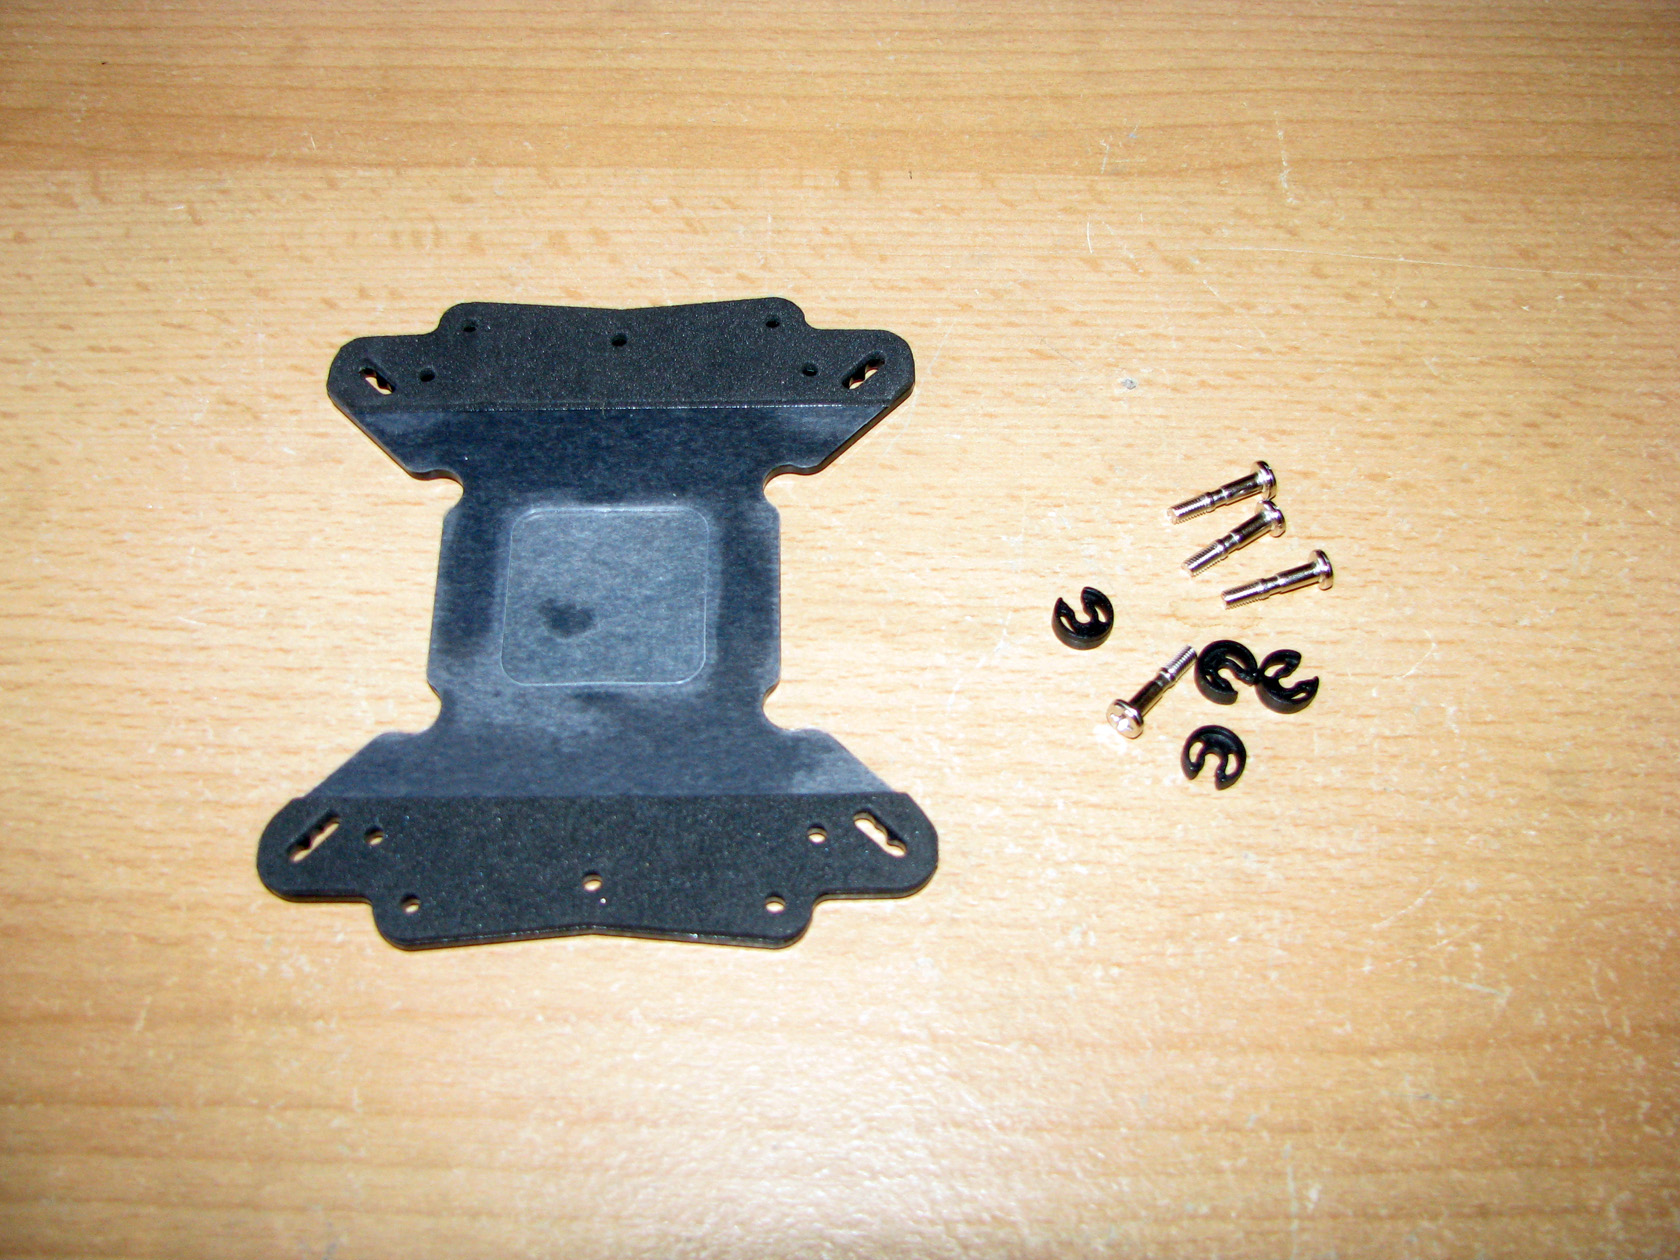
According to the picture above there is nothing much to prepare. The backplate provided in the accessories pack is entirely made of metal with additional soft foam to provide a distance between the backplate and the motherboard for avoiding short circuit. So let’s put these 4 bolts in the AMD holes and prepare the backplate for installation.
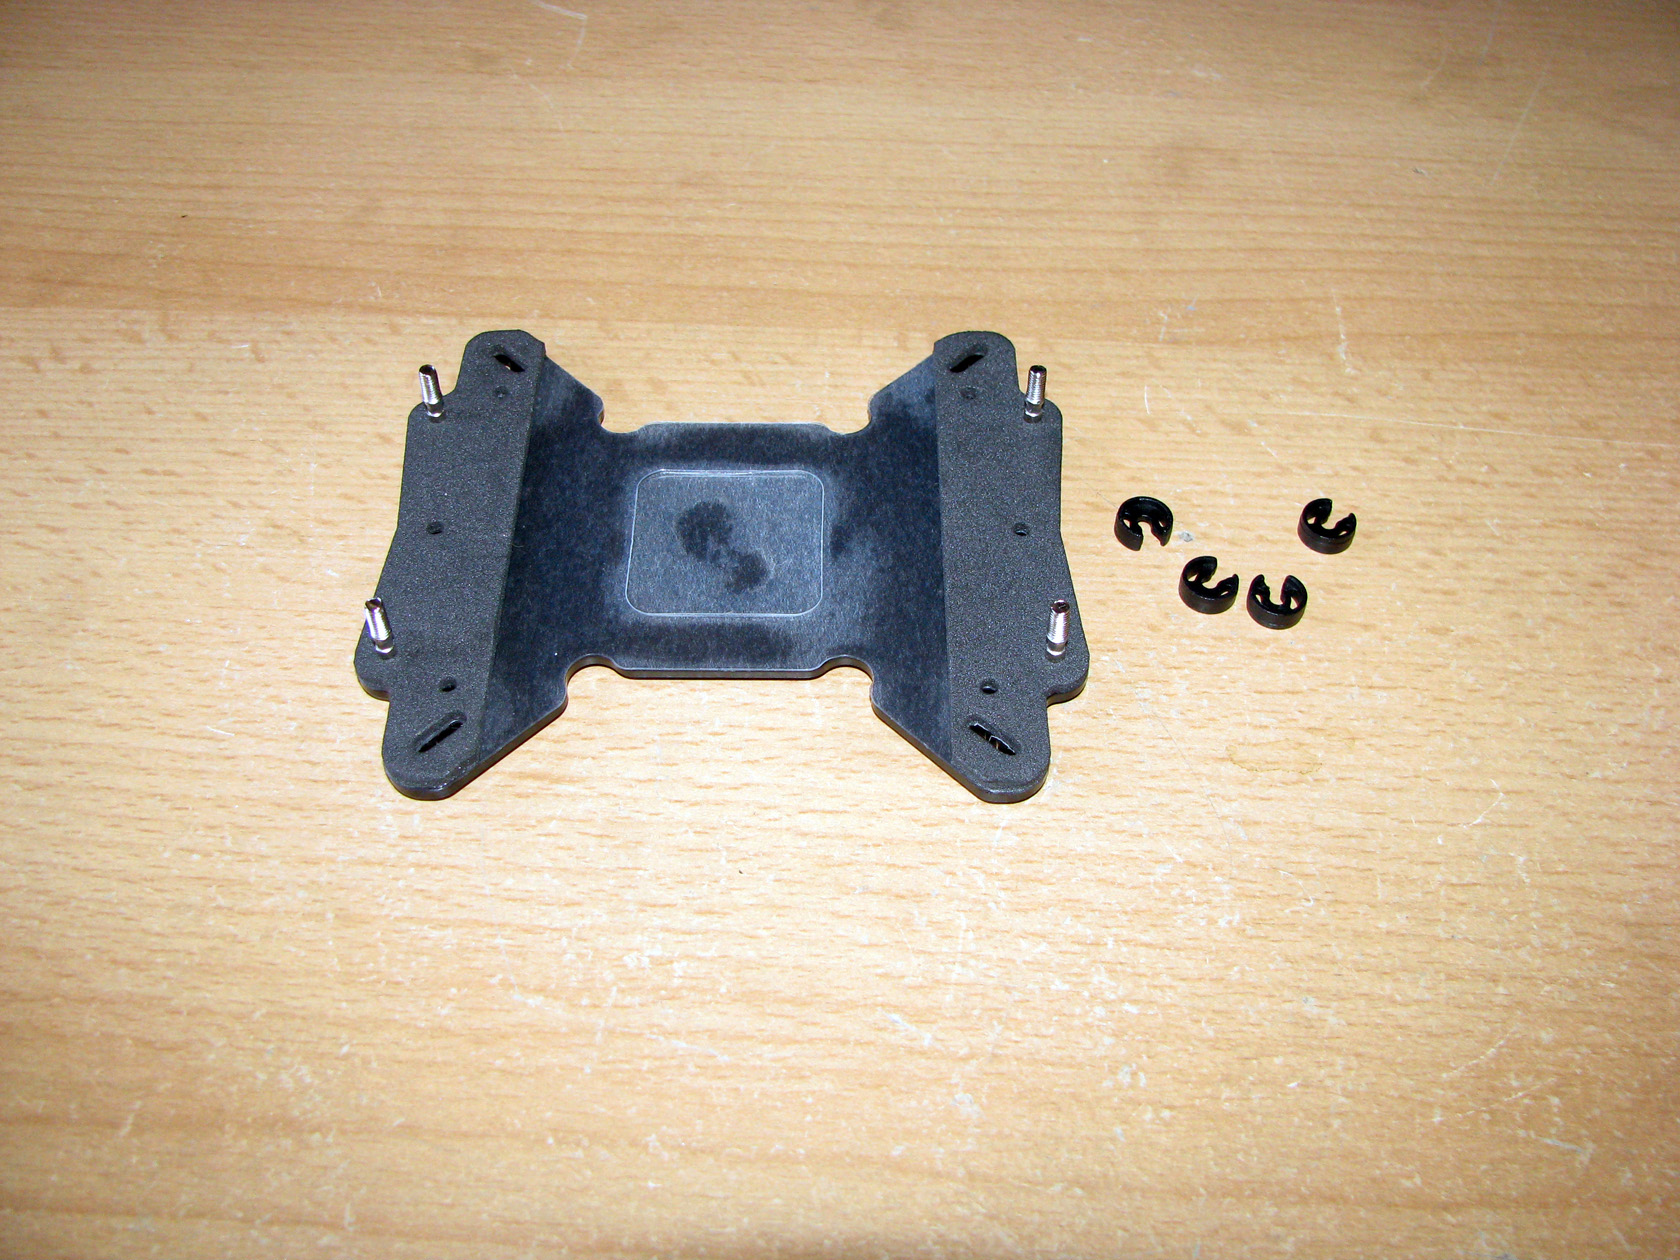
Next step is to fix the backplate to the motherboard with the four Pacman-like plastic parts.
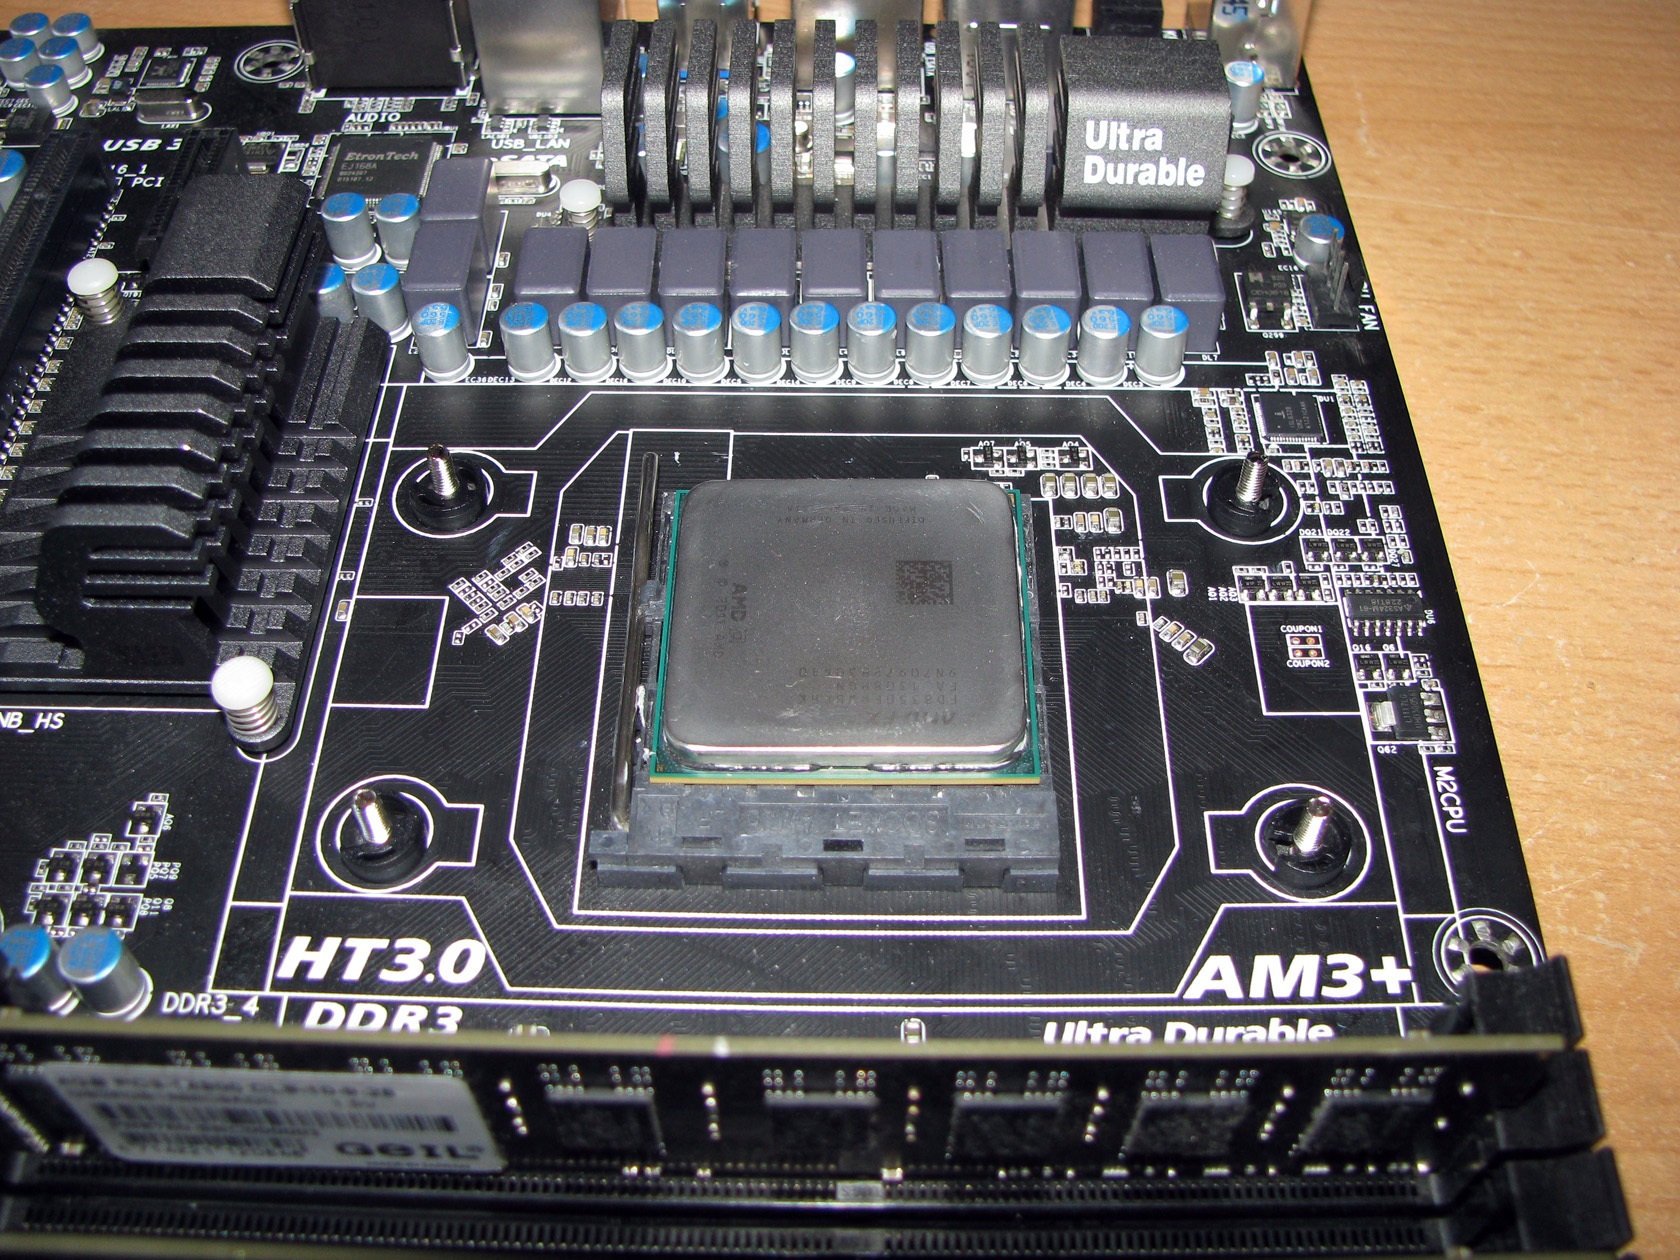
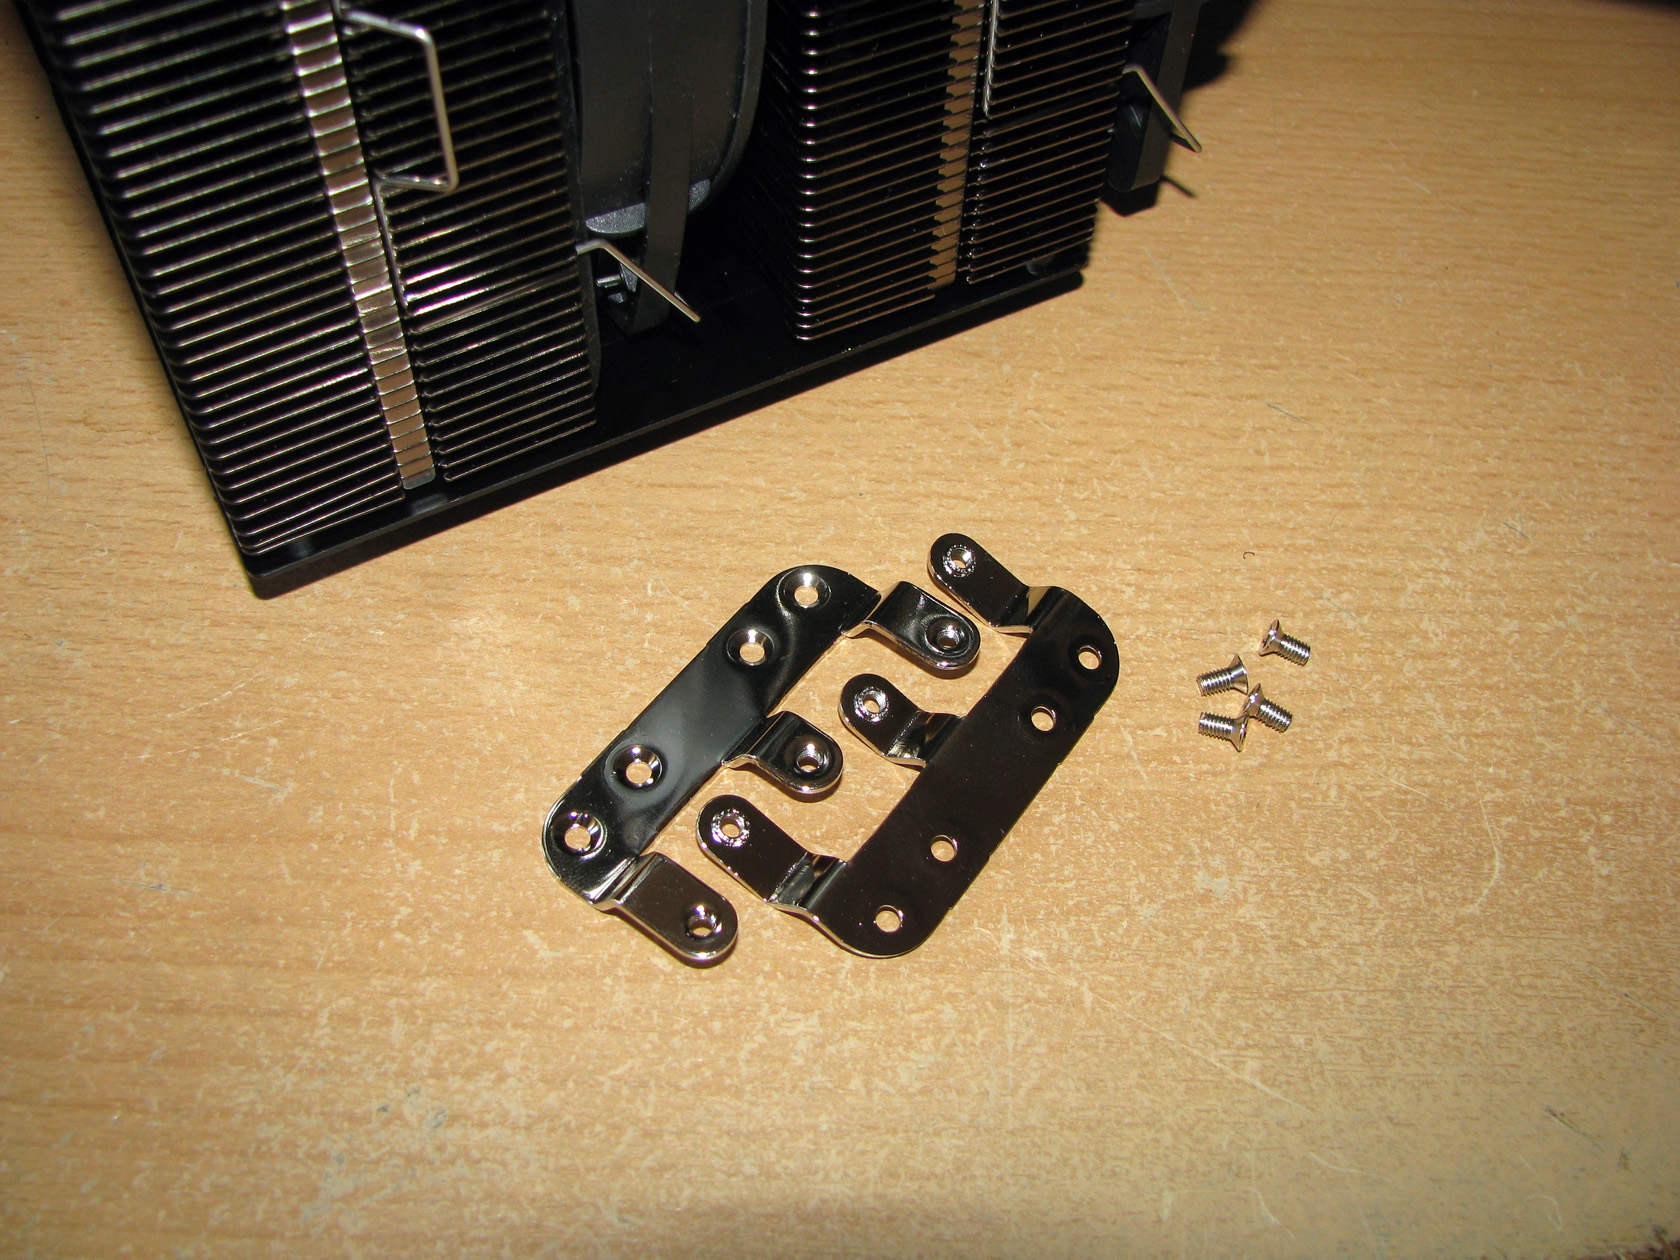
And this is what the motherboard looks like ready to accept the big black cooler for doing tests, but before I install the cooler I will have to prepare it as well by adding the AMD brackets to the heat sink.
| The AMD brackets | The brackets attached to the heatsink |
 |
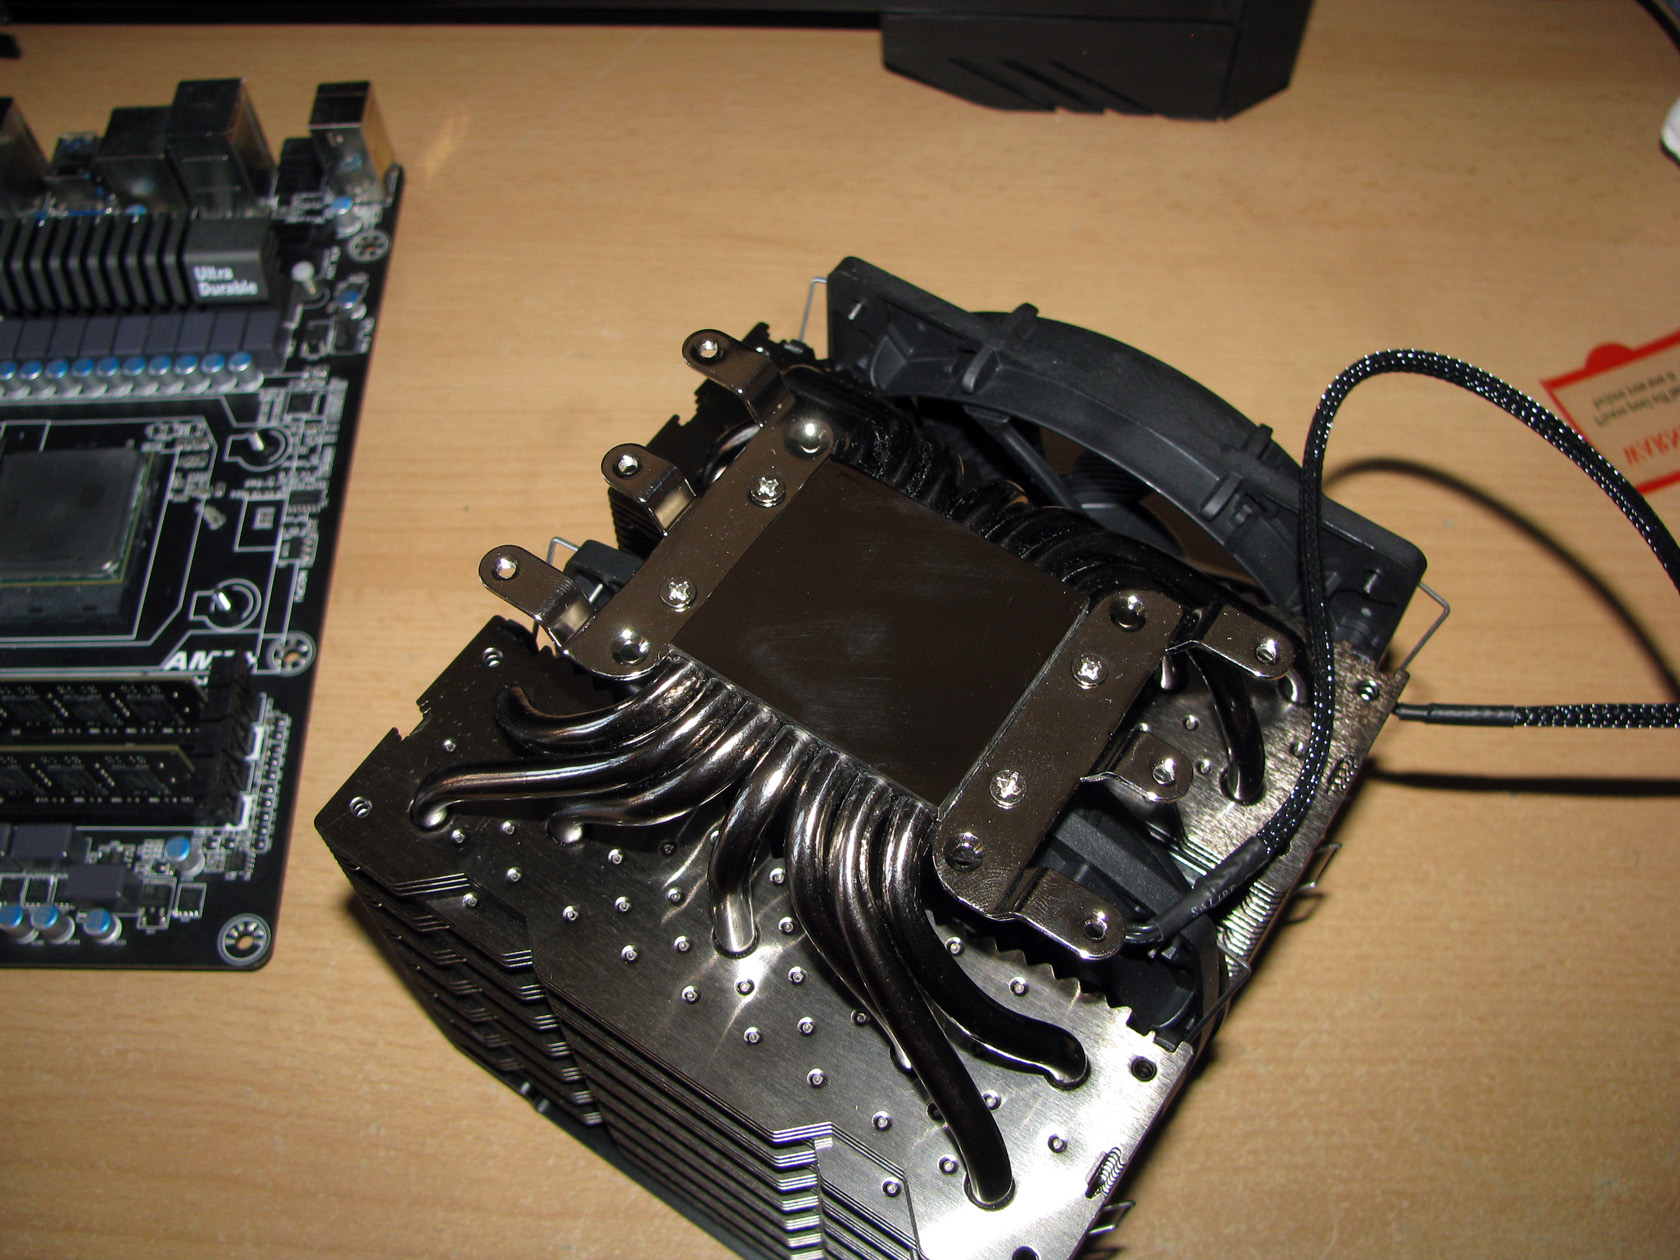 |
To install the two metal brackets I will have to use 4 metal bolts provided in the package, which should be fastened tightly to the contact plate. So far so good. Everything was prepared for the installation and here comes the most tricky part. The actual installation of the cooler on the motherboard. Something which was really strange and made me wonder a lot. To install the cooler first I had to install a thermal compound on the processor using a spatula and make a nice compound layer and later put the cooler on the table with the contact plate facing up. After that I had to put the motherboard with the processor facing down towards the contact plate. And after that fasten the cooler to the motherboard from the back side of the motherboard using the 4 bolts, which I’d installed before. Of course, I used the x-type bolts fastening method to provide nice and steady pressure over the 4 bolts. To be honest this mounting method really surprised me. I’ve already seen this mounting method before for coolers at least 5 times smaller than Be Quiet Dark Rock Pro 3 but here it was pretty strange. To be honest I am not much of a fan of this mounting method, but maybe it will do the trick… We will find out a bit later. And this is what the heatsink with the middle fan looks like installed on the motherboard: 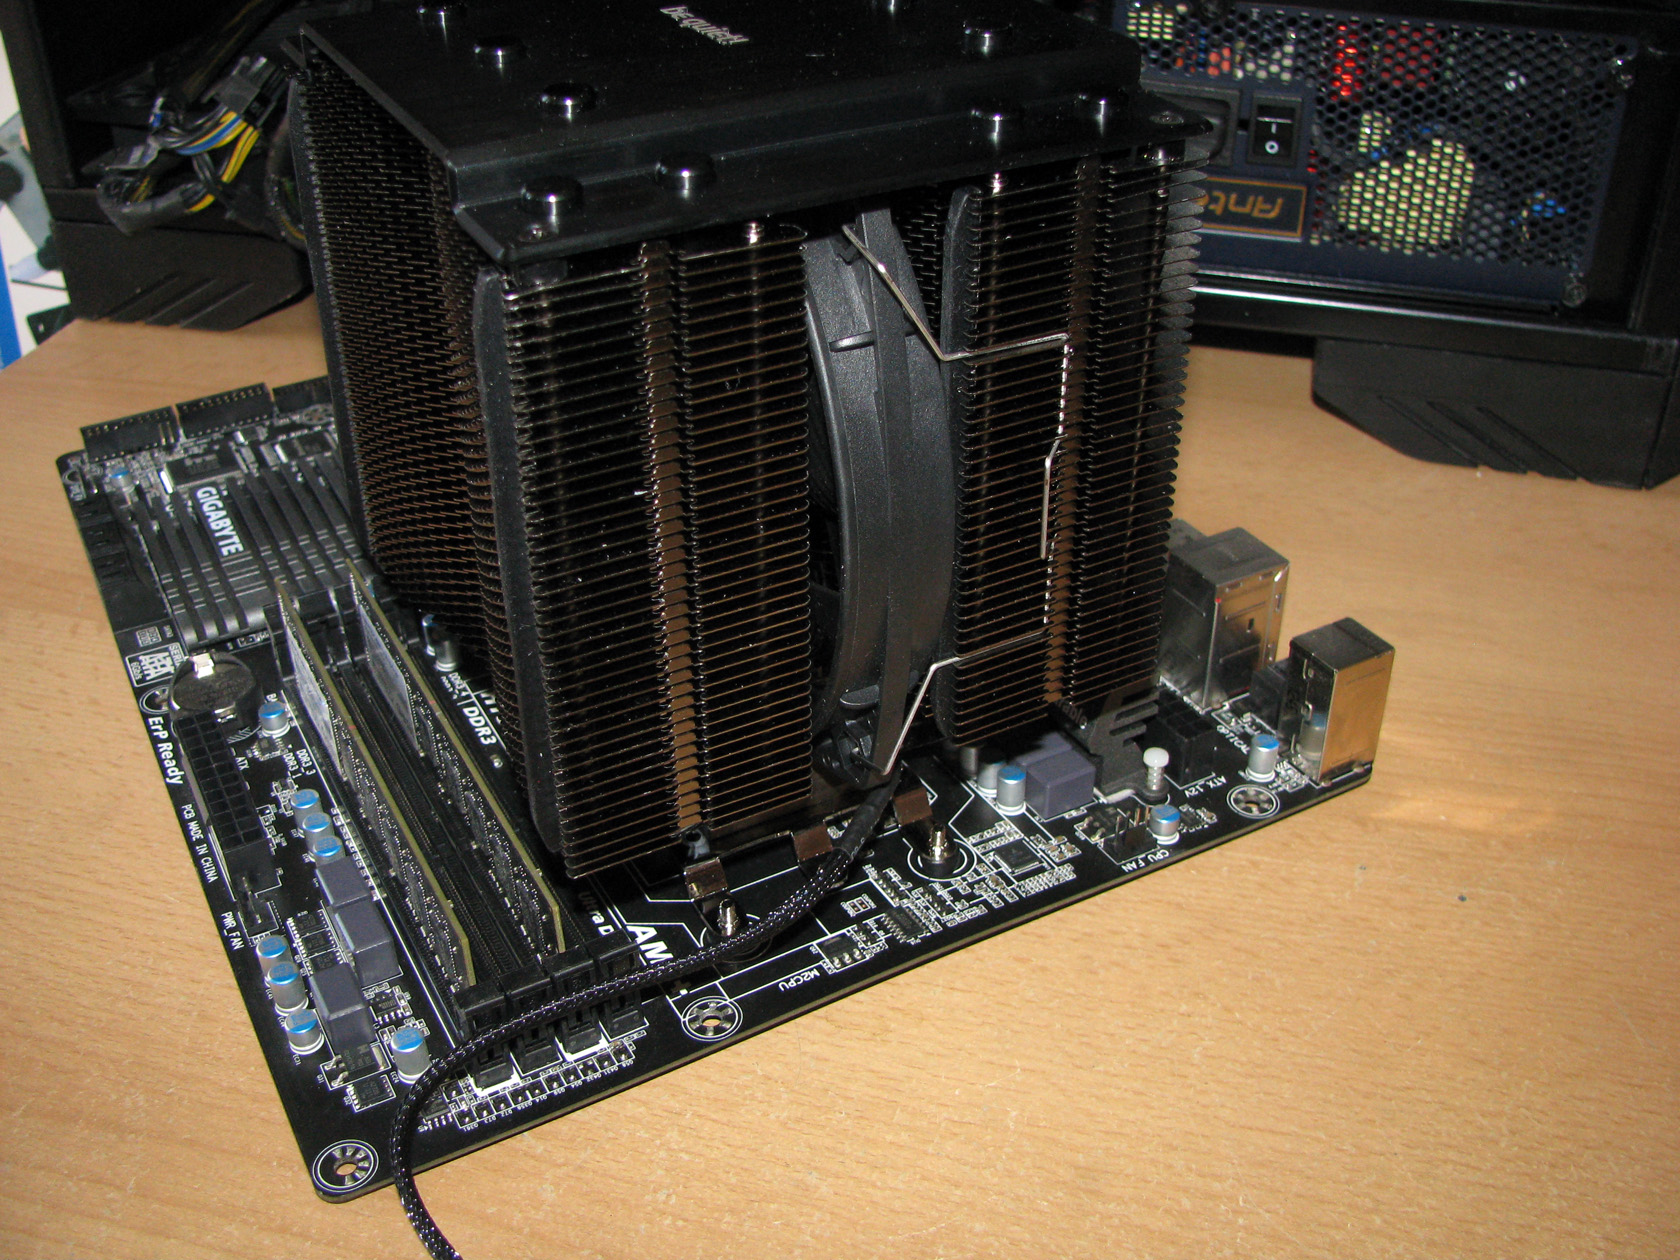
… and the full cooler setup installed on the motherboard …
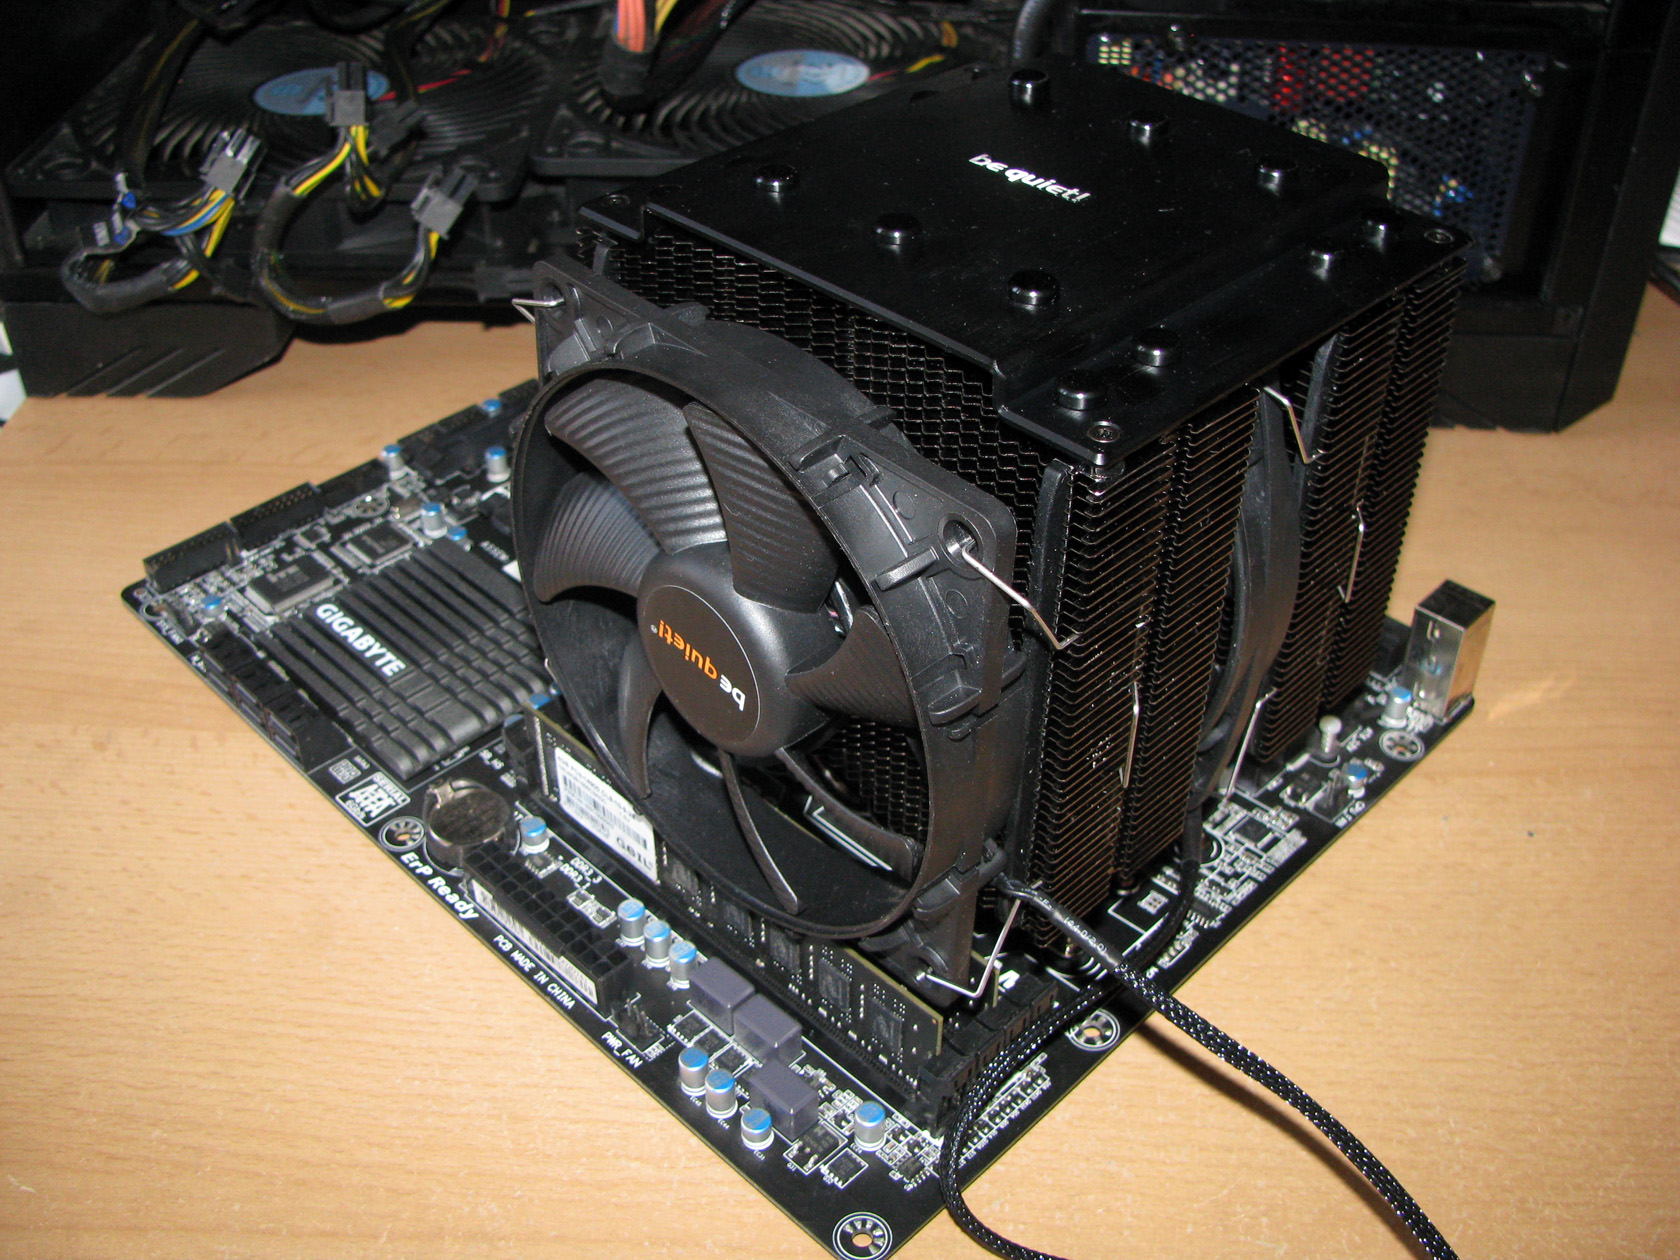
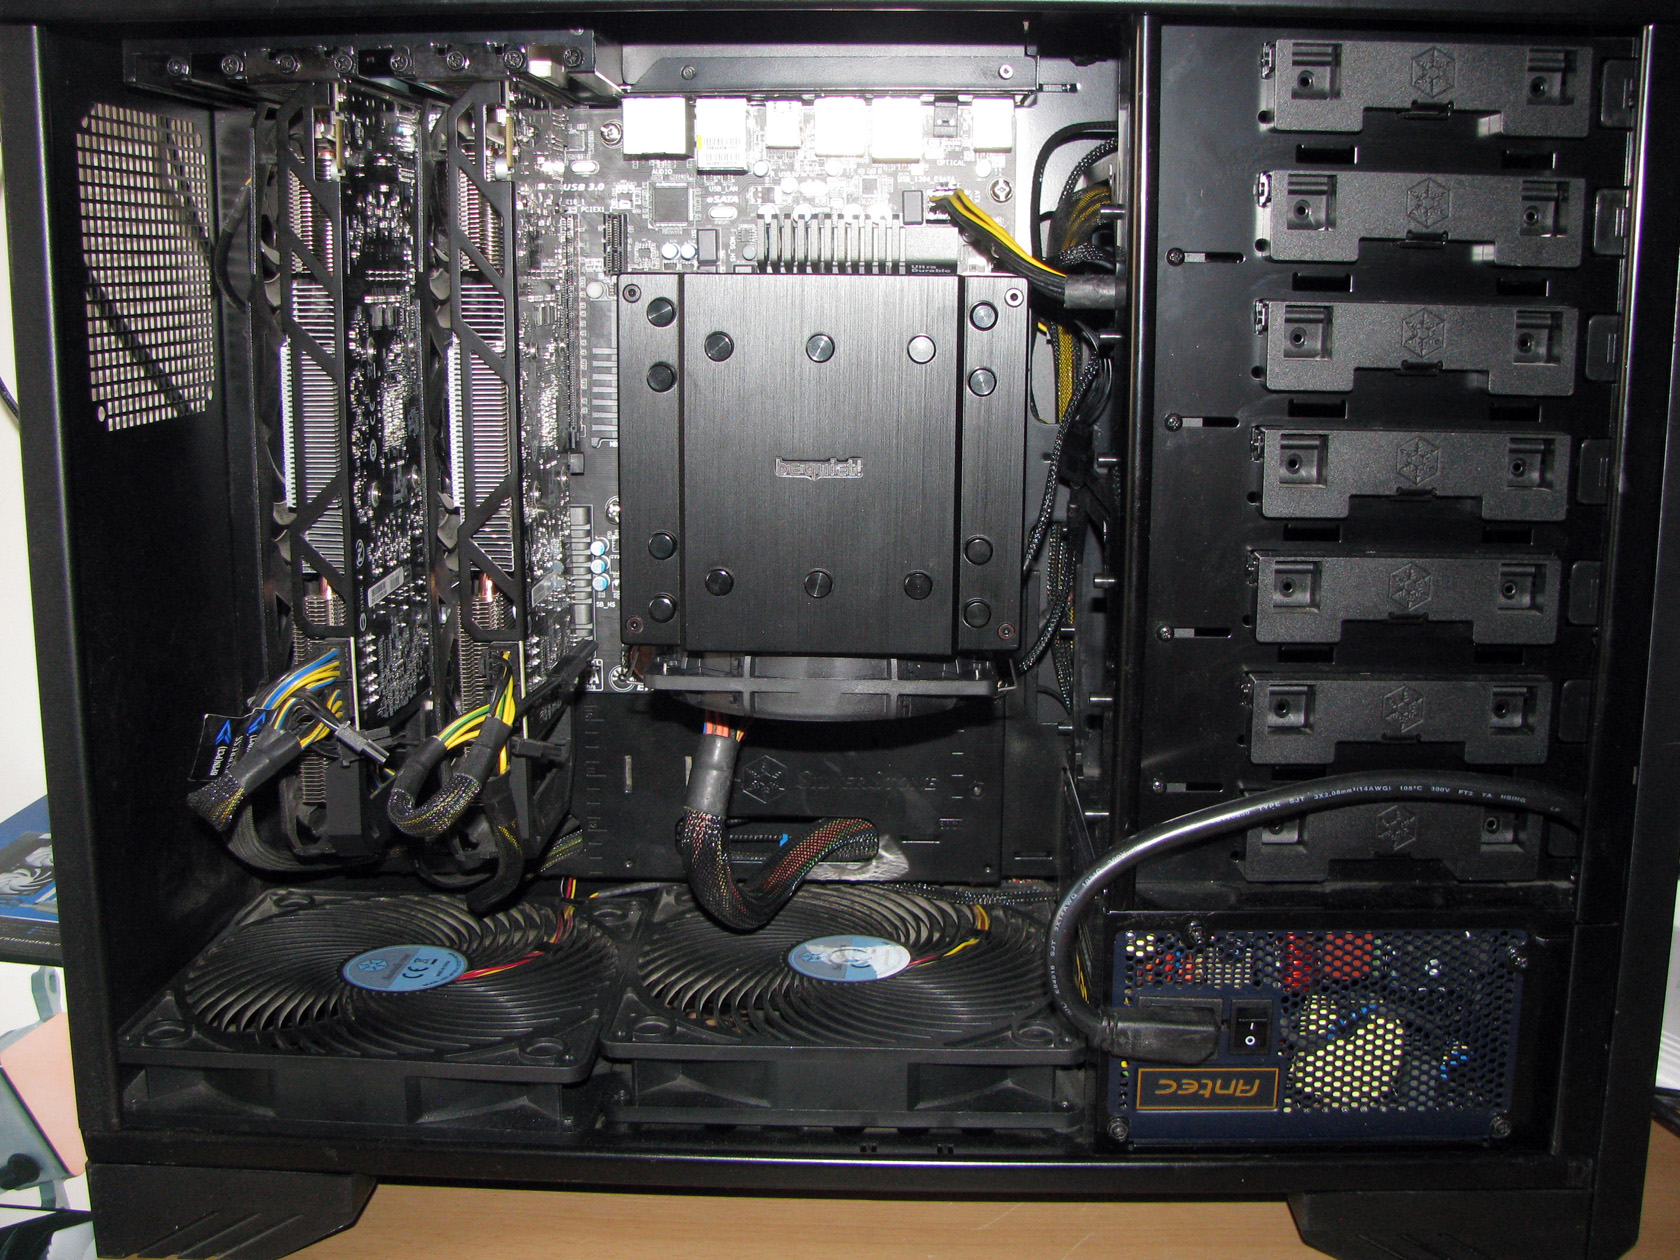
As you can see from the pictures above, when the heatsink is installed on the motherboard it is not possible for memories with taller heat spreaders to be used inside the rig. After all, this is a really massive cooler which when installed is above the RAM slots and most of the elements around the socket.
Be Quiet Dark Rock Pro 3 Tests
Since the cooler is installed I believe it is time to check my testing rig and continue the article with the tests… CPU: AMD Vishera FX-8350
- At standard frequency 4.020 MHz (at 1.344V)
- At low overclock frequency of 4.220 MHz at 1.380V)
- At medium overclock frequency of 4.420 MHz (at 1.416V)
Motherboard: GigaByte 990FXA-UD3 Video card: 2 x Gigabyte GV-R927XOC-2GD Memory: 2 x 4GB Geil Black Dragon 1866 MHz Hard drive: Kingston SSD SV100S264G Case: SilverStone Raven RV-03 Power supply: Antec HCP-750W Cooler: Be Quiet Dark Rock Pro 3 Thermal paste: Gelid GC-Supreme For this test and review I am going to use the standard fans working at:
- 1 x SilentWings PWM 120mm PWM powered and regulated working at a maximum of 1700 revolutions per minute, providing maximum airflow level of 93.3 m3/h, and static level pressure of 1.23mm H2O.
- 1 x SilentWings PWM 135mm PWM powered and regulated working at a maximum of 1400 revolutions per minute, providing maximum airflow level of 113.8 m3/h, and static level pressure of 2.1mm H2O.
The tests were conducted in a closed system with:
- 2 SilverStone AP181 – 180mm fans on the bottom panel putting fresh air in and spinning at about 1200 rpm
- 120mm fan behind the motherboard cooling the socket and spinning at about 1000 rpm.
- Room temperature of about 18 degrees.
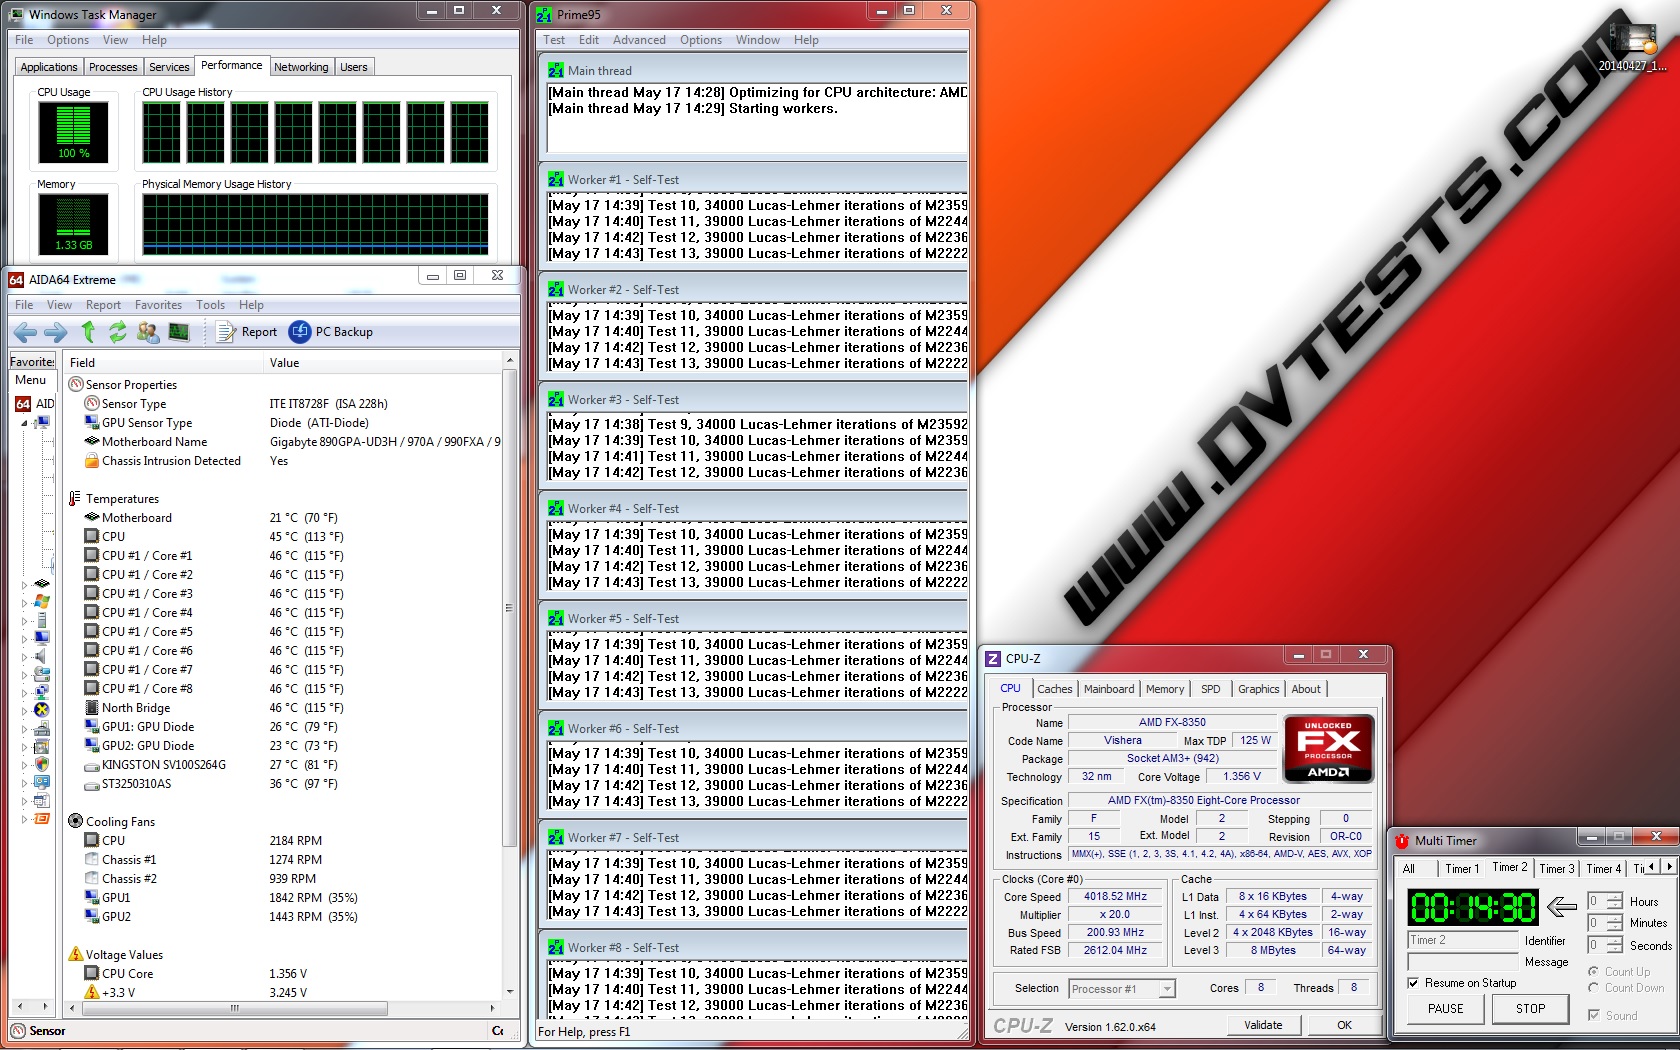
Both SilverStone AP181 – 180mm fans were connected together to the chassis 1 connector and were rotating at maximum speed. And here I want to describe my testing method. I will install Be Quiet Dark Rock Pro 3 and do stress tests using Prime95 AVX software with constant load on the cooler for 14:30 minutes with custom settings of minimum FFT size (in K of 128), max FFT size (in K of 128) and Run FFTs in place at:
- standard frequency of 4.020 GHz (at 1.356V), at low overclock frequency of 4.220 GHz (at 1.380V) and at medium overclock frequency of 4.420 GHz (at 1.416V) using only the 1 x SilentWings PWM 135mm fan installed between the two towers of the cooler working at maximum speed.
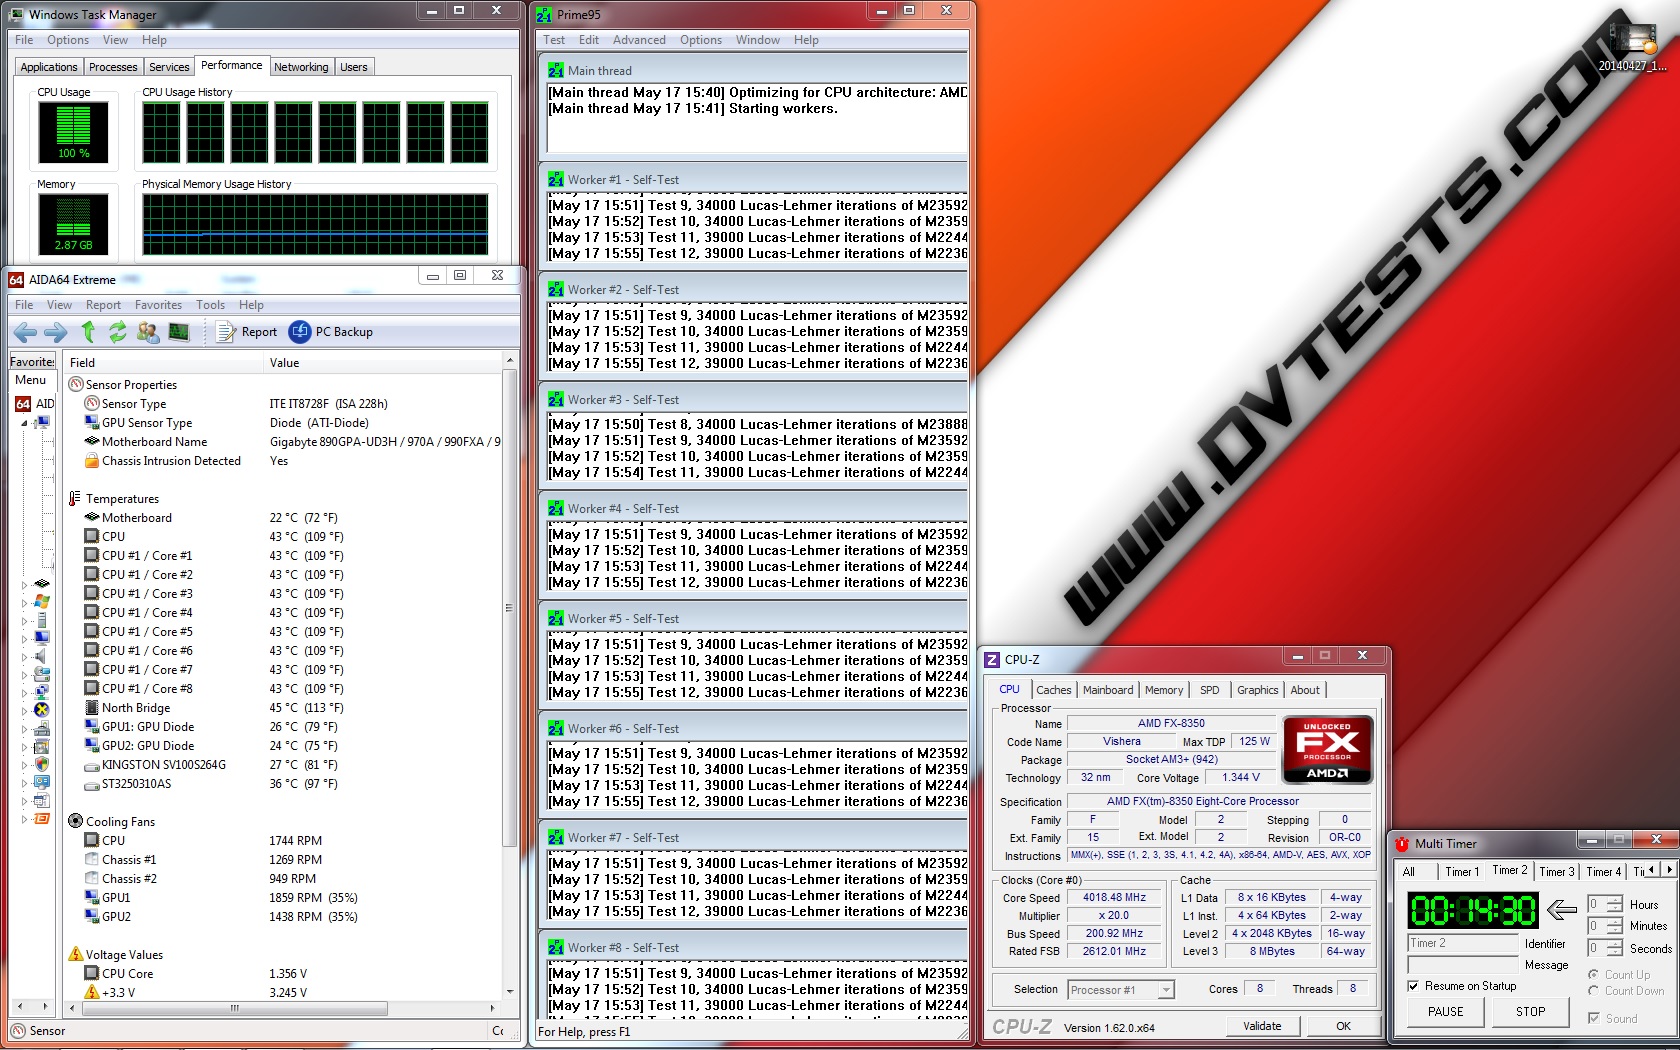
- standard frequency of 4.020 GHz (at 1.356V), at low overclock frequency of 4.220 GHz (at 1.380V) and at medium overclock frequency of 4.420 GHz (at 1.416V) with both fans installed on the cooler working at maximum speed.
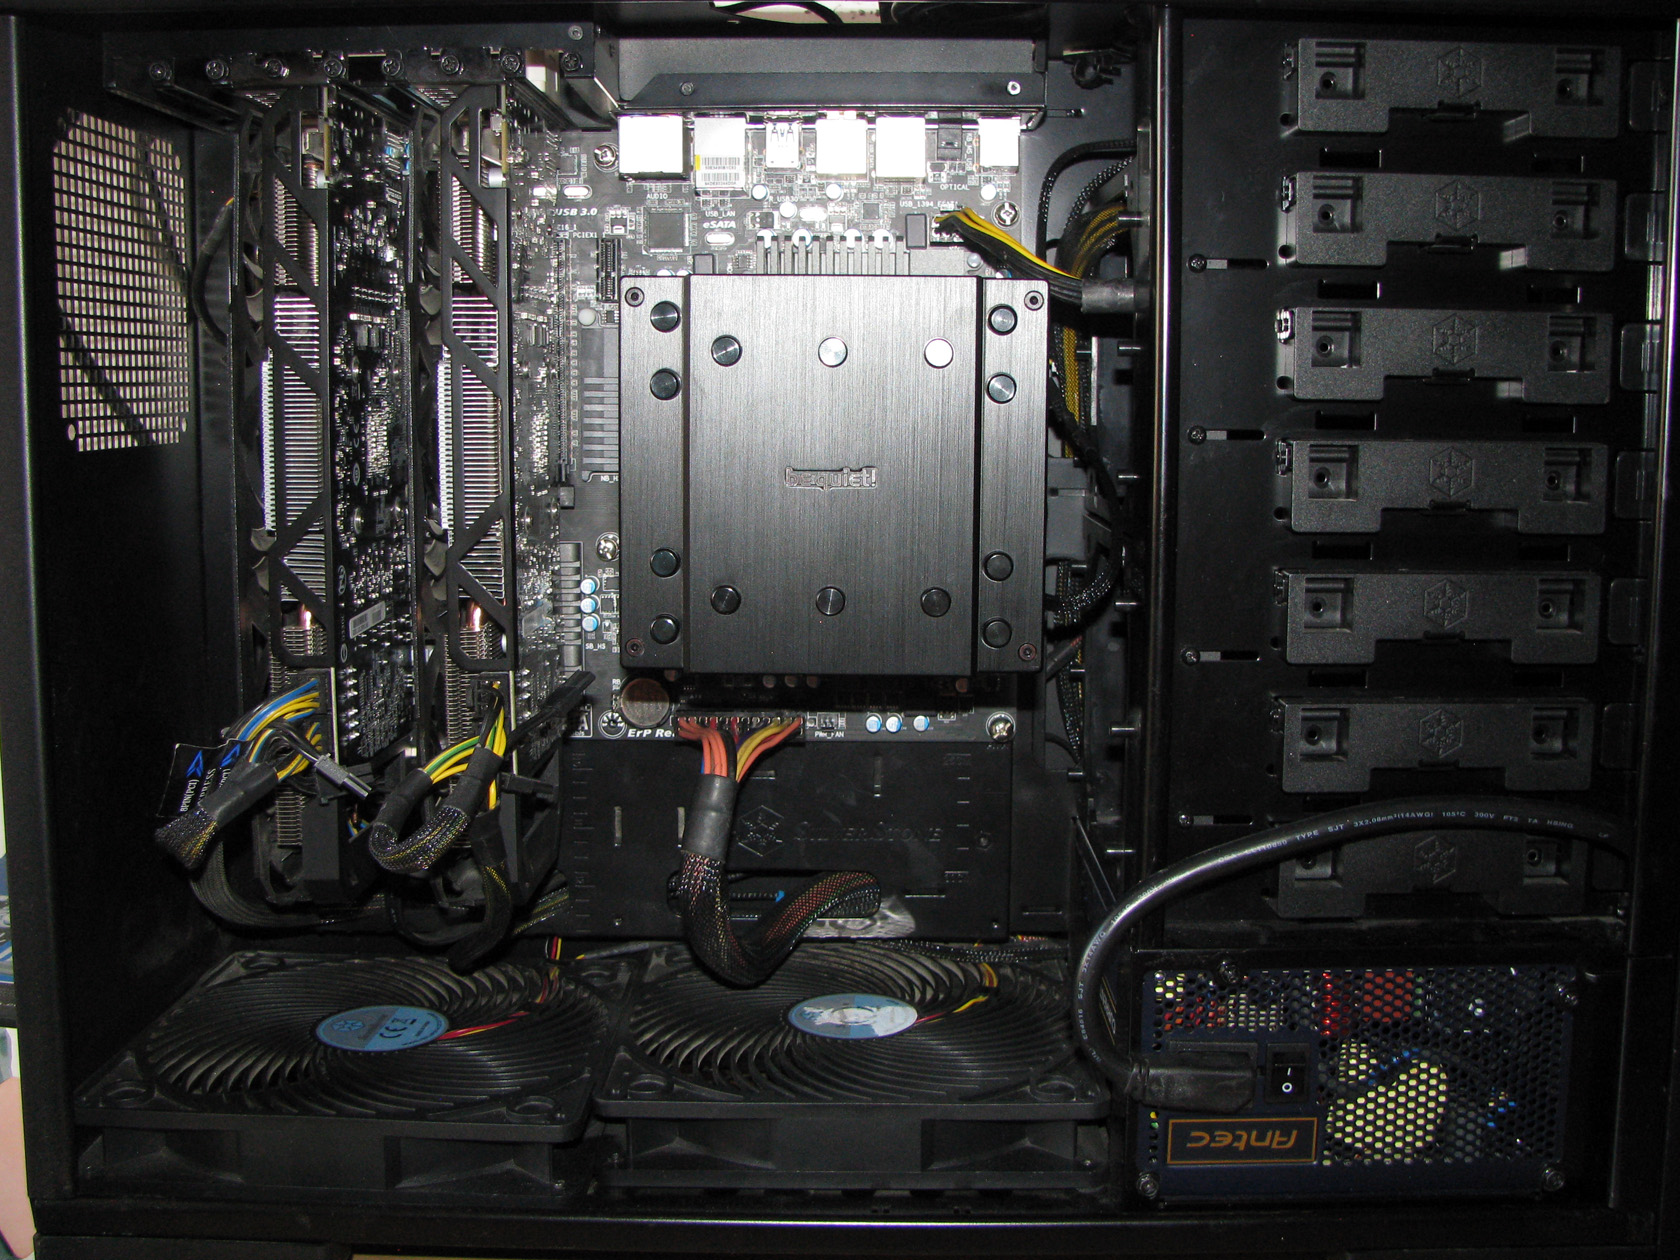
And this is what the CPU cooler looks like when installed inside the case and ready for testing.
| With just one fan | With two fans |
 |
 |
And this is how the cooler operates when there is some serious load on the processor running at medium overclock frequency of 4.420 MHz (at 1.416V) with Prime95 AVX for 14:30 minutes:
Now let’s check out the test results:
| Dark Rock Pro 3 1 FAN@4020MHz 1.356V | Dark Rock Pro 3 2 FANS@4020MHz 1.356V |
 |
 |
| Dark Rock Pro 3 1 FAN@4220MHz 1.380V | Dark Rock Pro 3 2 FANS@4220MHz 1.380V |
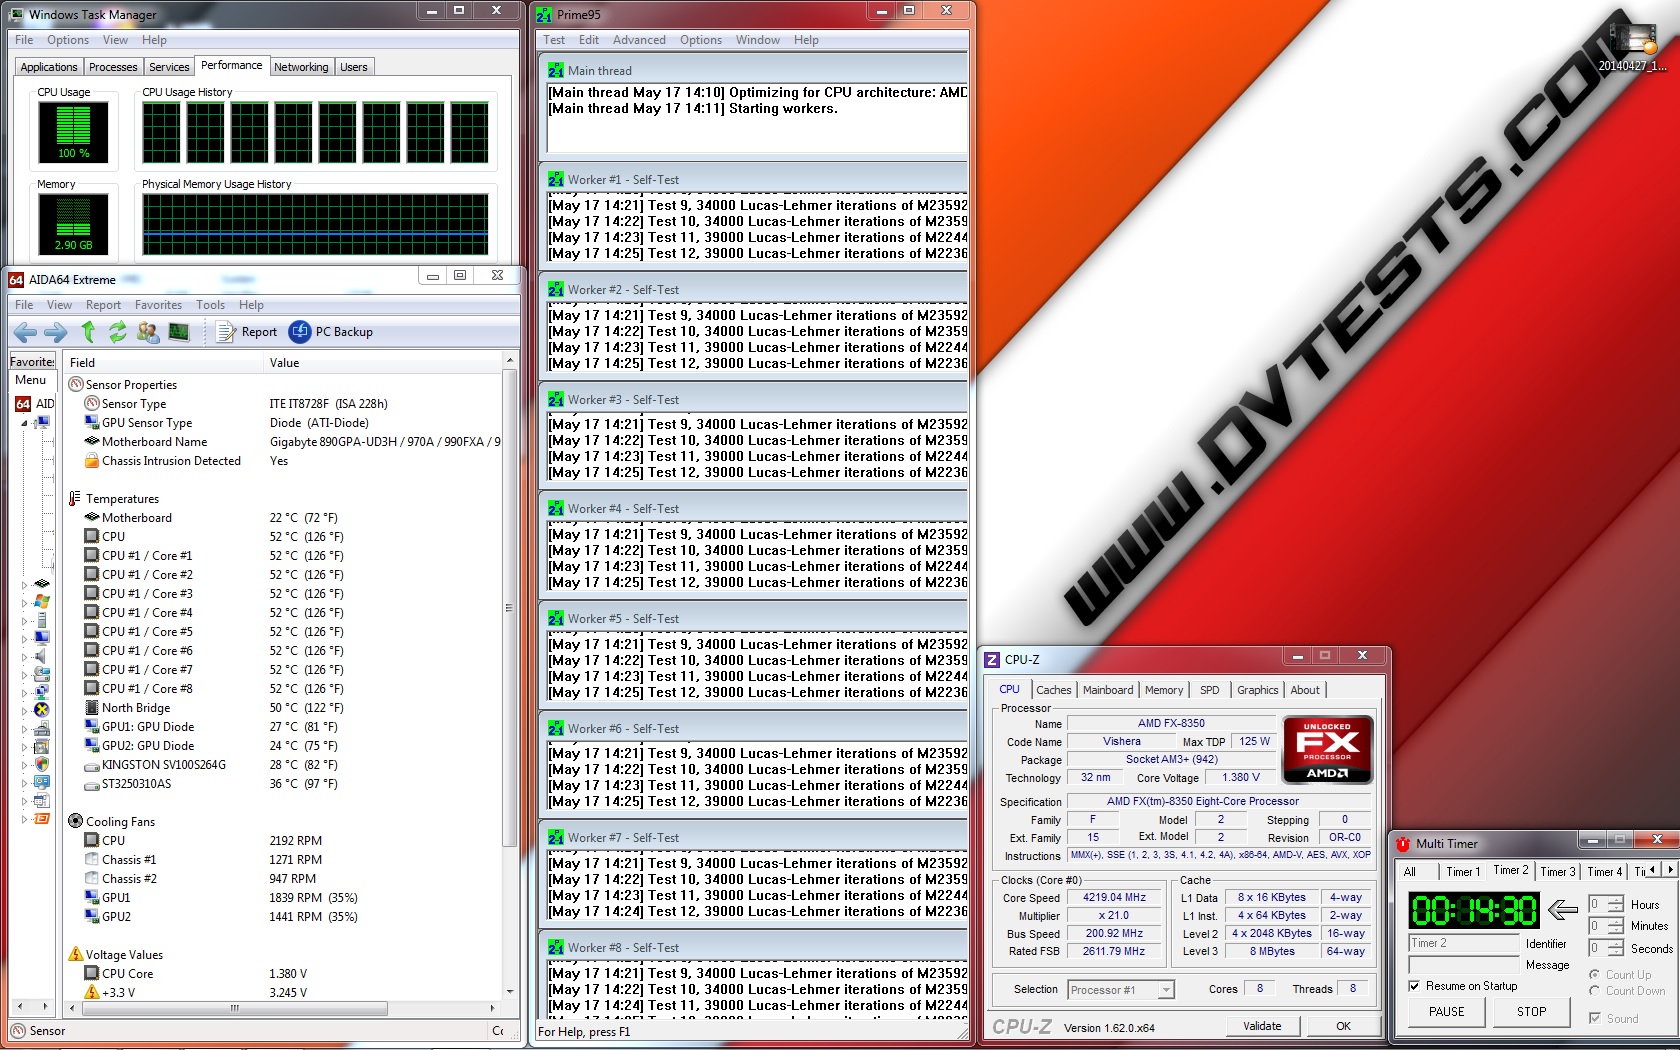 |
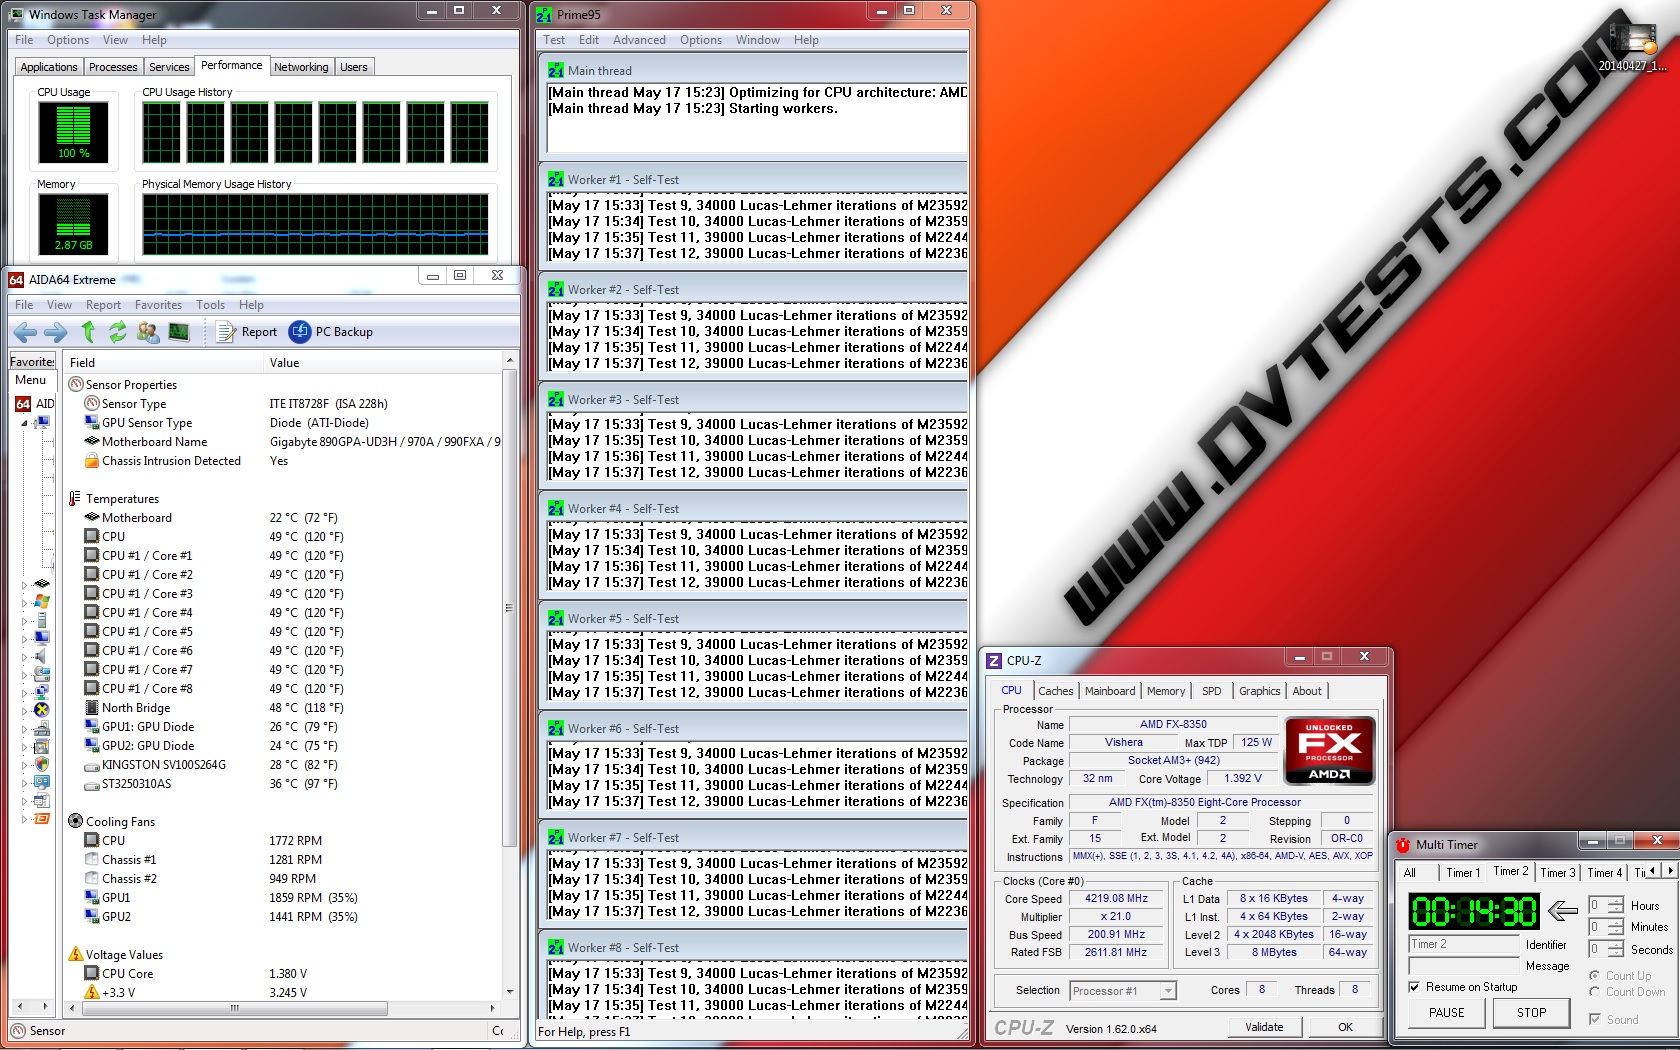 |
| Dark Rock Pro 3 1 FAN@4420MHz 1.416V | Dark Rock Pro 3 2 FANS@4420MHz 1.416V |
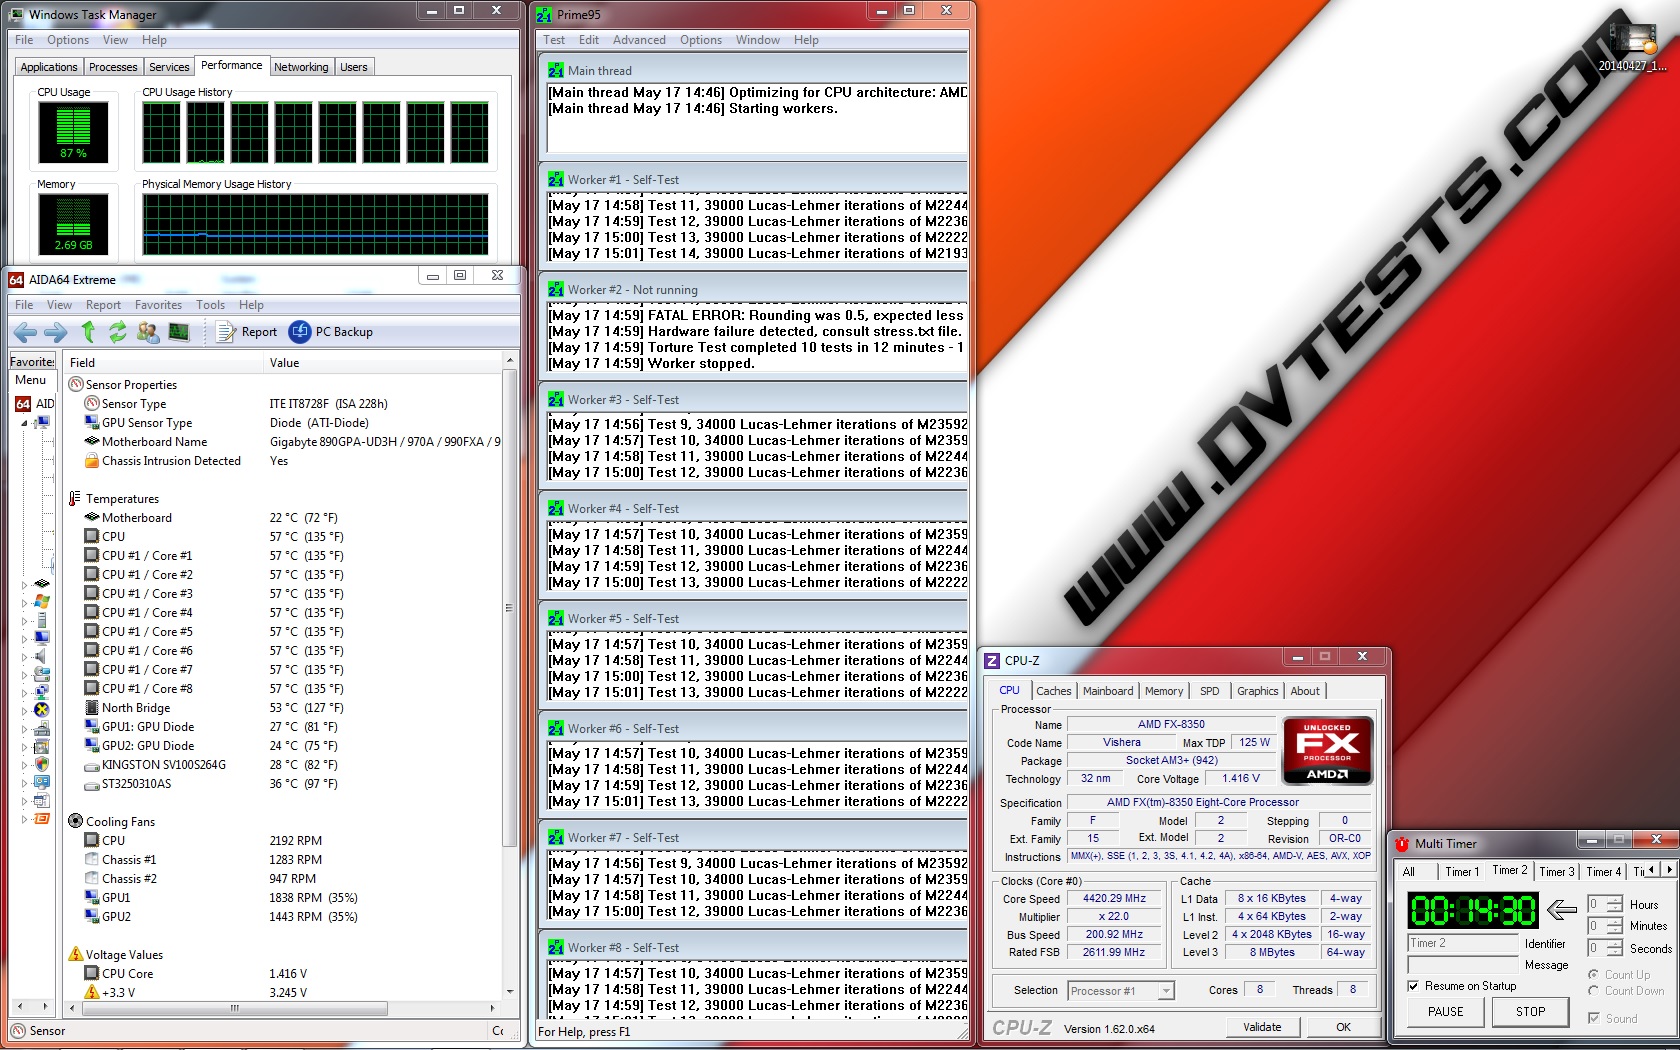 |
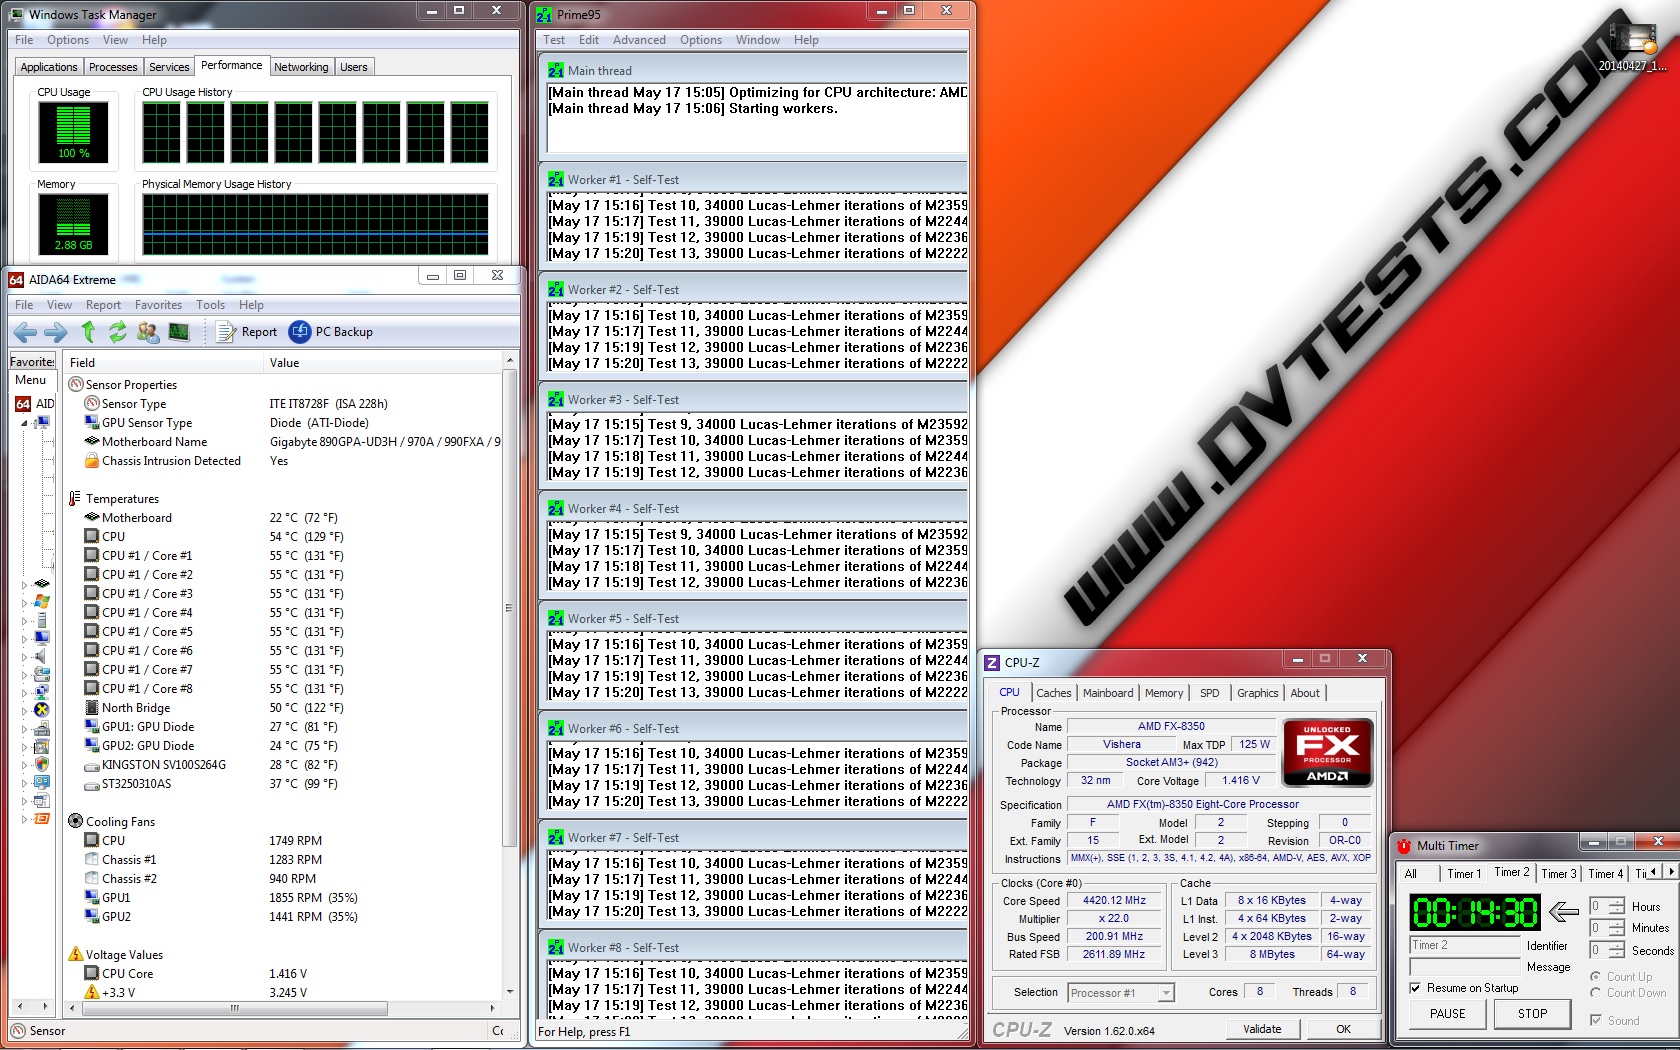 |
All of the test results have been summed up in the following charts:  And the fan speed during the tests:
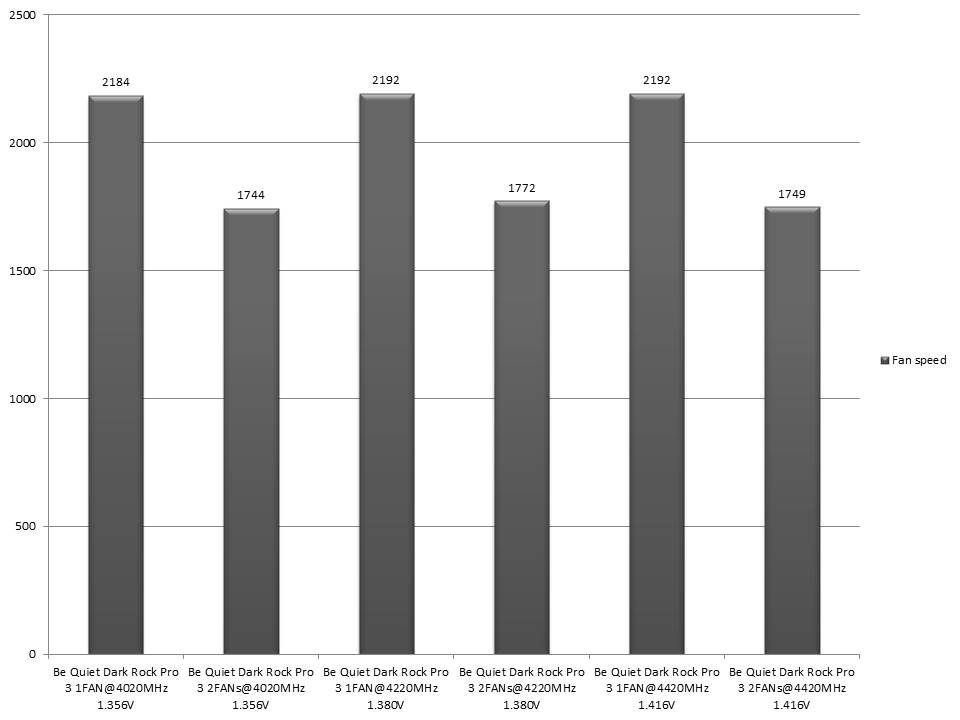
Before I continue with the test and review conclusions I want to point something out. Maybe you’ve already noticed that when only the 135mm fan was used between the two towers my motherboard showed almost 2200 revolutions per minute. A value which is with almost 800 revolutions more than the fan is rated. So what type of sorcery is this? Maybe Be Quiet lied about the rpm? I seriously doubt that! Maybe the fan decided to operate like a boss and provide the supreme revolutions per minute ? I doubt that, too. So I spoke to the guys from Be Quiet, who explained that situation like this: The standard fans on the market offer 4-pole motors, while the SilentWings PWM 135mm is supplied with an innovative 6-pole motor for smoother operation and less vibration, which caused my motherboard to receive wrong revolutions per minute result. The real speed is actually about 1400 revolutions per minute and my not really smart motherboard is popping up with a wrong value. Anyway, since I am not sure what are the exact revolutions I will announce the one, which I saw while testing the cooler. Keep that in mind if you are planning to buy this product.
Be Quiet Dark Rock Pro 3 Conclusions
Oh my… After I am done reviewing and later testing the cooler I believe it is time express my feelings regarding the product
1. Be Quiet Dark Rock Pro 3 performance: After I spent a couple of hours unpacking the extensive package of Be Quiet Dark Rock Pro 3 and all of the accessories accompanying it needed for normal operation, arranging them for taking some pictures, installing the cooler and finally after I’ve finished testing I can say that I am really impressed with the overall features and performance.
To be honest, I’ve thought a lot about what I should write in the conclusions since Be Quiet Dark Rock Pro 3 offers some really nice innovations such as:
The cooler itself is made of a heat sink which is pretty serious in dimensions and features a very big and reliable black nickel coated contact plate with an additional radiator on top for improving the cooling, 7 x Ø6mm black nickel coated heatpipes, 90 performance fins split into two towers and one appearance plate, made to boost the overall appearance of the cooler.
The fins themselves feature very nice structure and the improved dynamic wave-contour cooling technology with small dots on the surface entirely made to increase the air circulation and to contribute to high convection efficiency without raising overall noise. Apart from that on the front side of the towers the fin stacks are made to hold up to 4 rubber dumpers and to guarantee fan operation without any vibrations.
The fans themselves offer pretty serious cooling capabilities and overall very good performance/noise level balance, which should provide very nice airflow and static level pressure levels so the cooler can handle processors working with all kinds of frequencies. And I believe it will definitely handle with its 250W rated TDP.
After I’ve finished the tests, which were done with the pretty noisy fans working at maximum speed, I started using the cooler with fans PWM powered and regulated and for normal daily usage they are dead quiet!
2. Be Quiet Dark Rock Pro 3 appearance: So what should I say… I think that the pictures above explains everything. A very massive and at the same time very stylish looking black nickel coated square block, combined with entirely painted in black fans. Together they could fit in every modern case and look outstanding. The only non-black thing is the company logo, which is in silver made to contrast with the overall black theme of the cooler. And it looks pretty nice.
According to my review, I think that Be Quiet Dark Rock Pro 3 deserves the following reward:

Official price (MSRP) for Be Quiet Dark Rock Pro 3: 79 euro
Official warranty: 36 months
I thank Be Quiet for the test sample.

Hi, I have the same motherboard & CPU. My RAM just has the metal covering, no fins, tails, etc … Just simply not naked, but adds what appears to be very, very little “extra” height. Does RAM have to be bare naked to fit this cooler in ?
Hello Erik,
According to what you described I believe there will be no issue to install the cooler together with your RAM modules. Of course if by any chance there is a contact, you can slightly put the front fan a bit higher on the tower.
@ Stuen4y,
Very soon the comparison will be released. The results are pretty nice…
@ Dimcho,
The cooler looks great indeed.
I really dig this dark color – looks great, and as we see – performs very well. Keep up the good work, Dobri 🙂
Looks quite a lot like their previous cooler. Still decent performance and combined with the great quality it is a solid choice. Dobri, I still wish to see the promised comparisons though! And can’t wait to see the TRUE Spirit 140 Power in action compared to the big dual tower hyper coolers.
Soon the comparison will be released.
Now fixing the updated web page is priority