
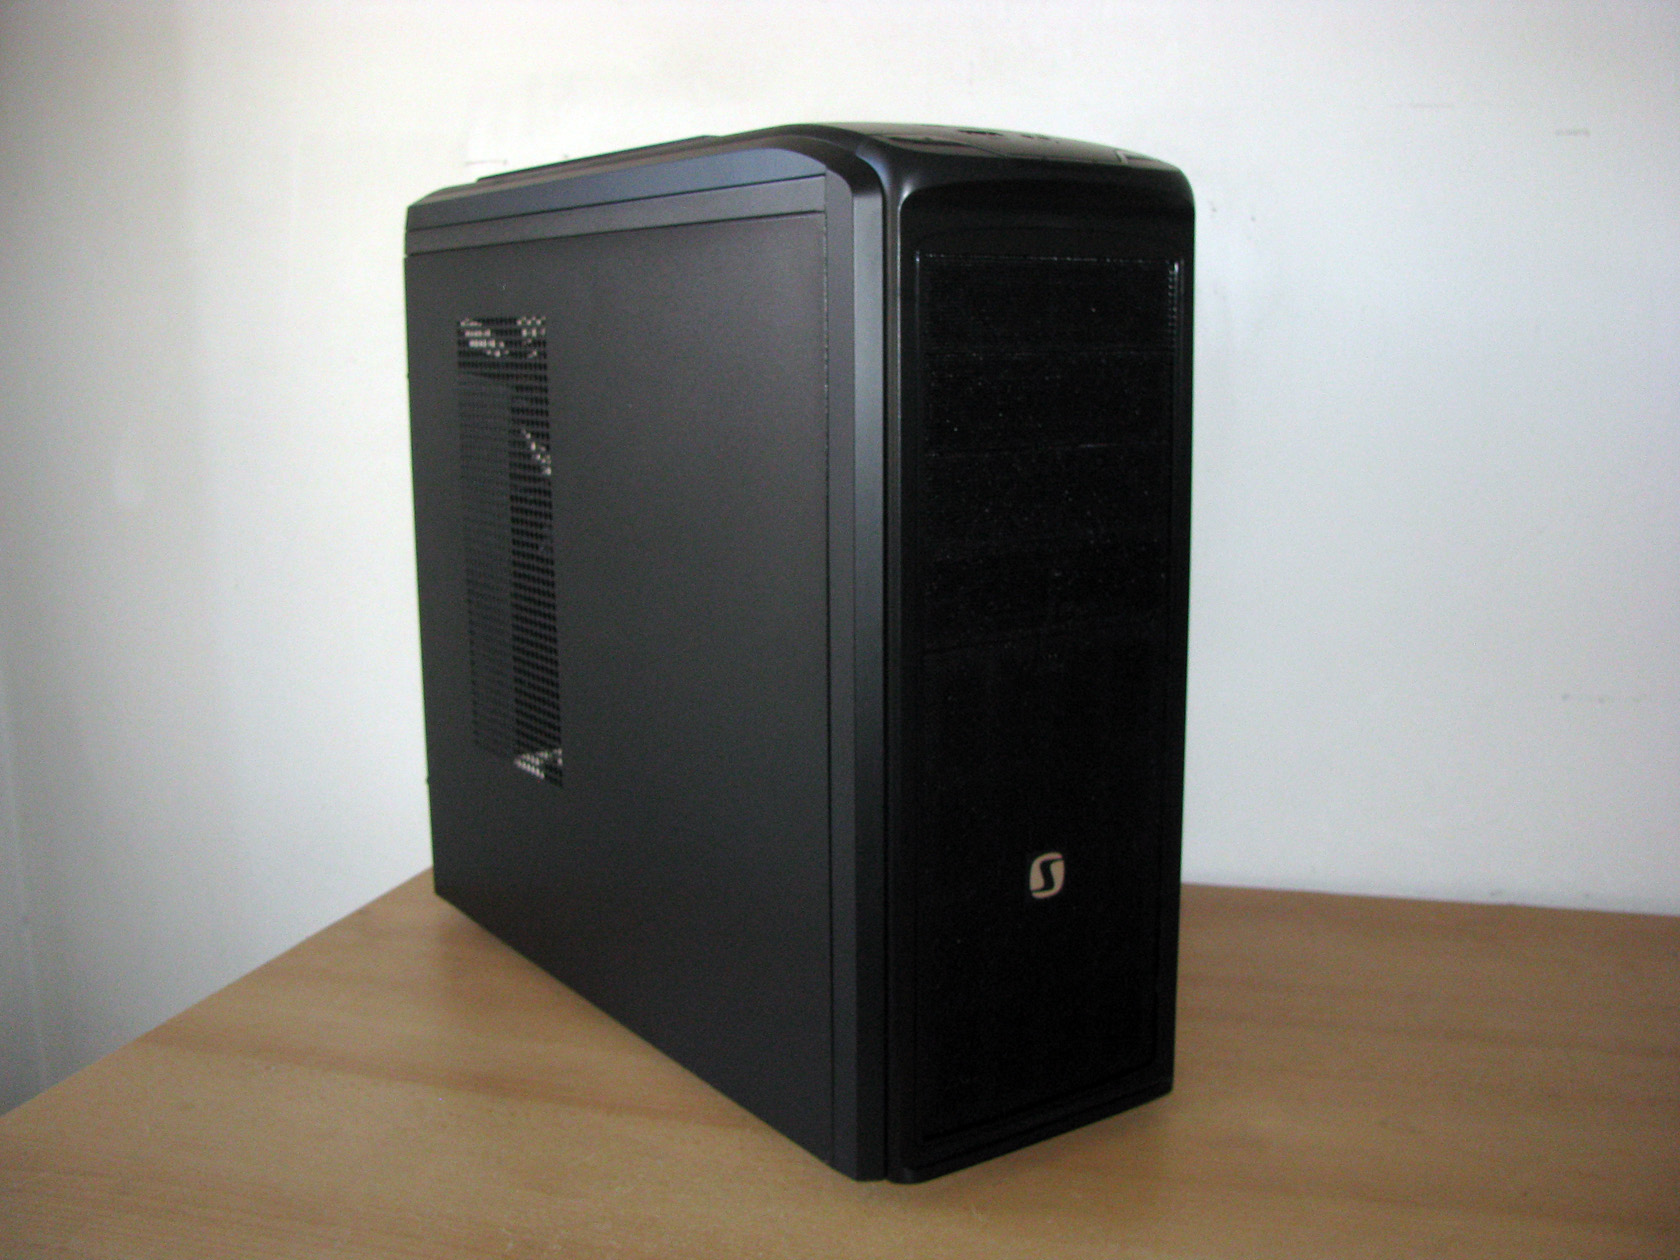
So SilentiumPC is actually a new brand to me and I was really surpised to see some very interesting products in their portfolio such as cases, CPU coolers and a big variety of fans. For my first test dealing with SilentiumPC I’ve decided to have some fun with Regnum L50 Pure Black, which is the case I liked the most:

The case was provided to me in a pretty big but very simple carton box with a full picture of the product on the front panel and some technical details related with the case, while the full technical details are placed on the side of the box.
So, let’s not focus on the box but focus on the case inside.
After I took the case out of the box I got this view.

Actually, Regnum L50 Pure Black is rated as a middle tower case made of SECC, mesh and plastic with dimensions of 496 x 540 x 209mm (height x depth x width) and overall weight of 7.65 KG. The case is completely painted in black from the outside and inside offering huge capabilities such as up to 4 x 5,25” external bays, 6 x 3,5”/2,5” internal bays and up to 7 expansions slots, serious performance combined the chance to install a video card with maximum length of 330mm and a CPU cooler with maximum height of 178mm with really nice and stylish design.
And this is what the case looks like seen from back/side:

After I took a look at the outside it was about time to check what the case looks like inside:
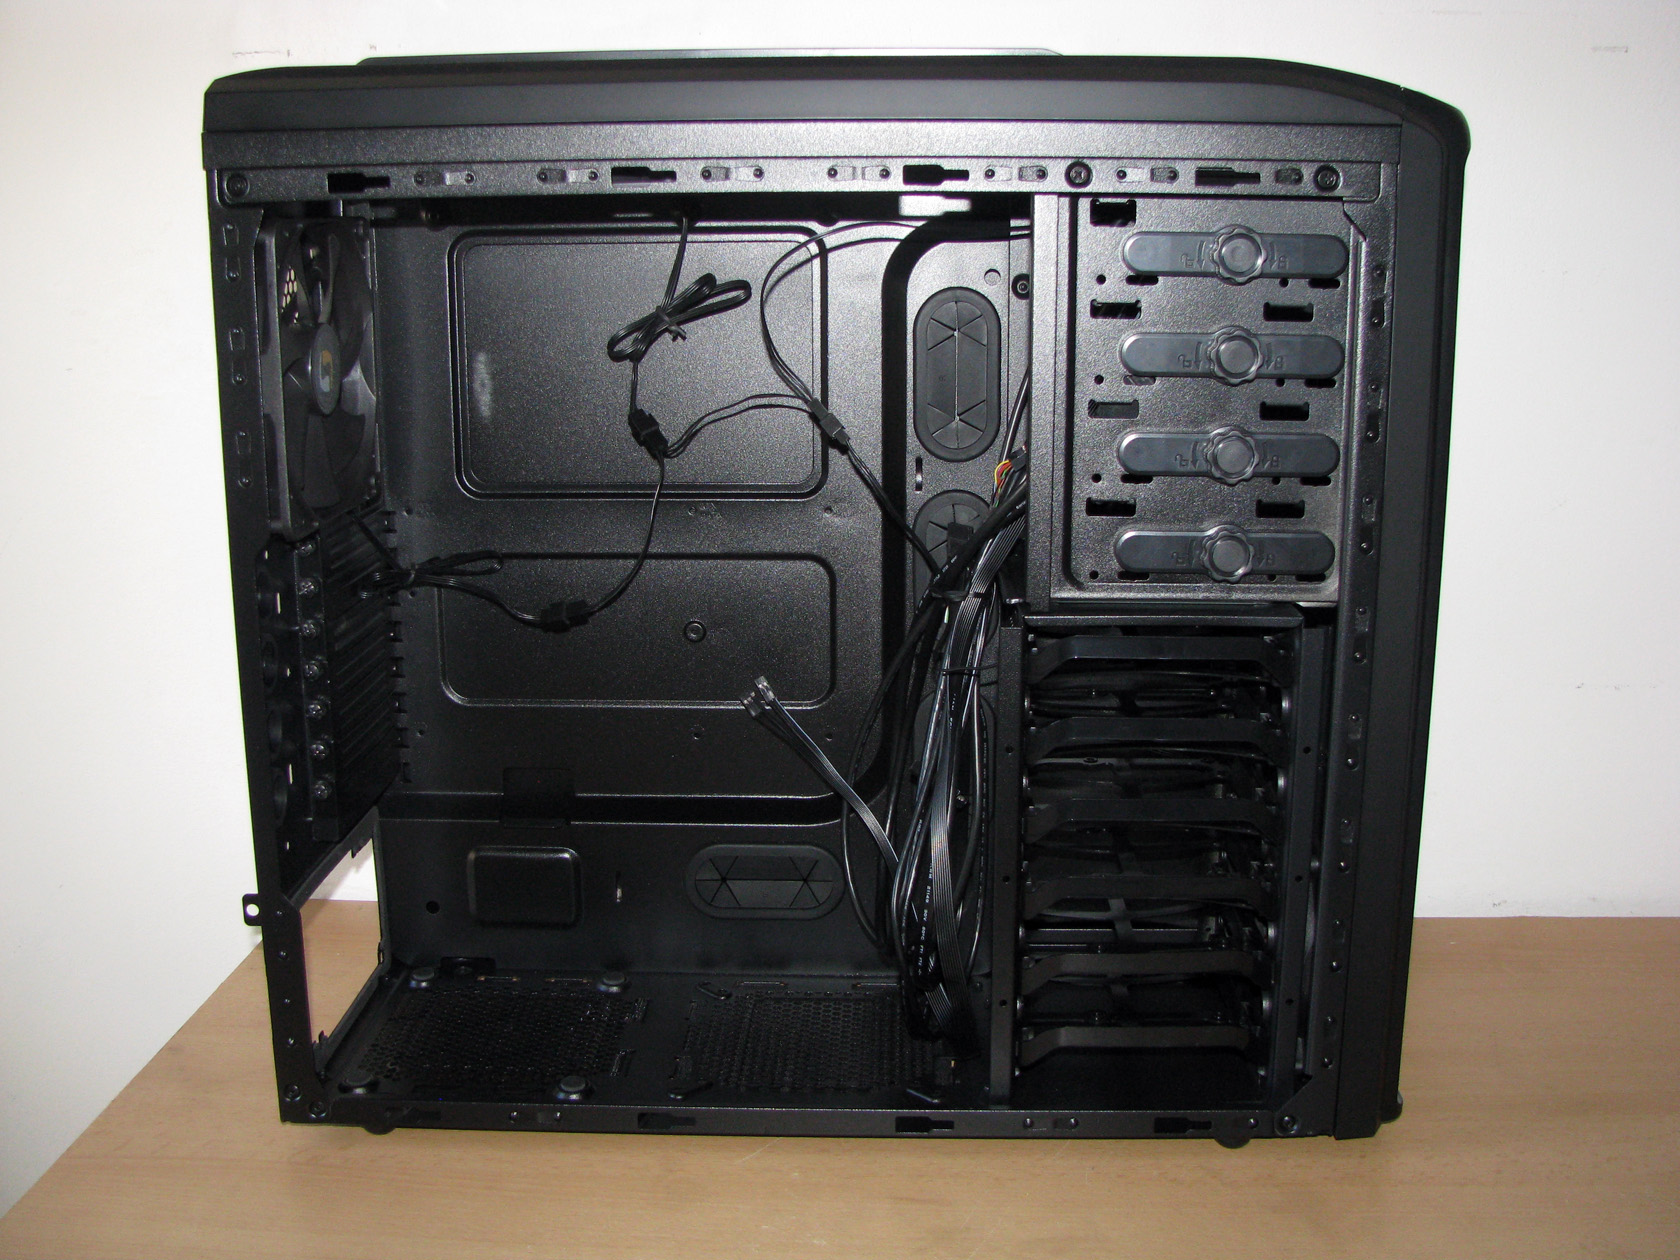
I removed the side panels and I noticed some nice features which I see for the first time and for which I will talk a bit later when I remove all of the parts from the case.
And this is what the case looks like with removed right panel.
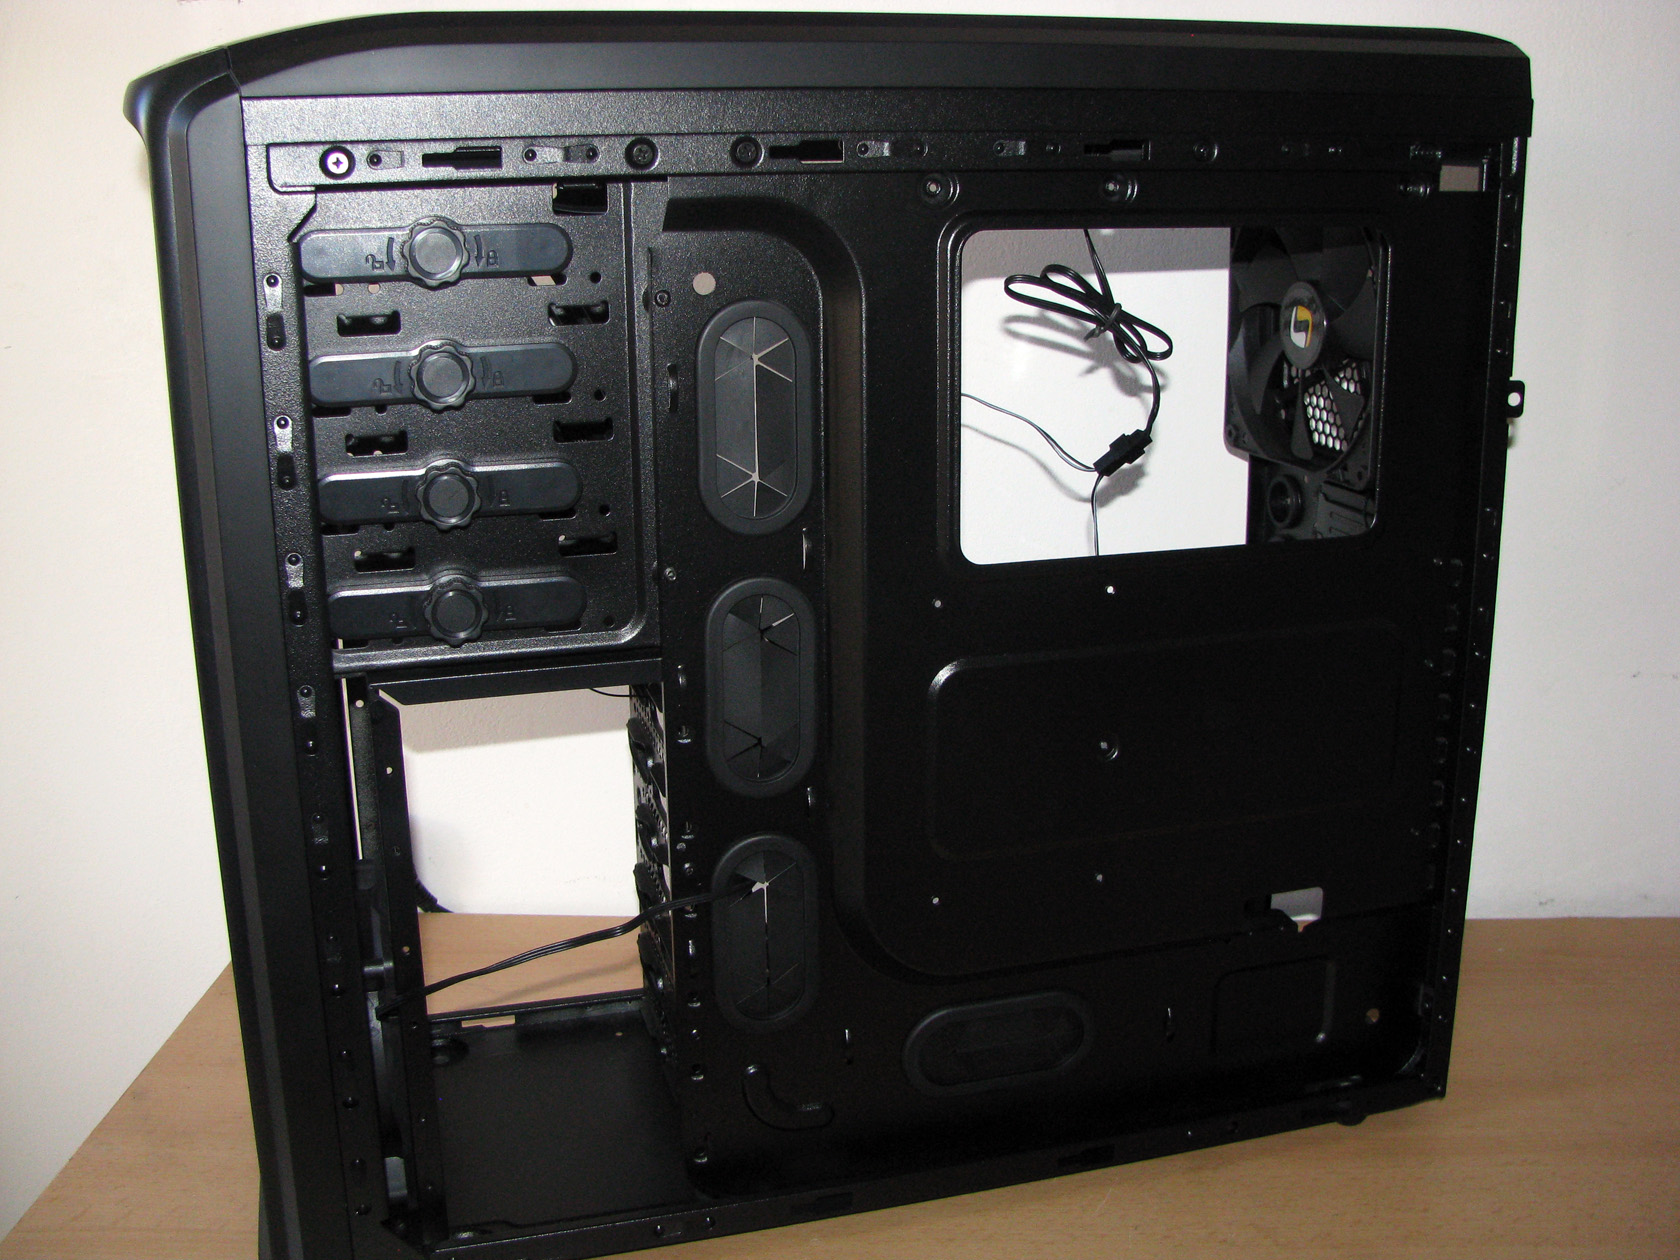
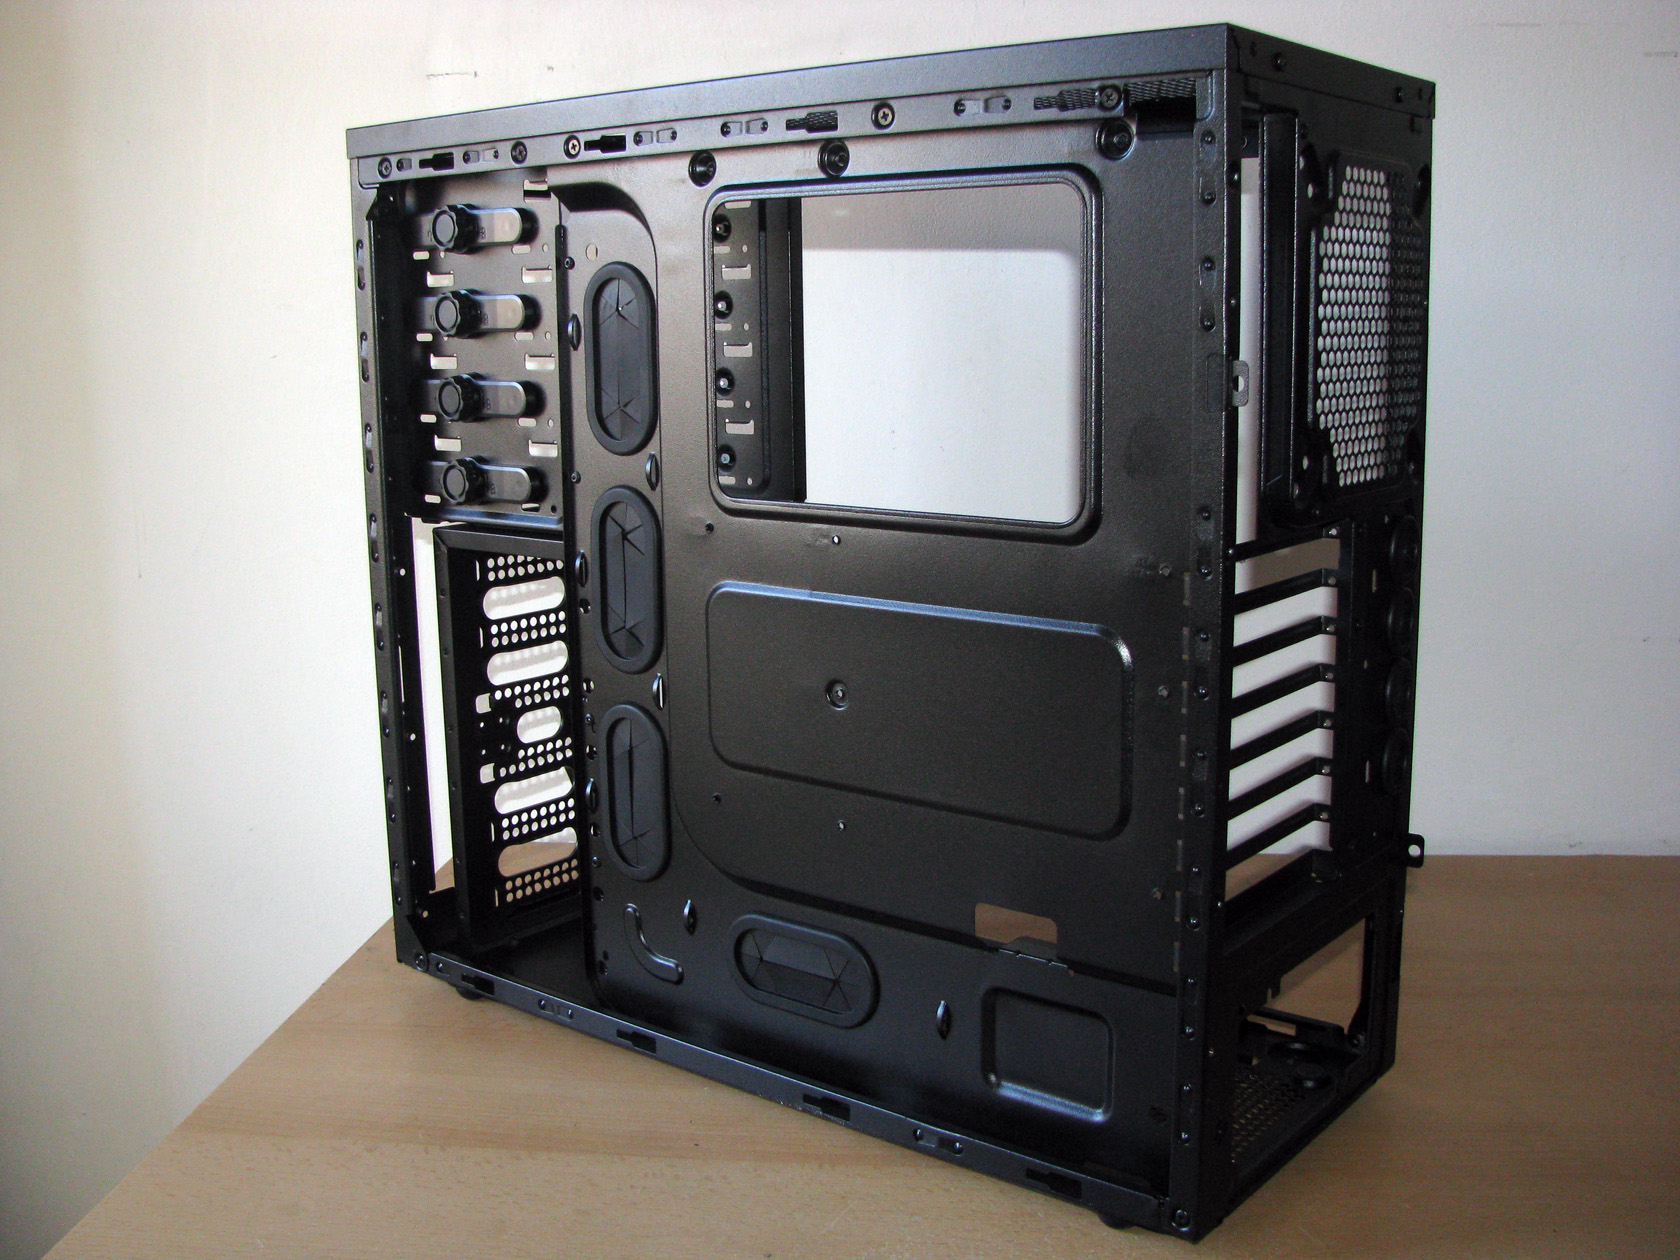
So to do a proper review I had to do some dirty job and remove all of the parts from the case and describe them one by one while installing them back to the frame. Here is the moment to mention that there were some parts which I was not able to remove or I was afraid not to break in the process. After the case was disassembled the frame looked like that from the left:
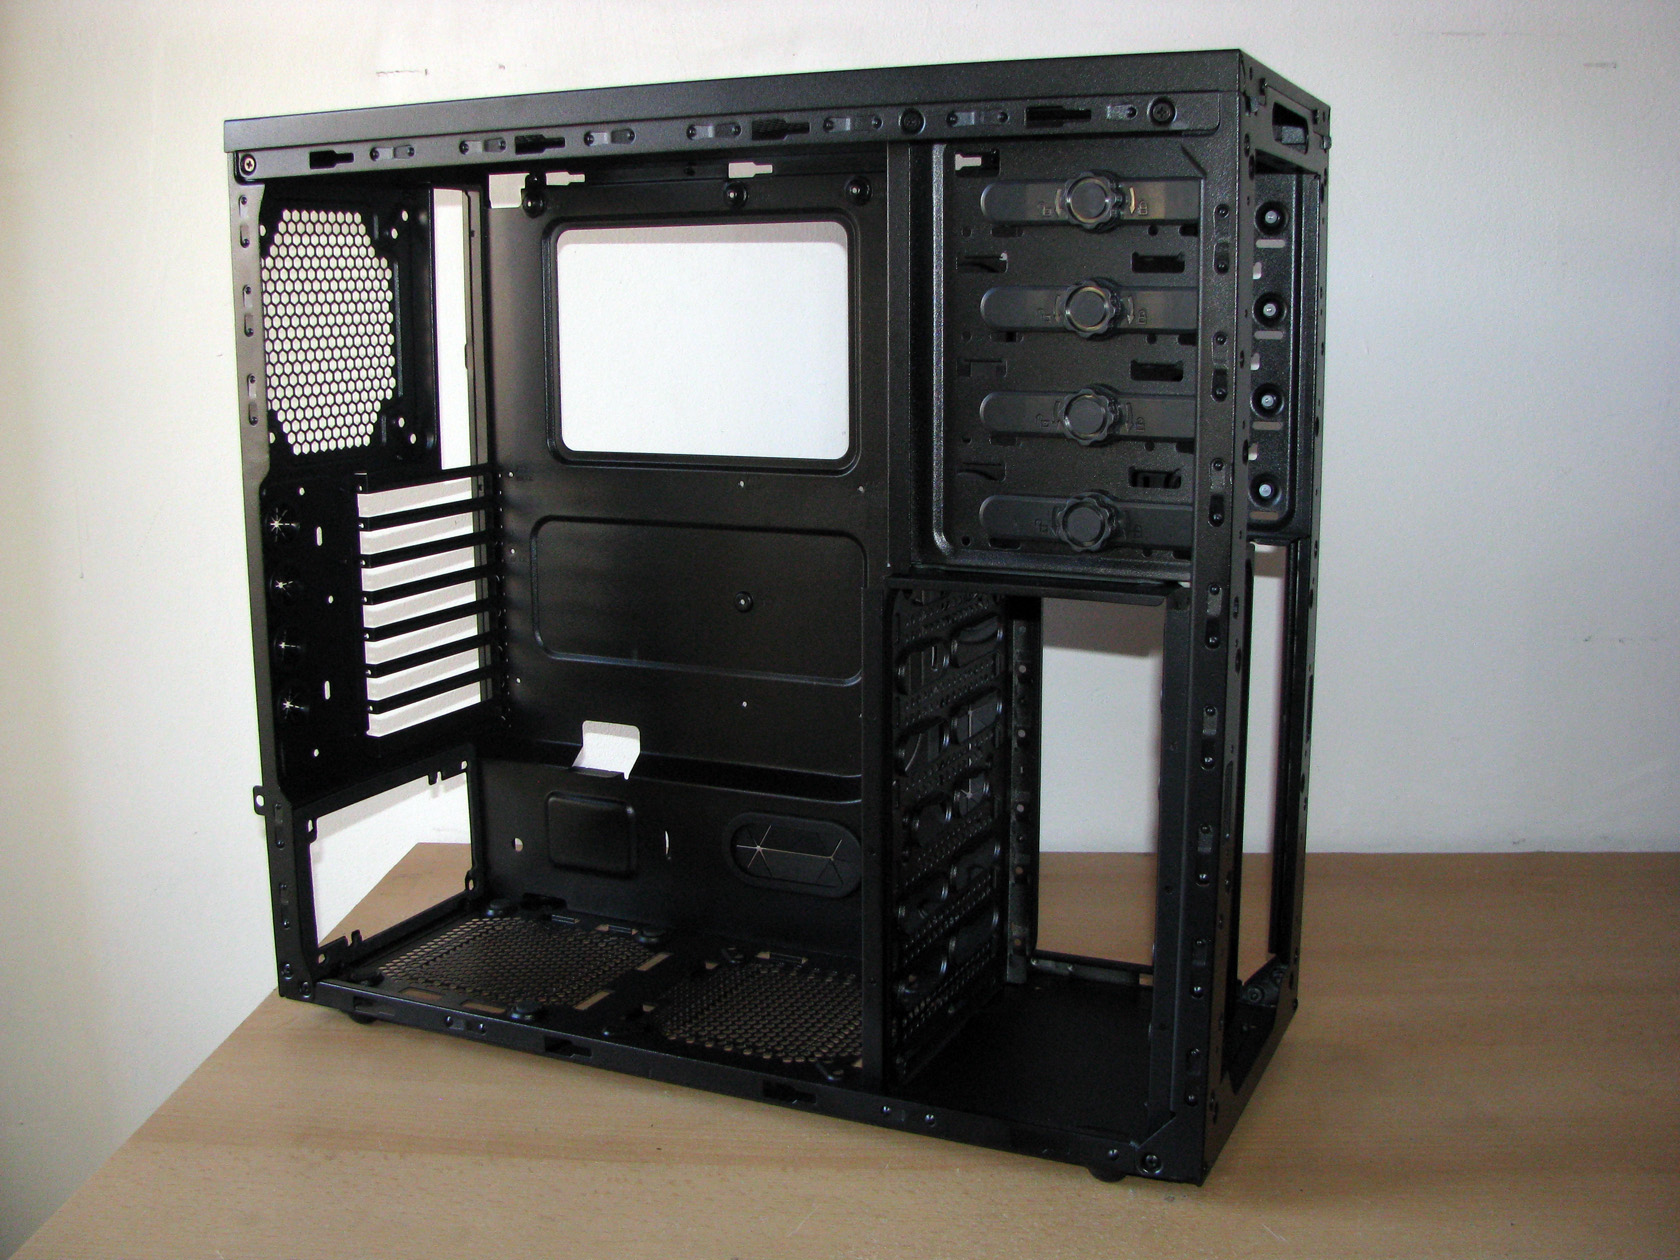
And like that seen from the right side:
After I removed and arranged all of the parts together, which by the way were a lot, they looked like that:
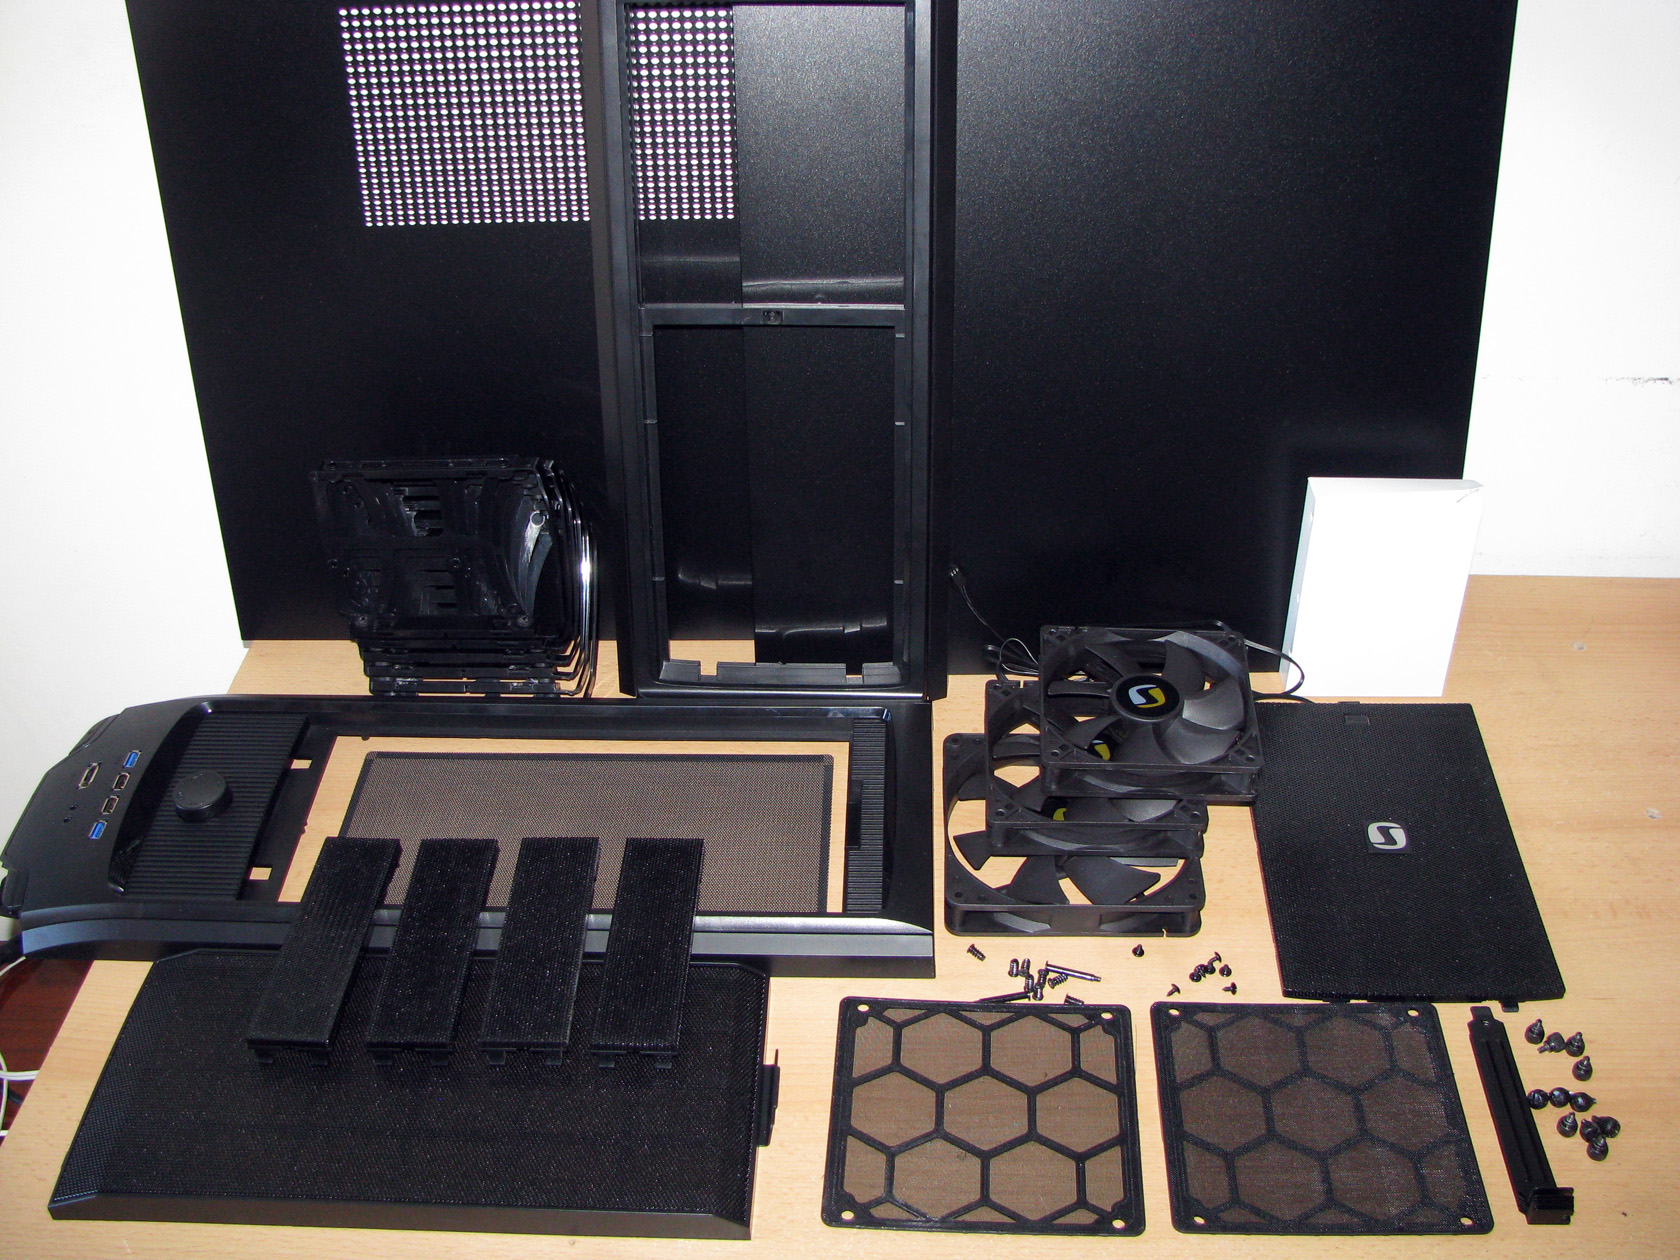
- Left and right side panels made of SECC entirely painted in black
- The front and the top panels made of plastic painted in black
- 2 x 120mm preinstalled fans painted in black and working at ~1500 revolutions per minute. One of the fan is installed on the front side of the HDD chassis behind the front panel and one on the top panel.
- 1 x 140mm preinstalled fan painted in black and working at ~1200 revolutions per minute installed on the rear panel
- 6 x plastic HDD trays with rubber dumpers
- 4 x 5.25″ brackets made of mesh and working as a dust filter
- 2 x bottom dust filters made of plastic and mesh
- 1 x front mesh working as a dust filter
- 1 x top mesh part working as a filter
- 1 x dust filter with magnets to be installed on the holes on the left panel
- A small white box with additional mounting accessories which I will check out a bit later
- 7 x expansion brackets painted in black
- Tons of tool-less bolts and screws paited in black
- An installation manual
So to do more than just a review I had to put all parts back together and install the hardware so I can do a proper test, too. Now let’s use the screwdrivers and put all back together.
While I was disassembling the case I had some troubles removing the top panel, since all of the screws are small, painted in black and placed at very narrow spots, so I decided to put the top panel first. And these are all of the parts needed to completely install the top panel.

I believe now is the time to say some words about the top panel. The top panel is made of hard plastic and is holding all of the I/O slots which are placed on the front part of the top panel and are: 2 x USB 3.0, 2 x USB 2.0, headphones and microphone jacks, eSATA port, the power and the reset buttons and a fan controller made to control up to 3 fans and directly powered from the power supply.
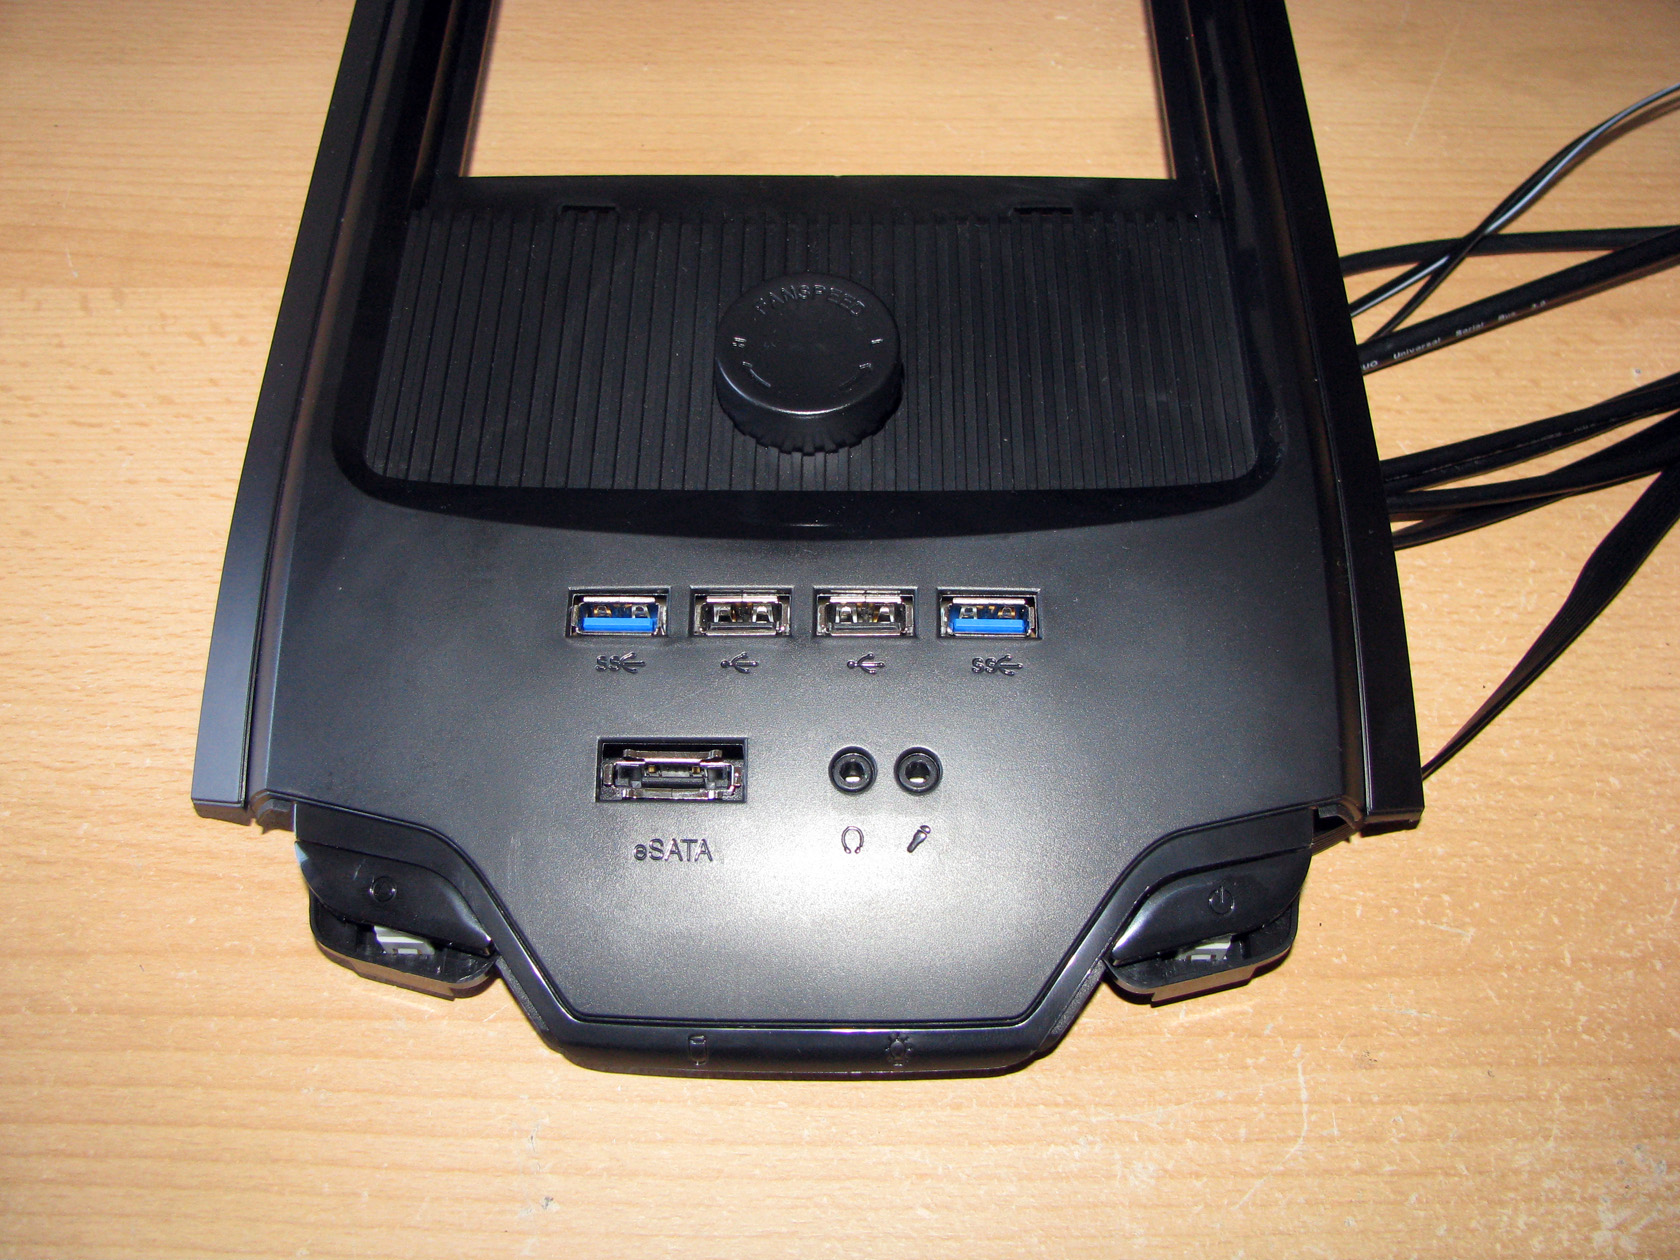
After some time fighting with the screws and the top panel was in its place:
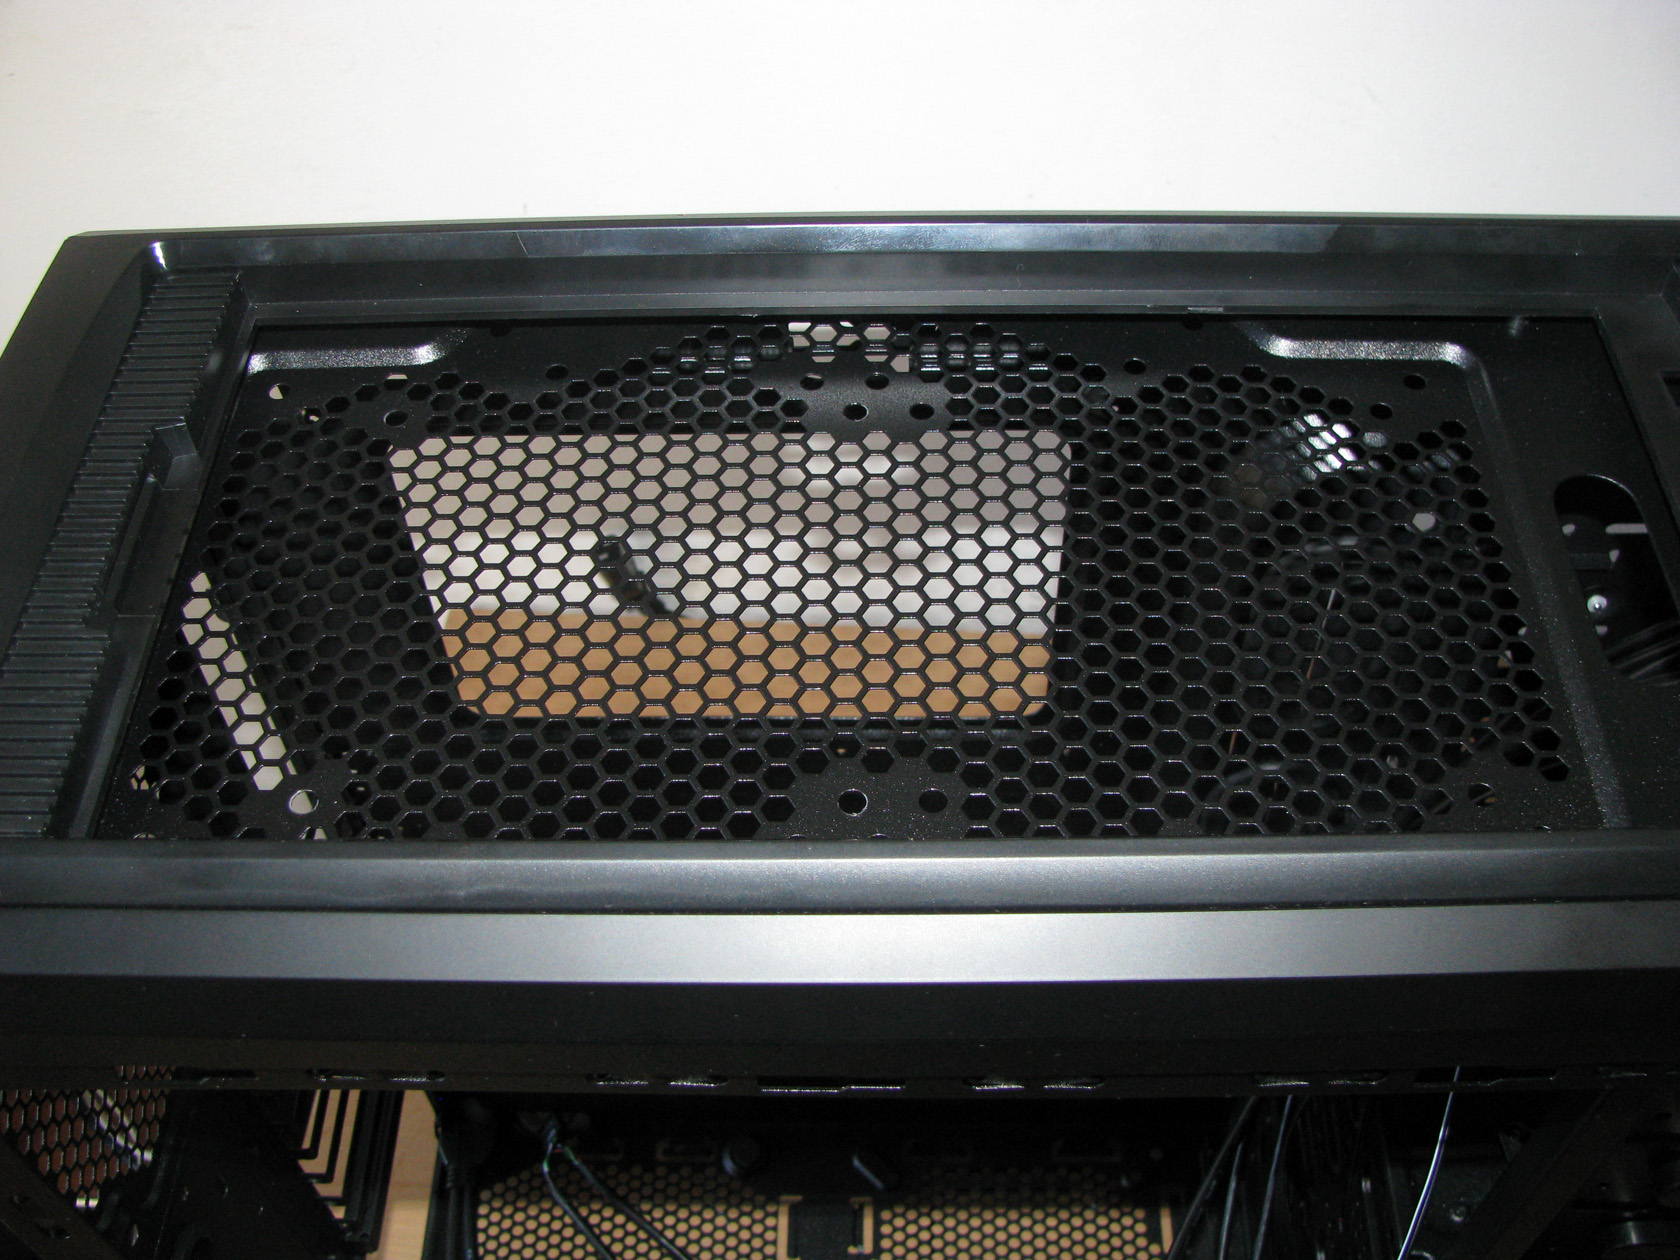
Maybe you’ve already noticed the top panel is cut like this and there is a space which requires an additional part made of mesh and working as a dust filter to be installed. The top panel can hold up to 2 x 120mm fans or a 240mm watercooling radiator.
And this is what the case looks like with the additinal mesh part installed.
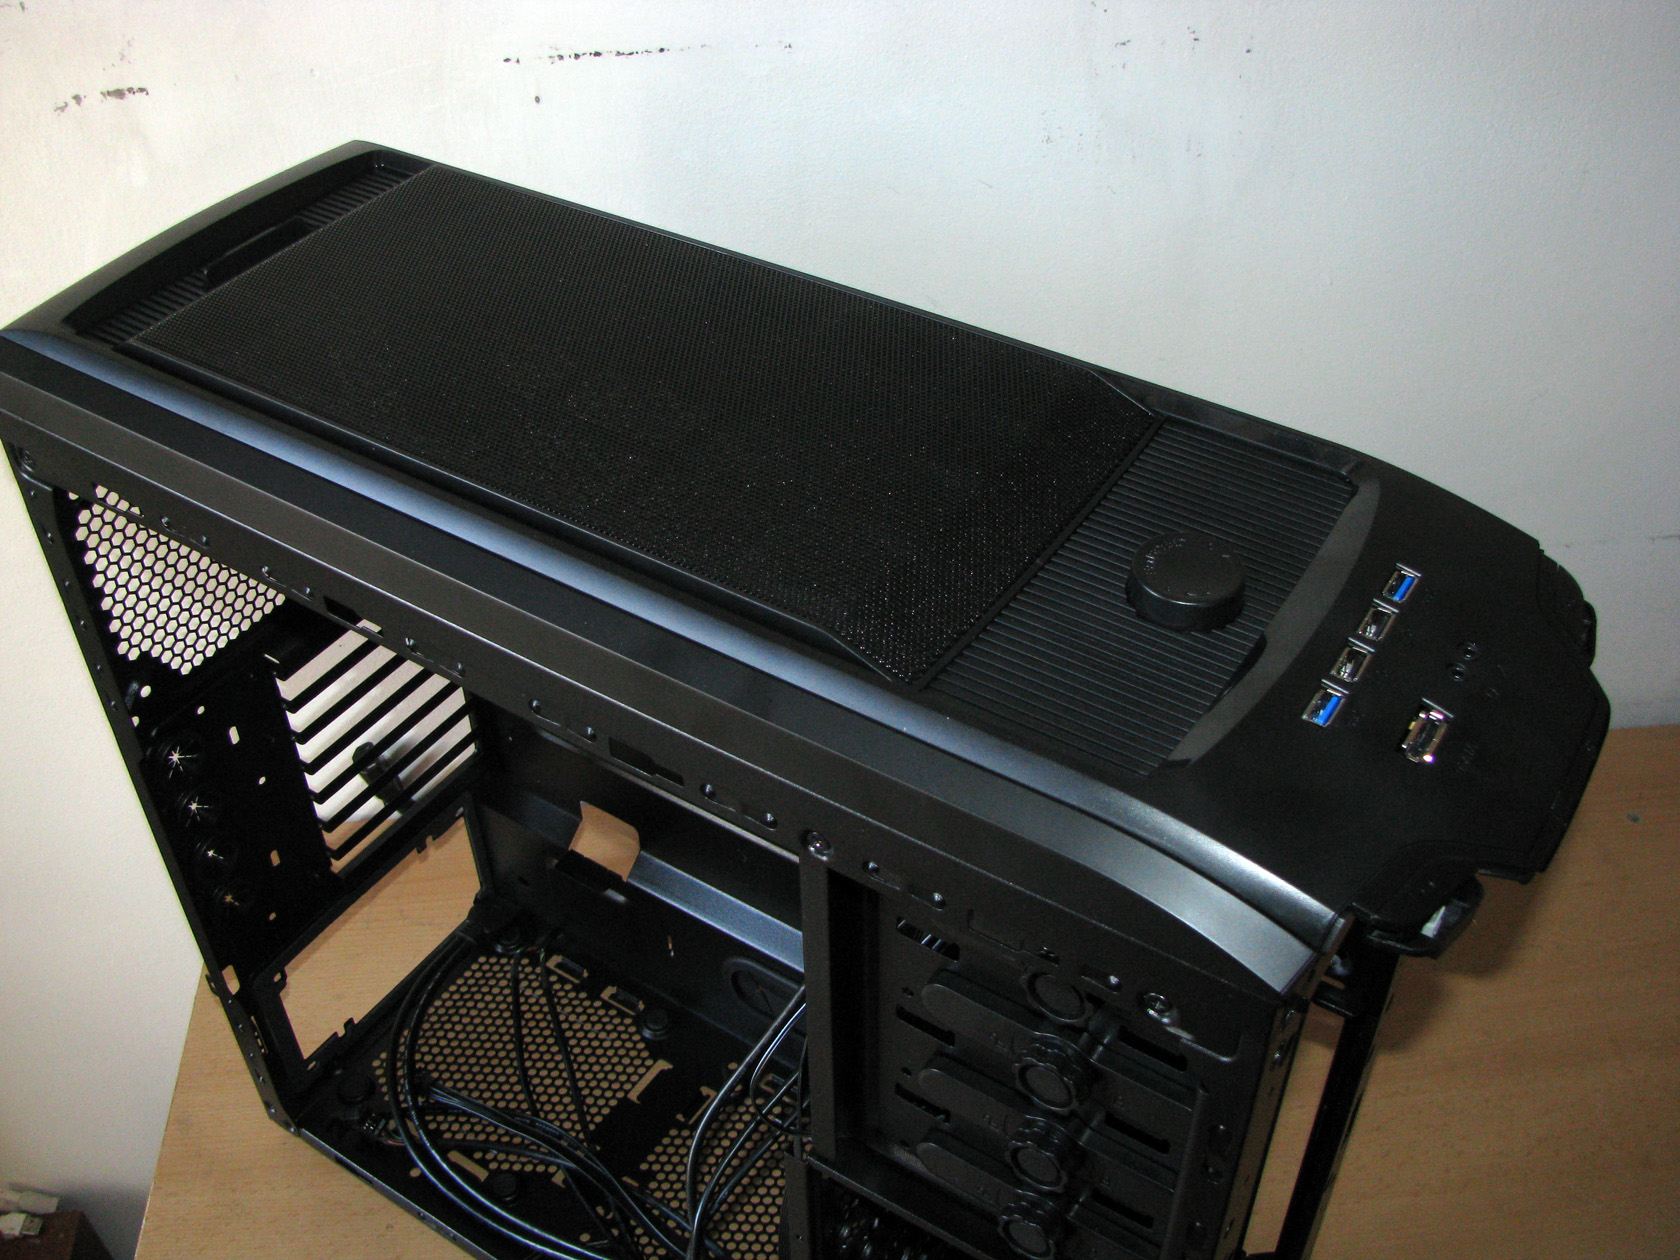
So far so good but still there are a lot of parts which require my attention and need to be installed back to SilentiumPC Regnum L50 Pure Black.
Since some of the parts are hidden behind the top and the front panels I decided to install them back to their position. And those parts are actually the fans:
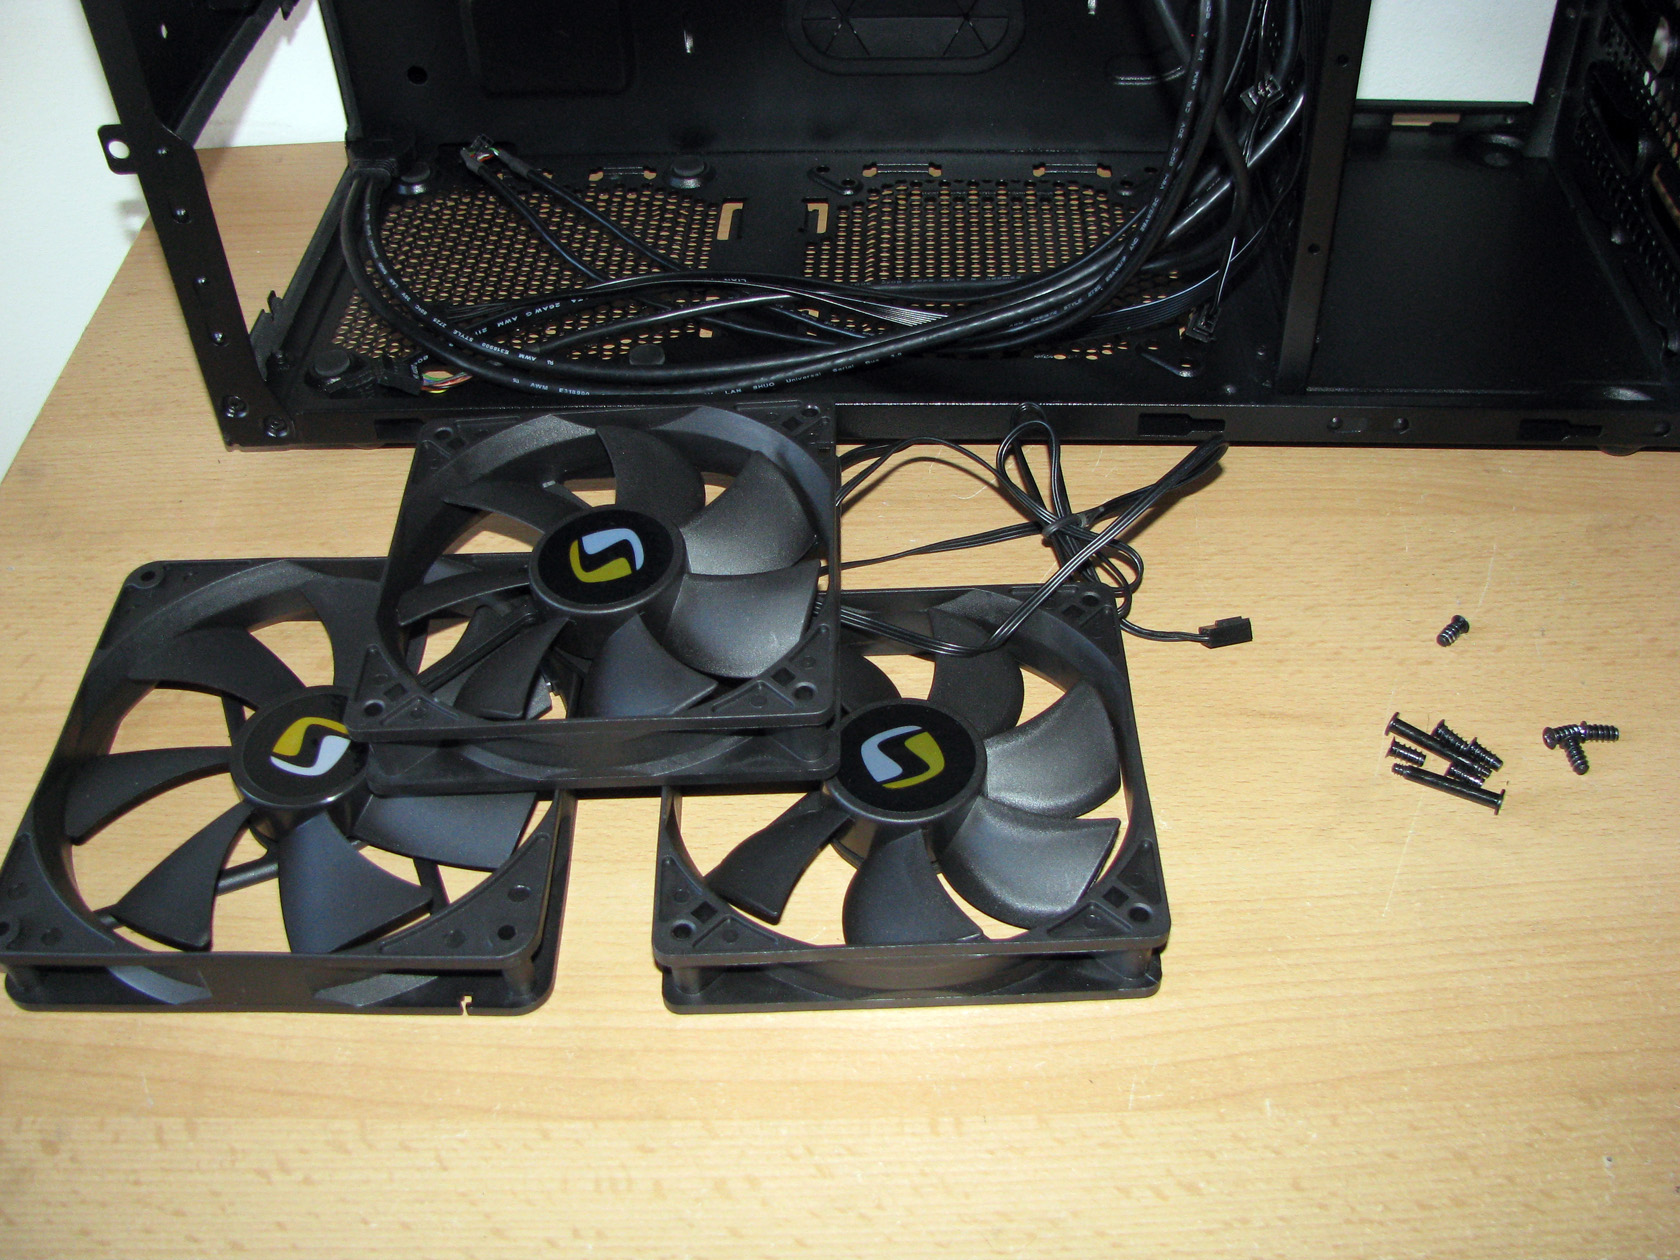
SilentiumPC Regnum L50 Pure Black offers 2 x 120mm fans working at ~1500 revolutions per minute one installed on the front to cool the hard drives and one installed on the top panel to work as exhaust fan. There is a third fan with dimensions of 140mm working at ~1200 revolutions per minute and is installed on the back panel working as an exhaust fan, too. Now let’s put them back inside the case:
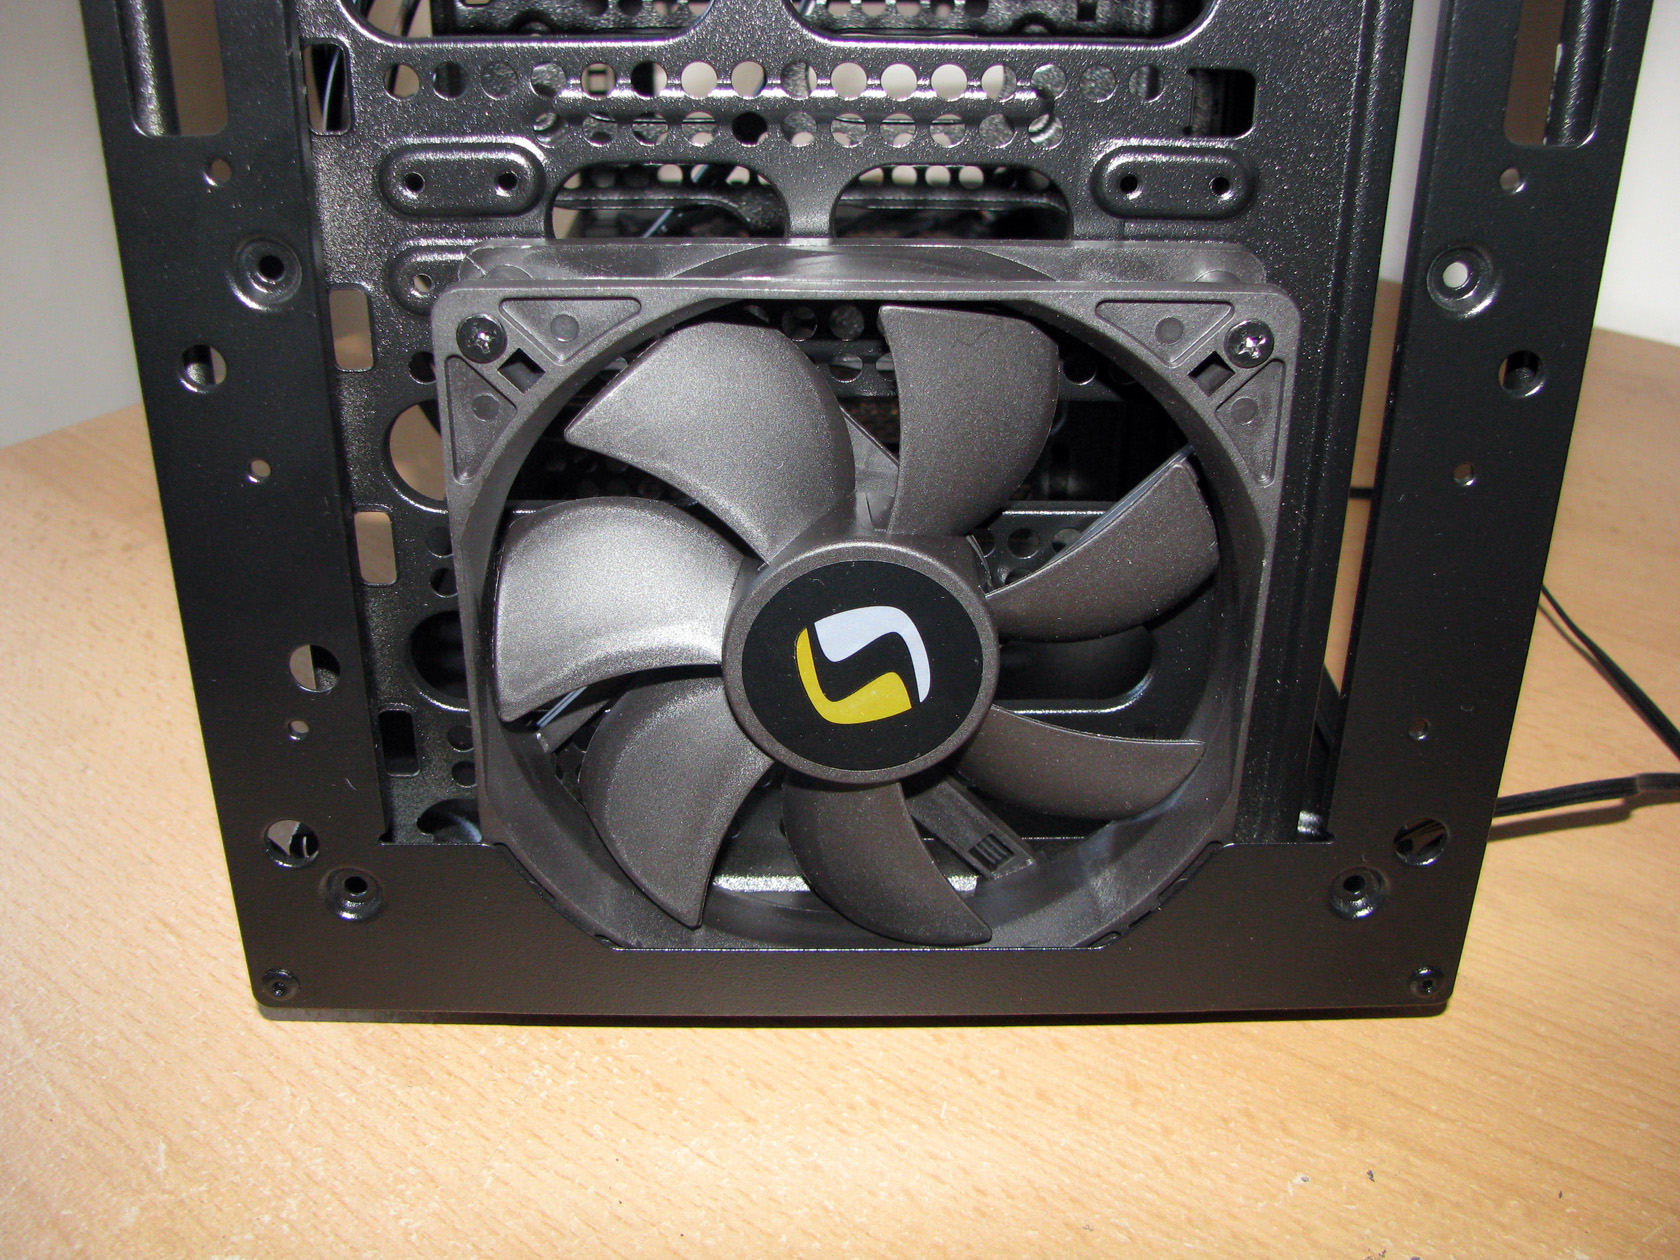
Behind the front bottom mesh working as a dust filter there are 2 slots for 120mm fans mounted with long bolts. Of course, all of the parts are painted in black. As a standard setup this case is supplied with 1 x 120mm on the bottom slot and made to take in fresh air from outside the case. The fan is installed with only 2 bolts but still there are no vibrations or annoying noises.
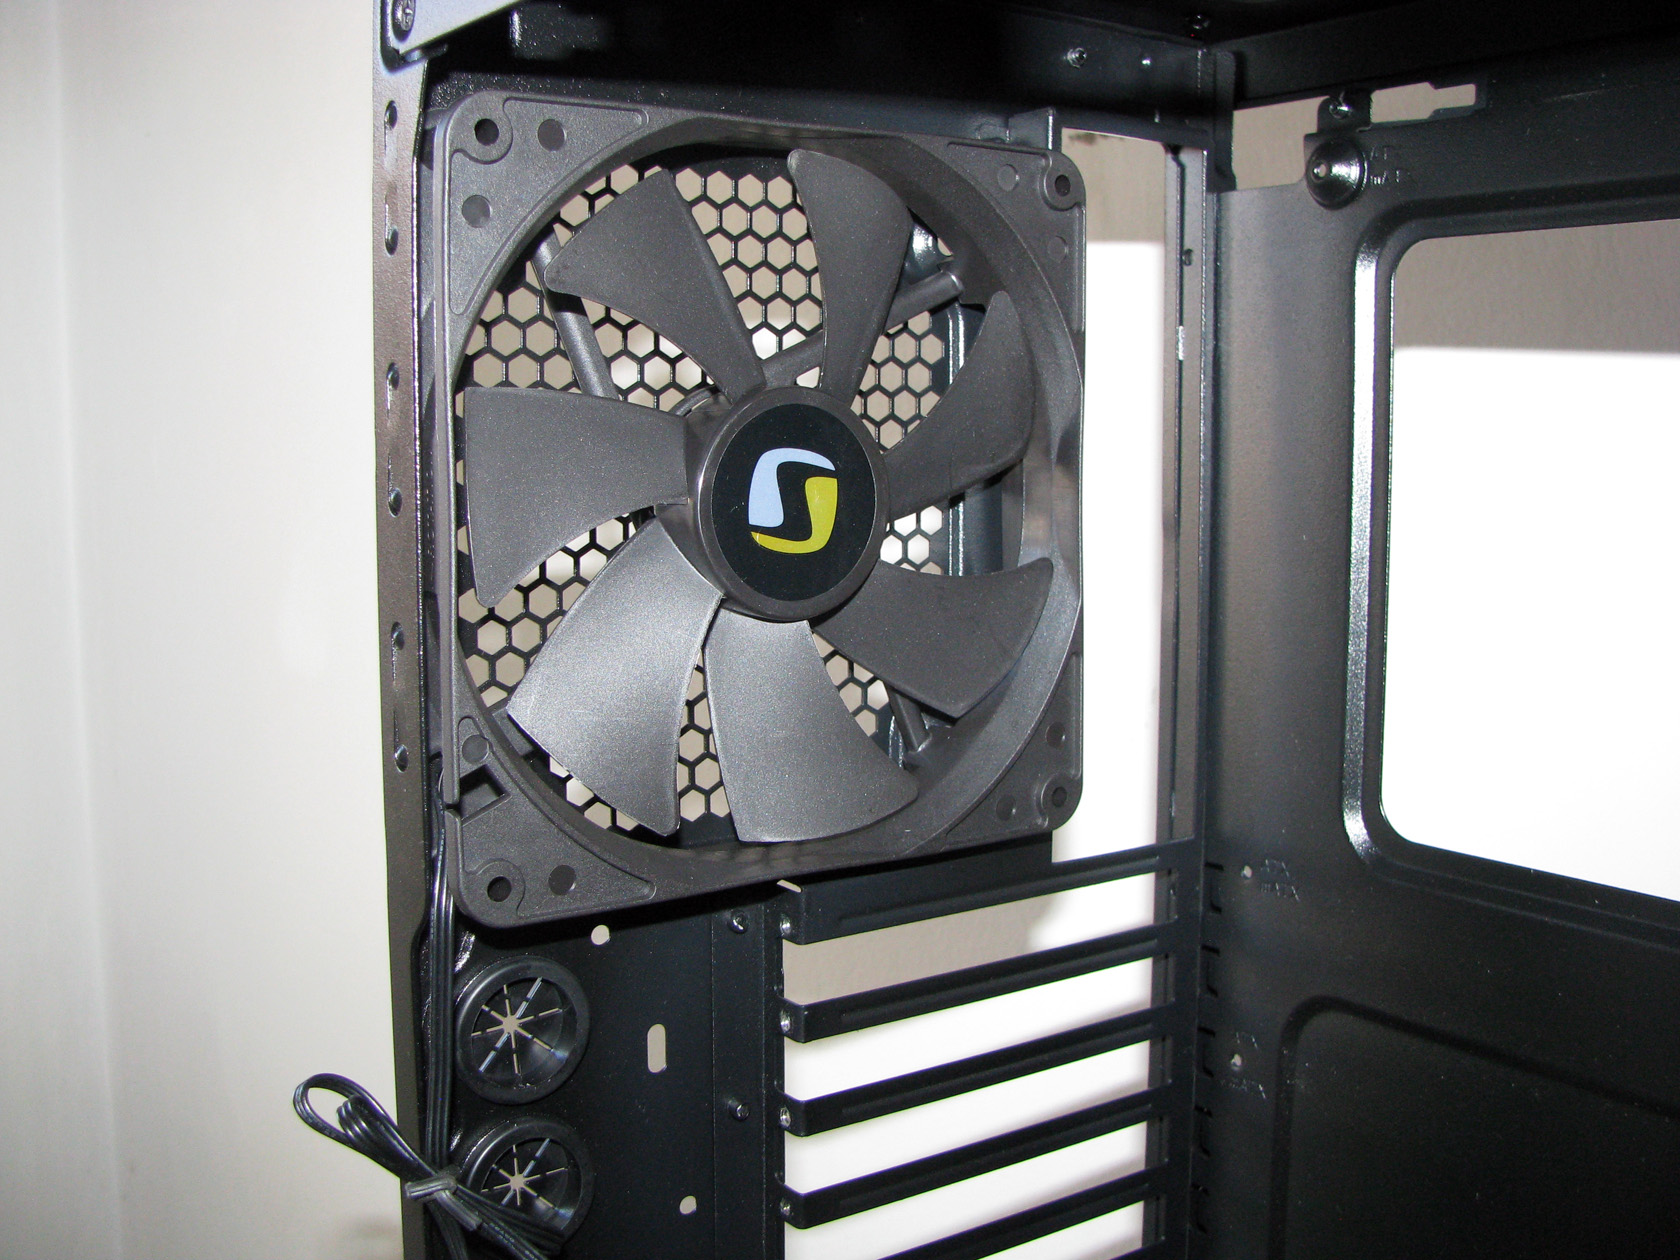
The next fan is attached to the back slot of the case with four black screws and again there are no vibrations.
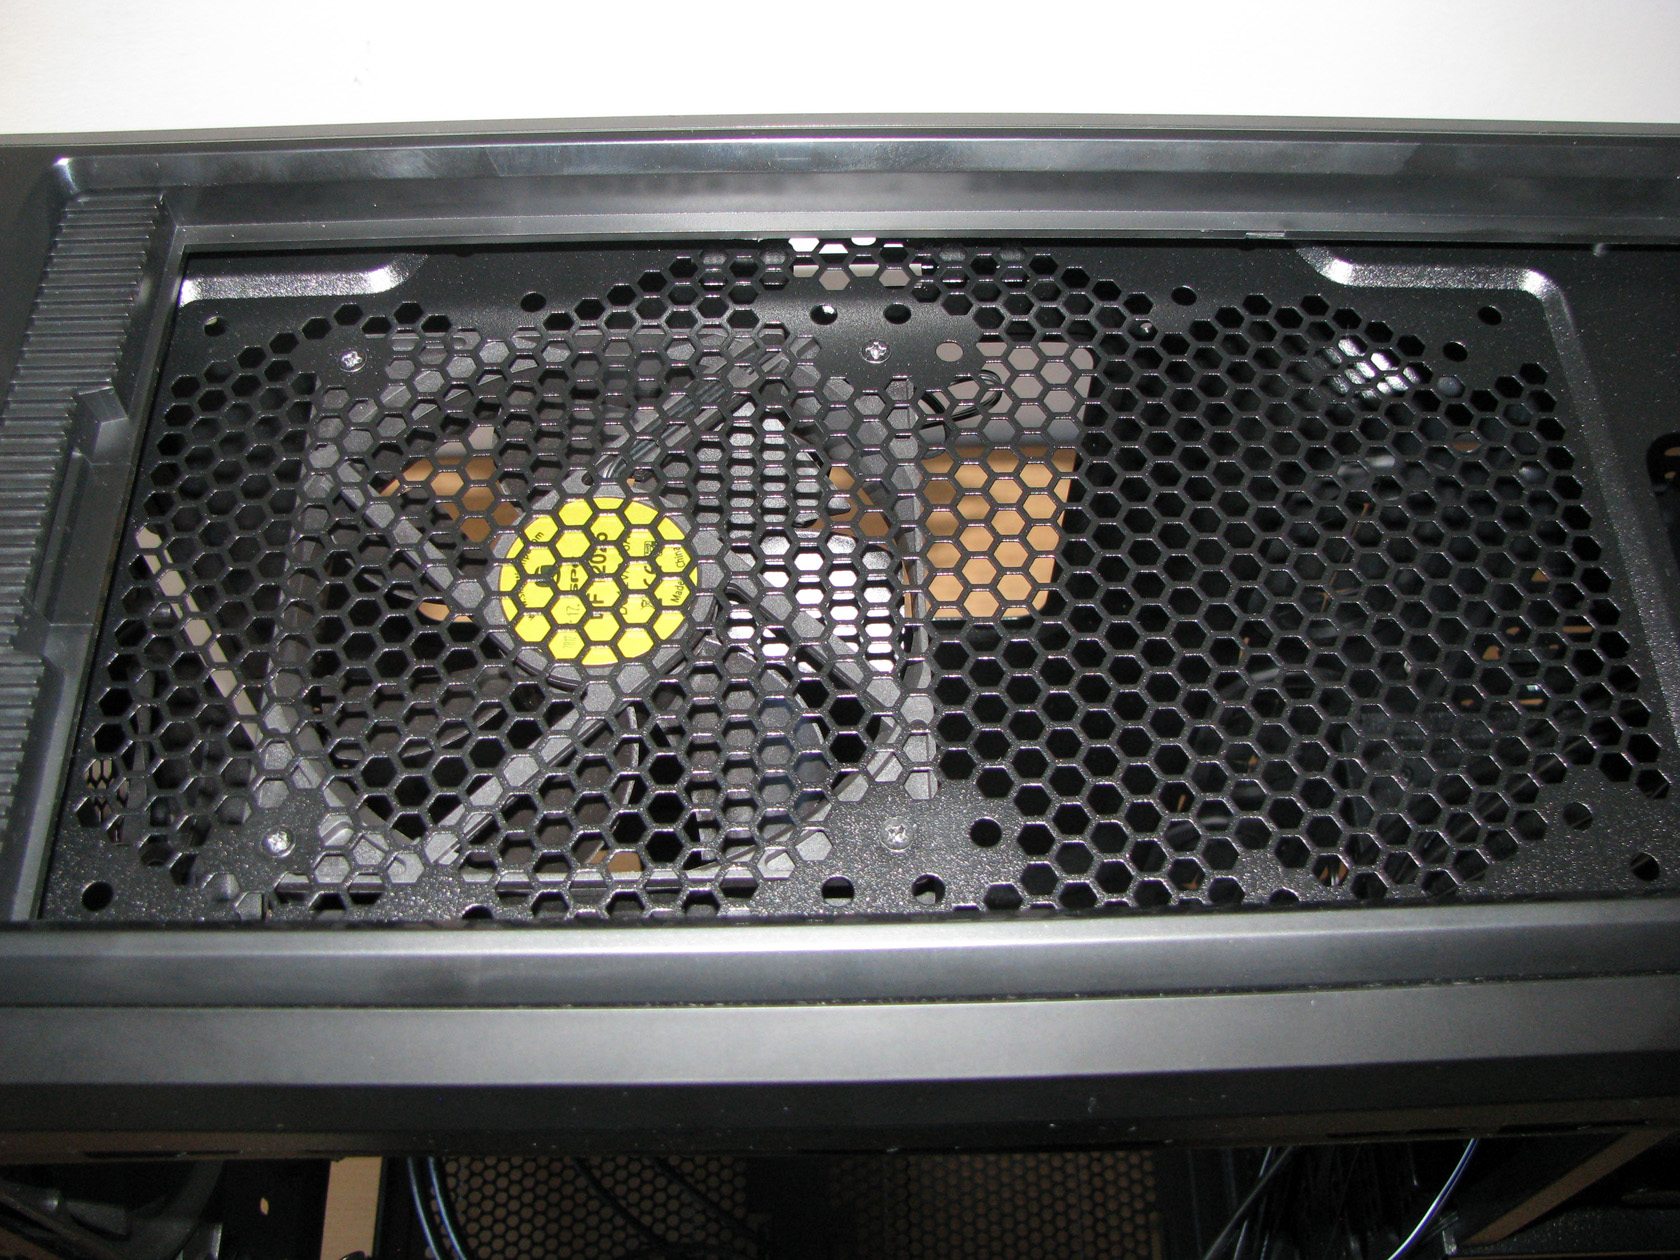
And the last fan back to its place, again mounted with four, painted in black screws.
While I was installing the fans I noticed that actually this case can provide really serious performance if all of the fan slots are filled with cooling units. The case can hold up to:
- 2 x 120mm fans mounted on the front part of the HDD chassis behind the front panel working as intake fans
- 2 x 120mm fans on the back side of the HDD chassis
- 2 x 120mm or 2 x 140mm or 1 x 180mm fans on the top panel working as exhaust fans
- 2 x 120 fans mounted on the left panel working as intake fans
- 1 x 120mm or 1 x 140mm fan on the bottom panel working as intake fan
Apart from that the case offers the option to power and regulate up to 3 fans directly from a knob placed on the top panel and powered from the power supply.
Did anybody count them and see what variety of fans can be installed? Very, very impressive and good job SilentiumPC! Apart from that I really love that all of the intake fans are behind dust filters which is a nice feature meant to keep the system out of dust.
So let’s continue assembling the case…
Next thing to install back was the front panel and all of the mesh parts which looked like that:
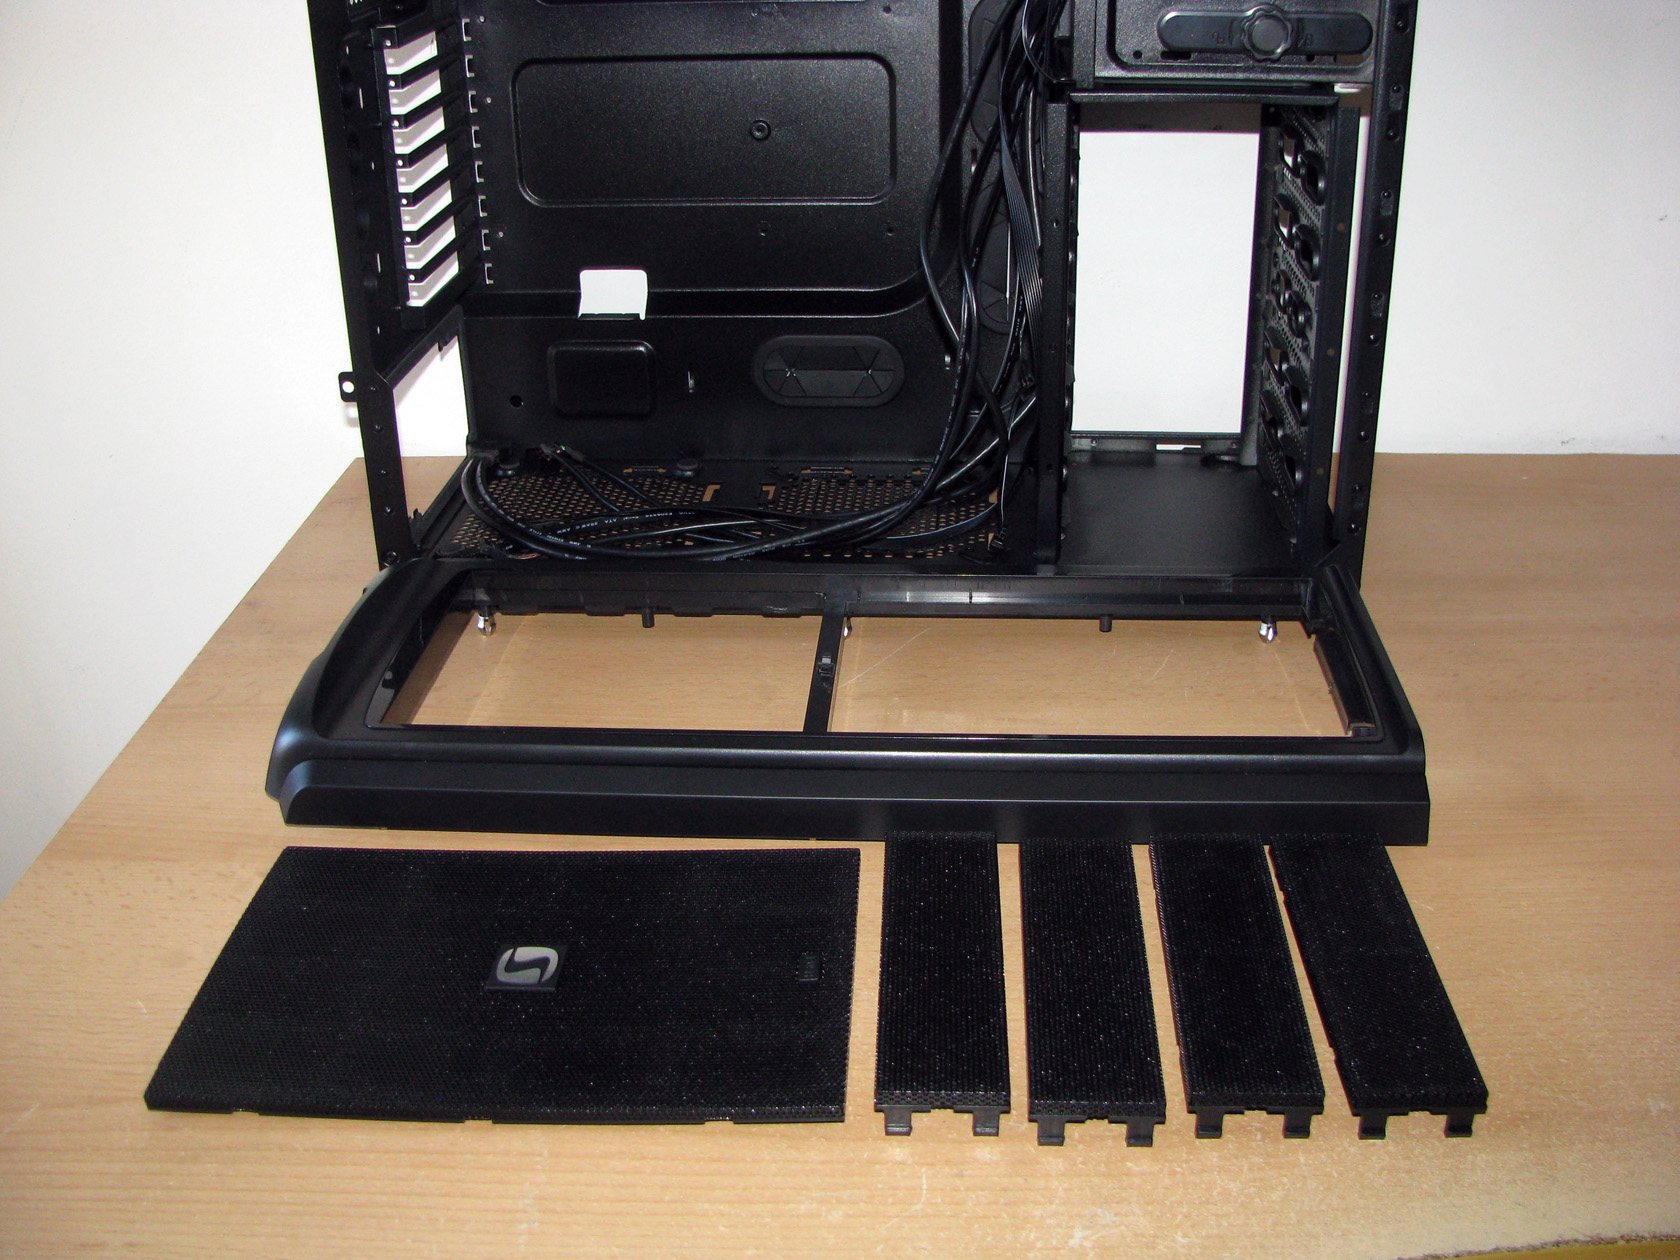
The front panel is actually a black plastic frame with metal clips made to hold it tight to the frame and holding the mesh brackets to their place.
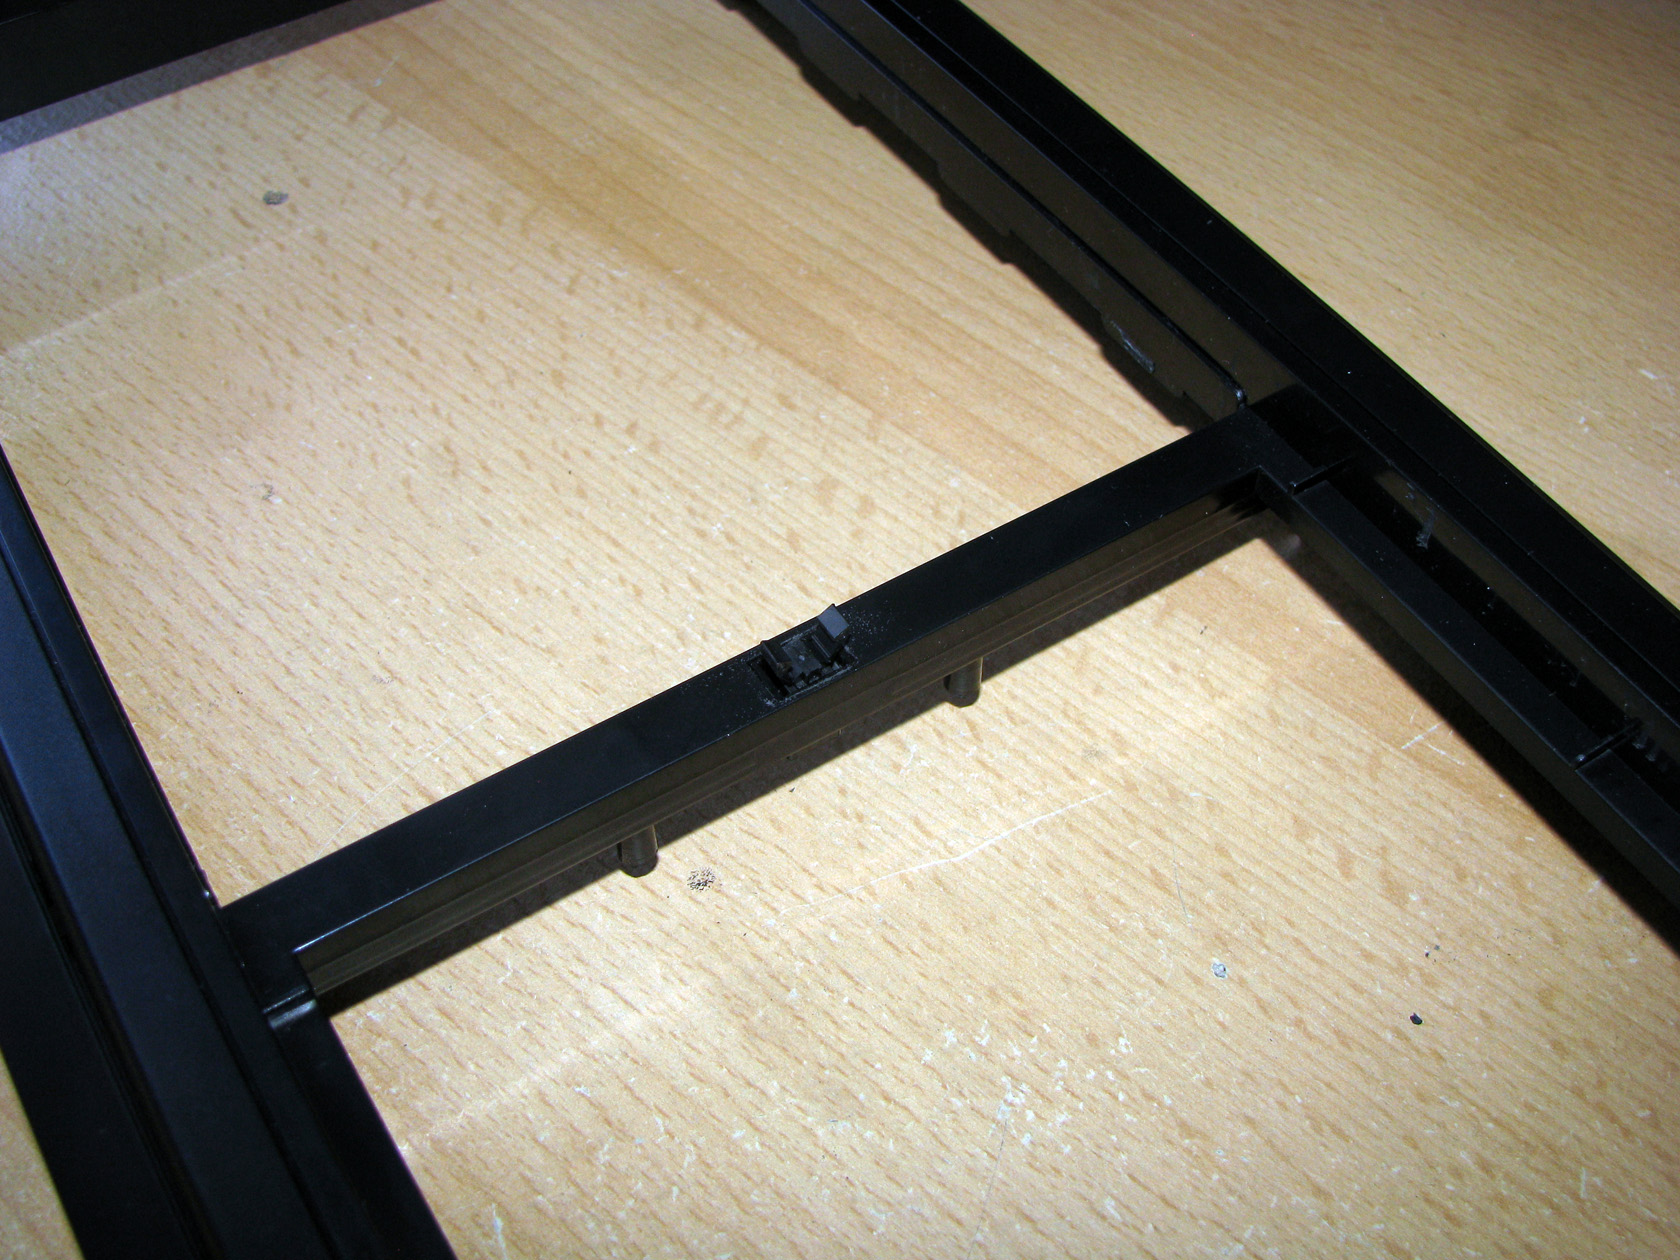
There is one thing that I actually enjoyed a lot and that is a small plastic push clip made to hold the front mesh with the dust filter infront of the fans. And this is the front panel with the mesh part together:
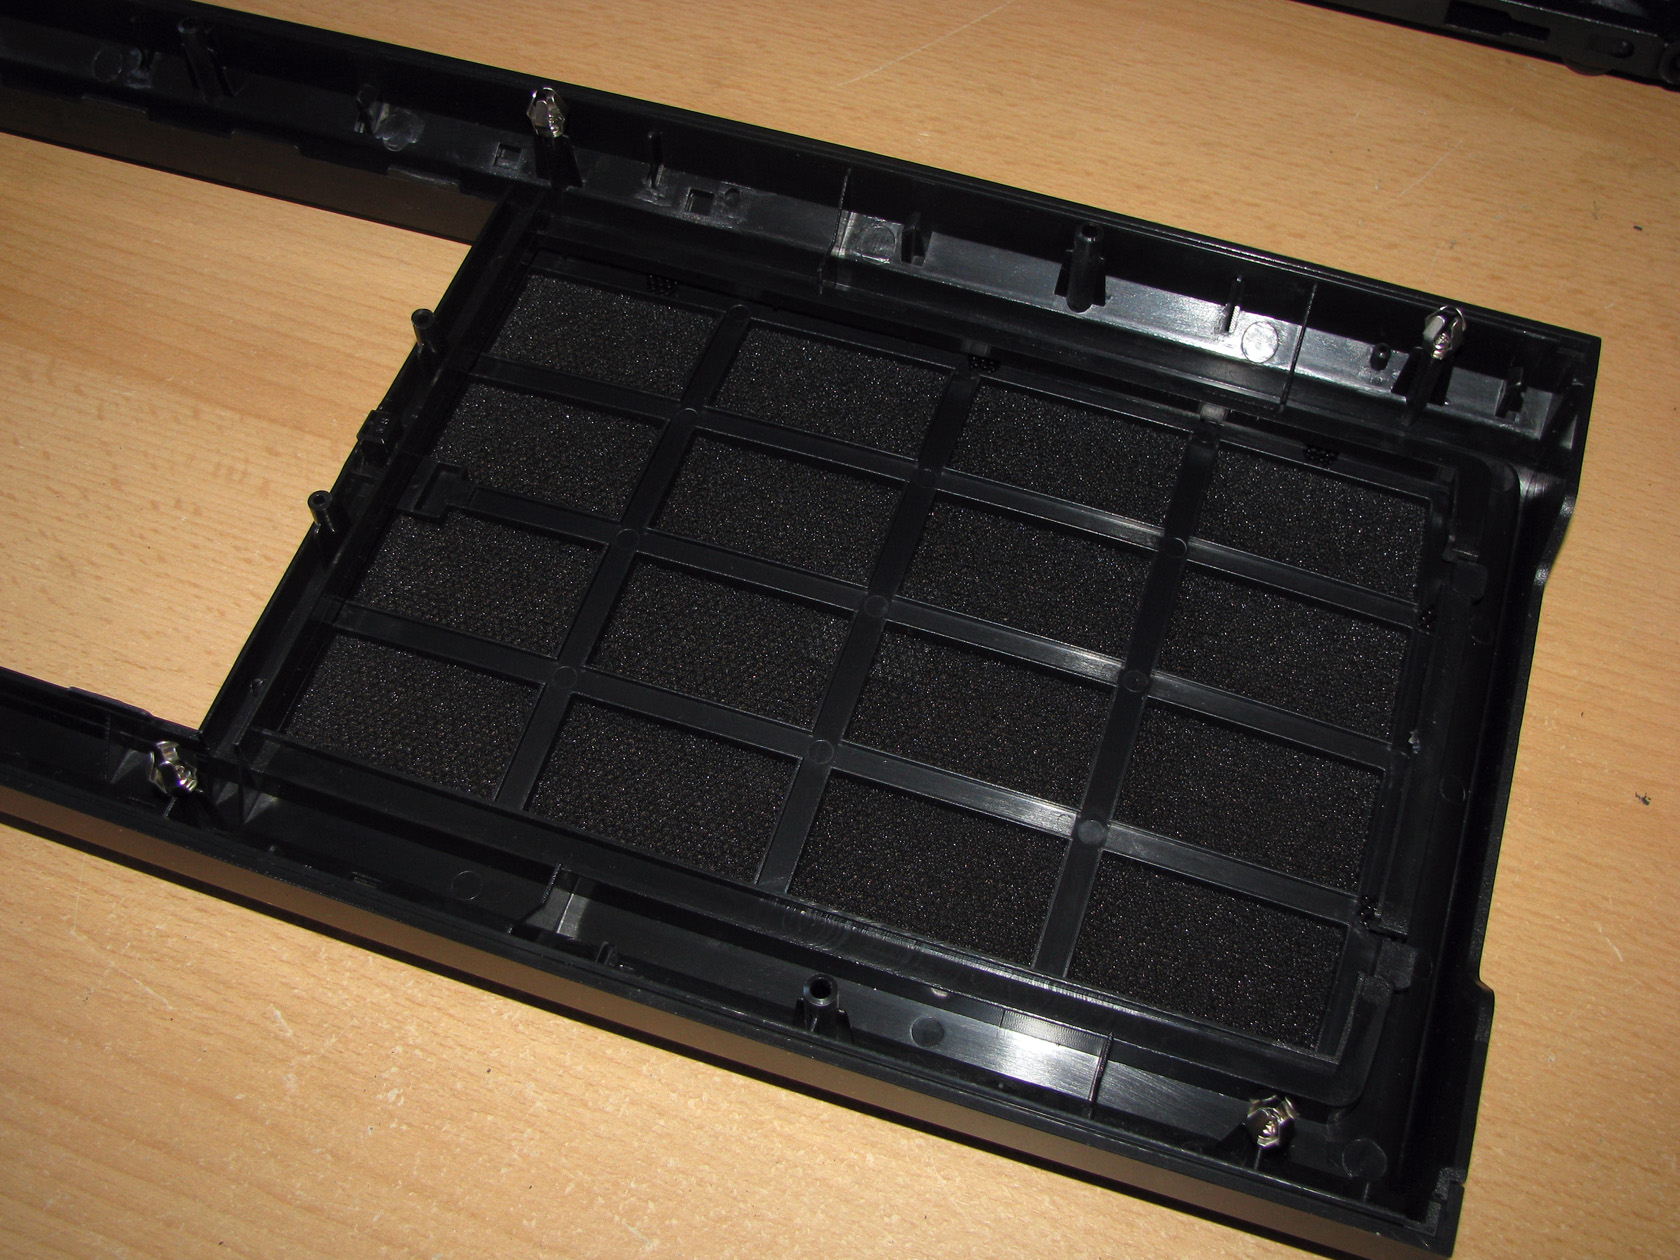
The front meshed filter can be removed just by pushing a small spot on the upper part working as a button.
Both the plastic panel and the meshed filter to their place:
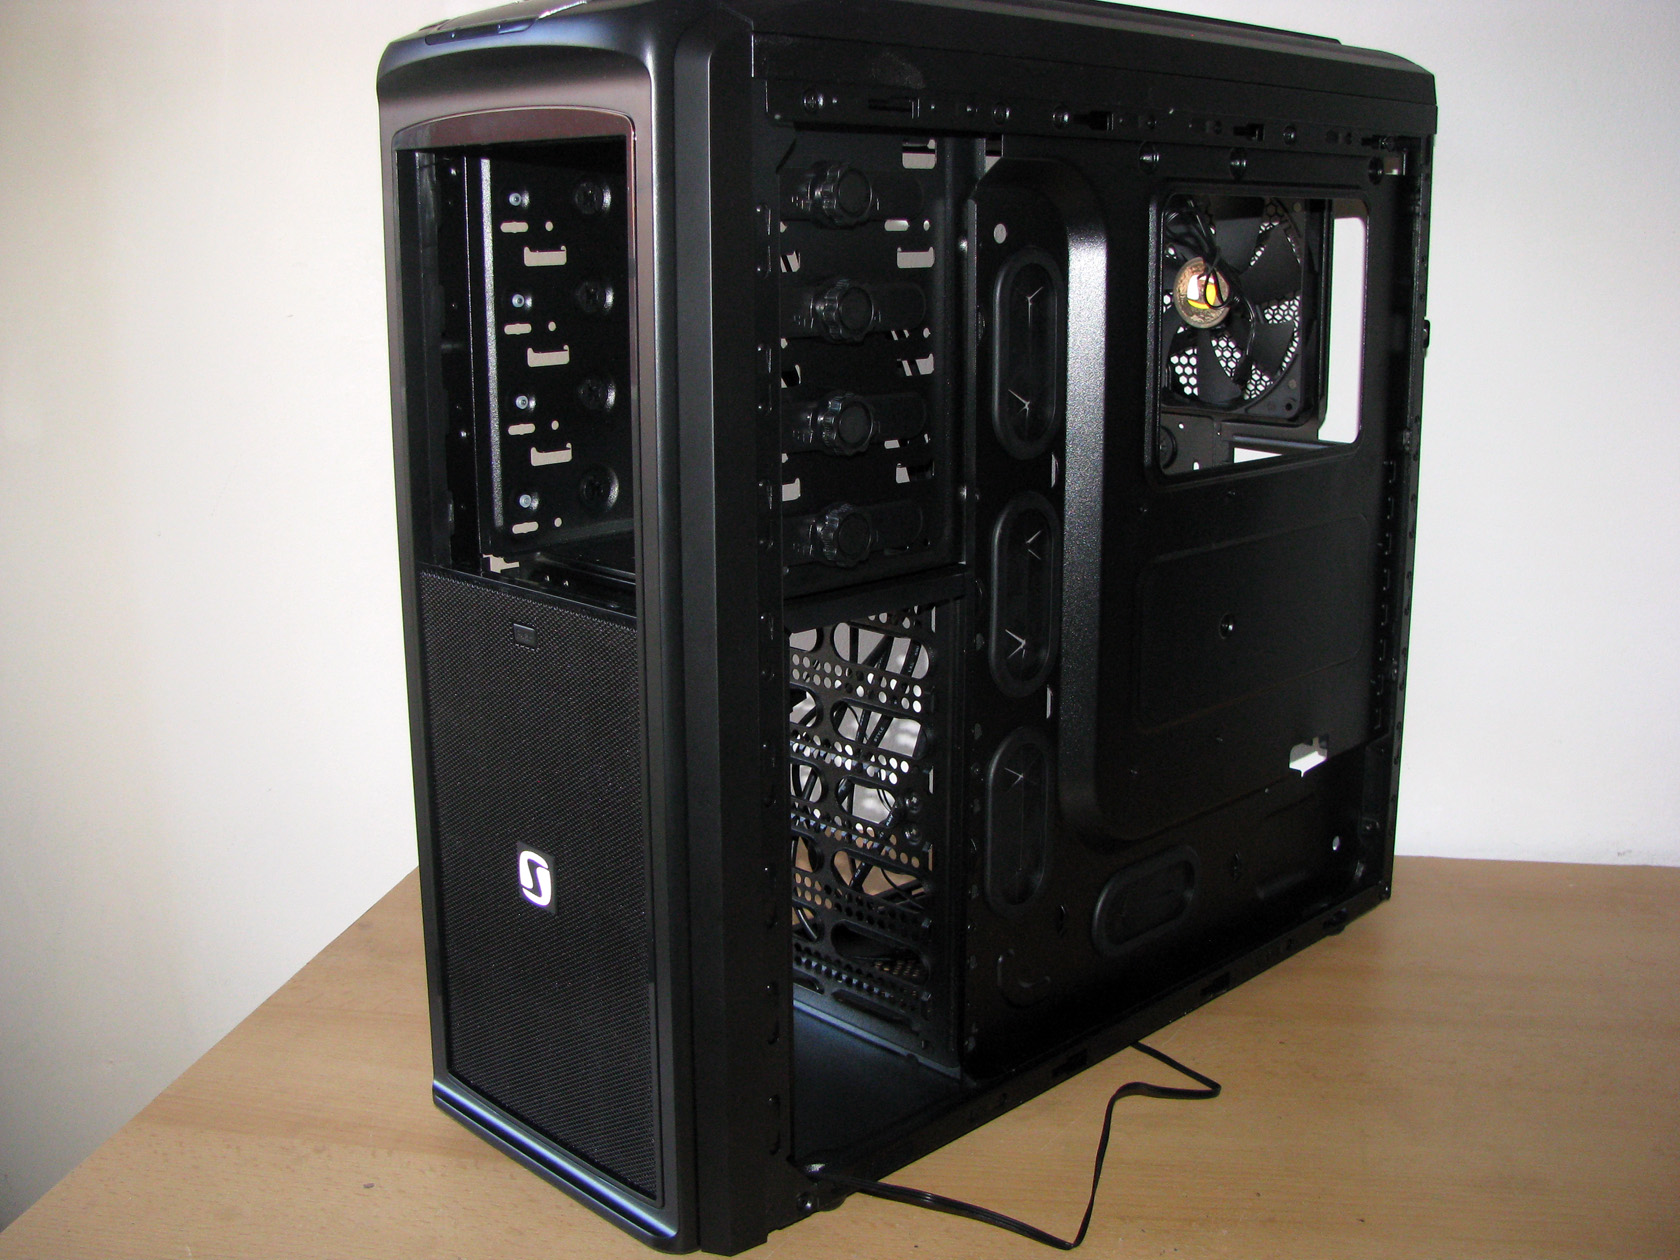
On the meshed filter there is the Silentium metal plate as a logo of the company. Looks very stylish since it is the only non-black part together with the case.
And this is what the front panel looks like when all of the parts are installed.
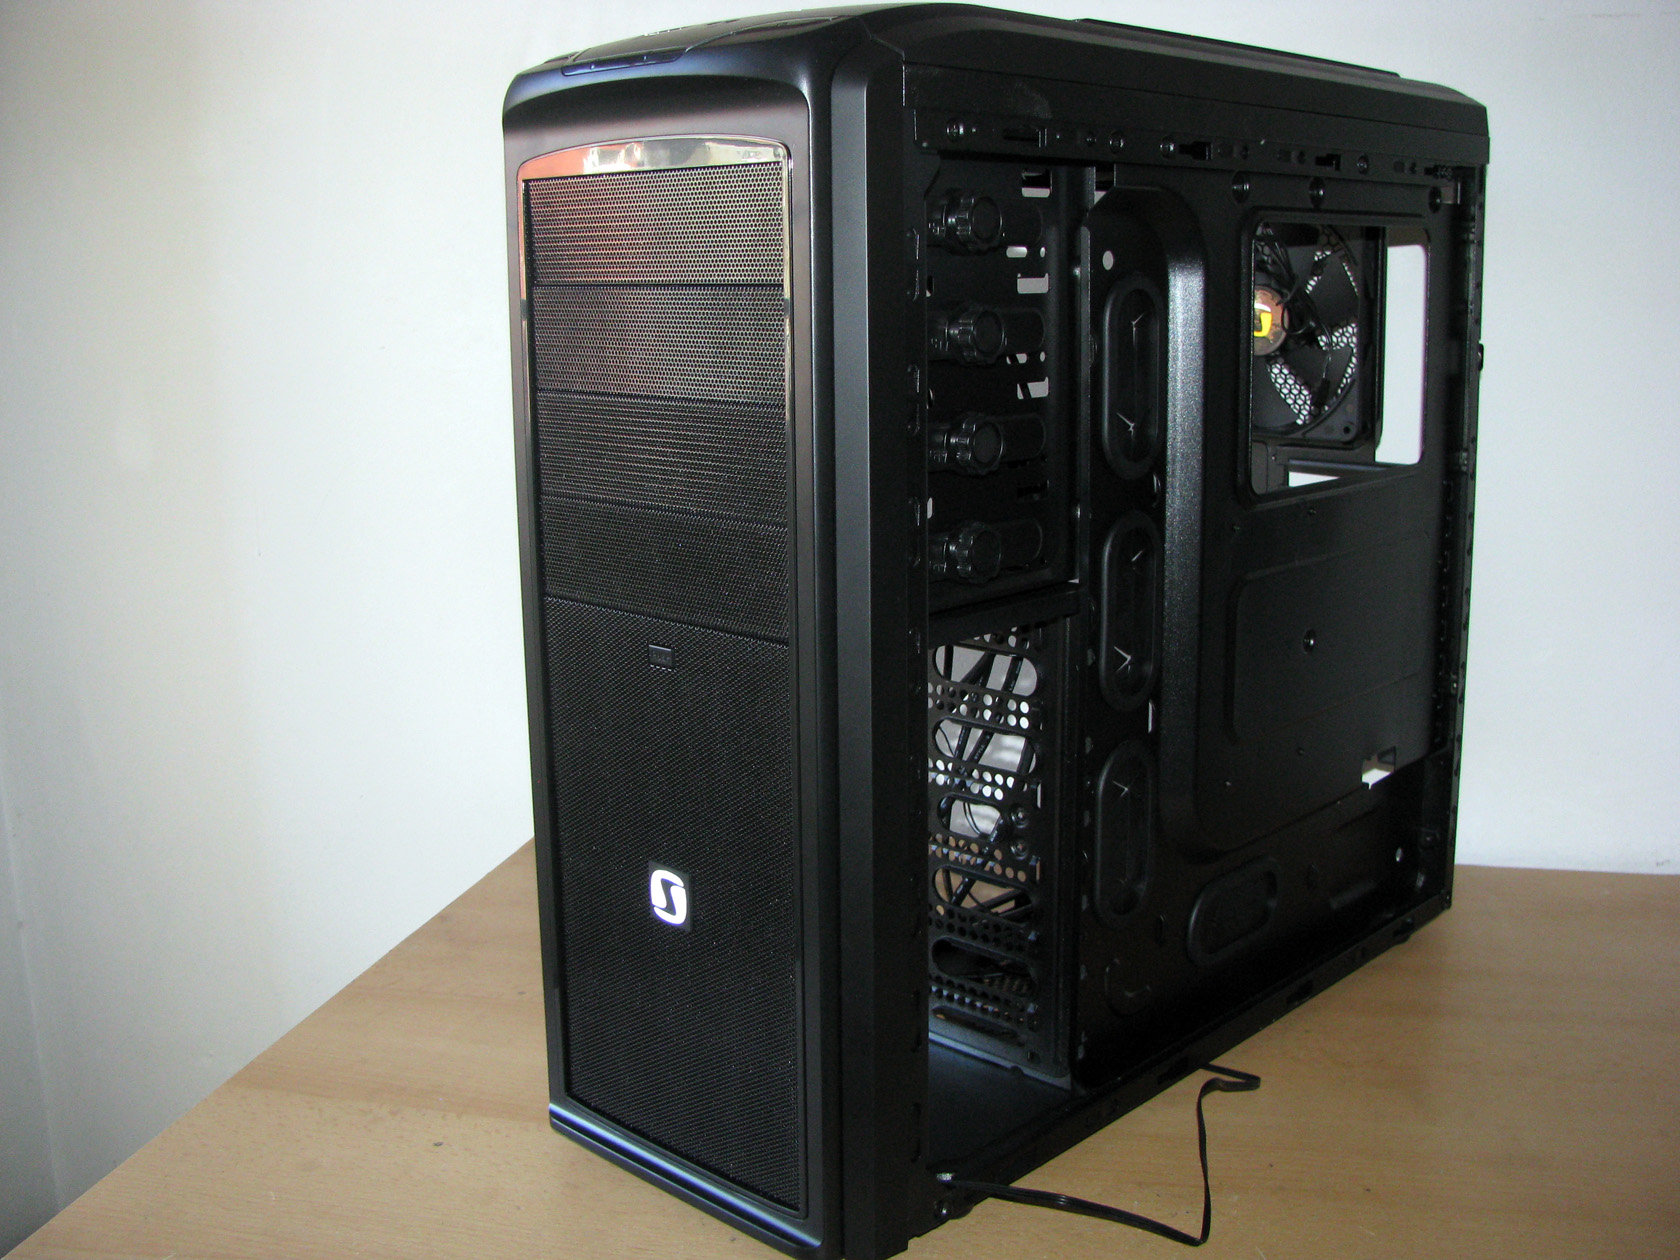
I am almost done reassembling the case. Next thing to put back to the case were the black plastic HDD bays, which are really interesting.
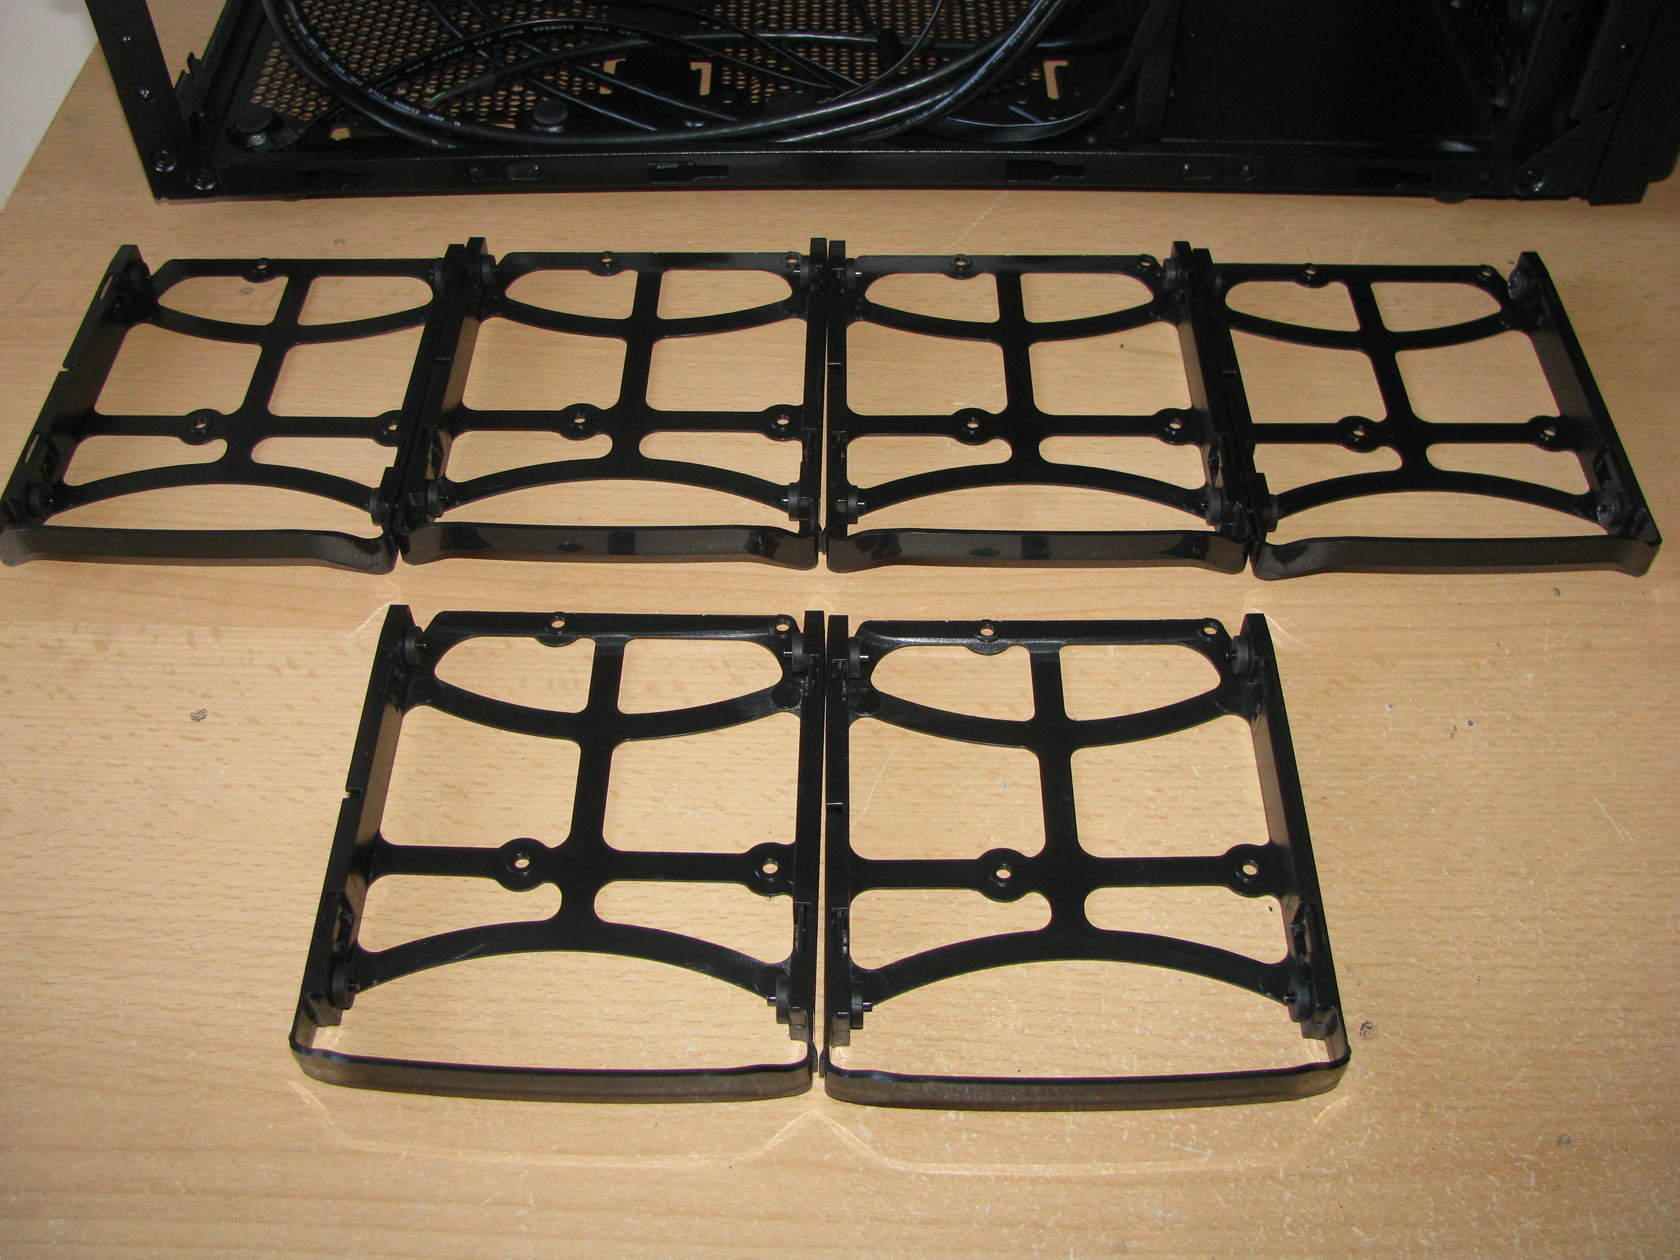
According to the official technical details this case can hold up to 6 x 3.5″ HDD or 6 x 2,5″ SSD using just these brackets:
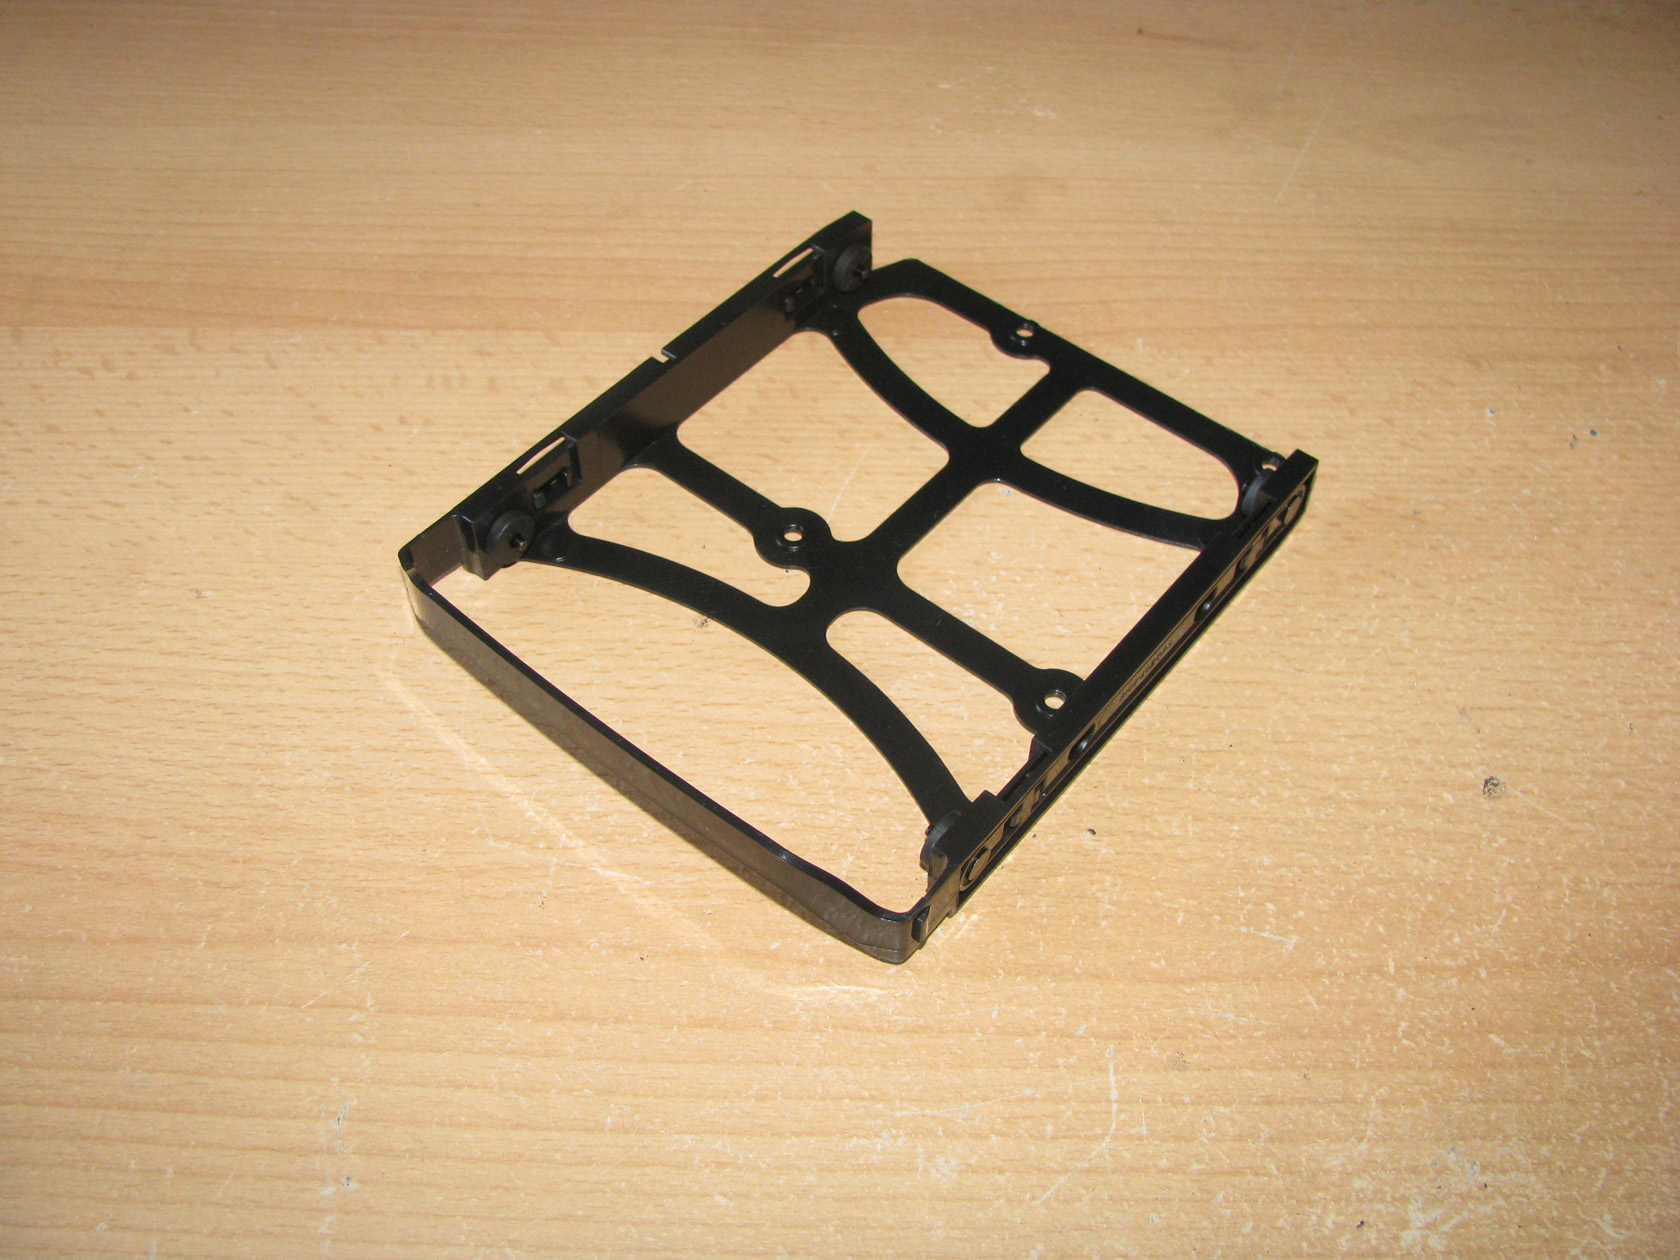
When I tried to install my SSD I noticed that sides of the brackets there are pins made to hold the 3.5″ HDDs tight and those pins were supplied with rubber dumpers for reducing the vibrations from the HDDs. And to install the SSD I had to remove the pins or just use my imagination and install the SSD on the bottom side of the bracket.
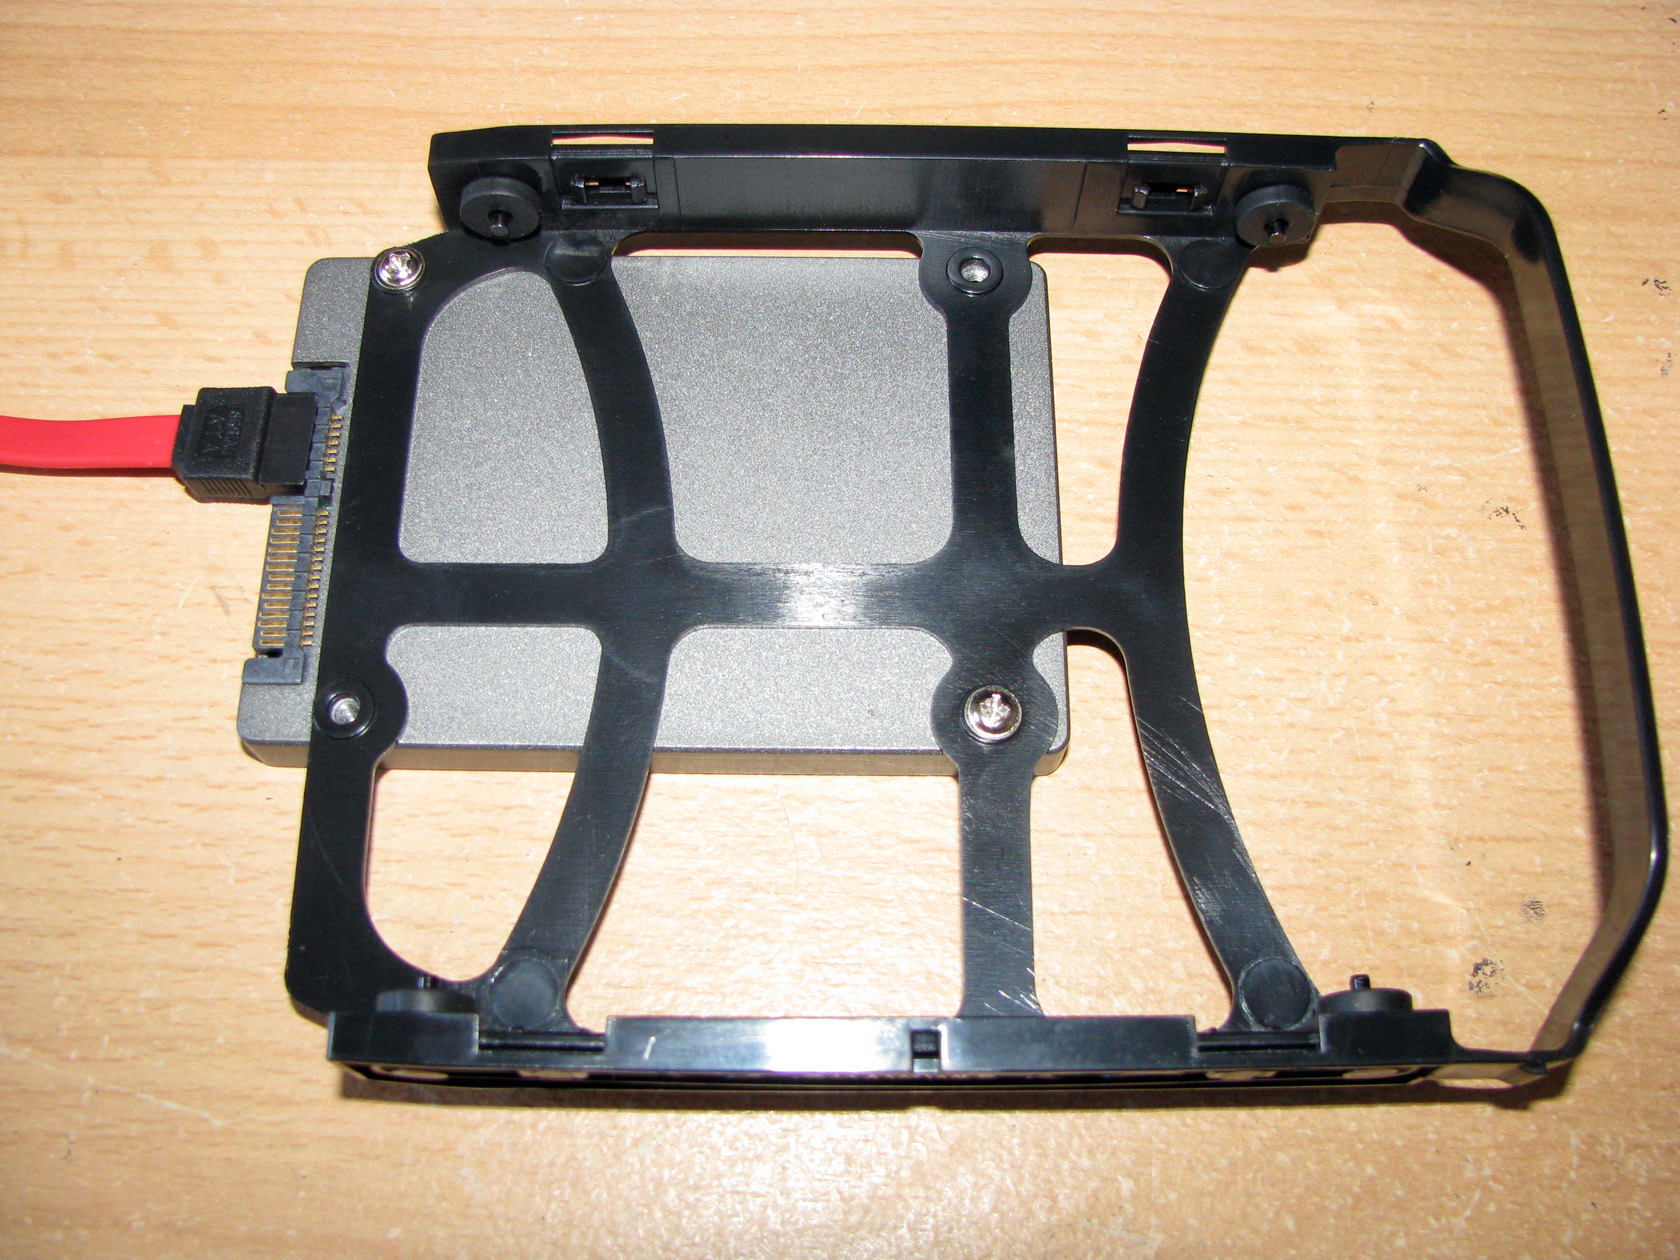
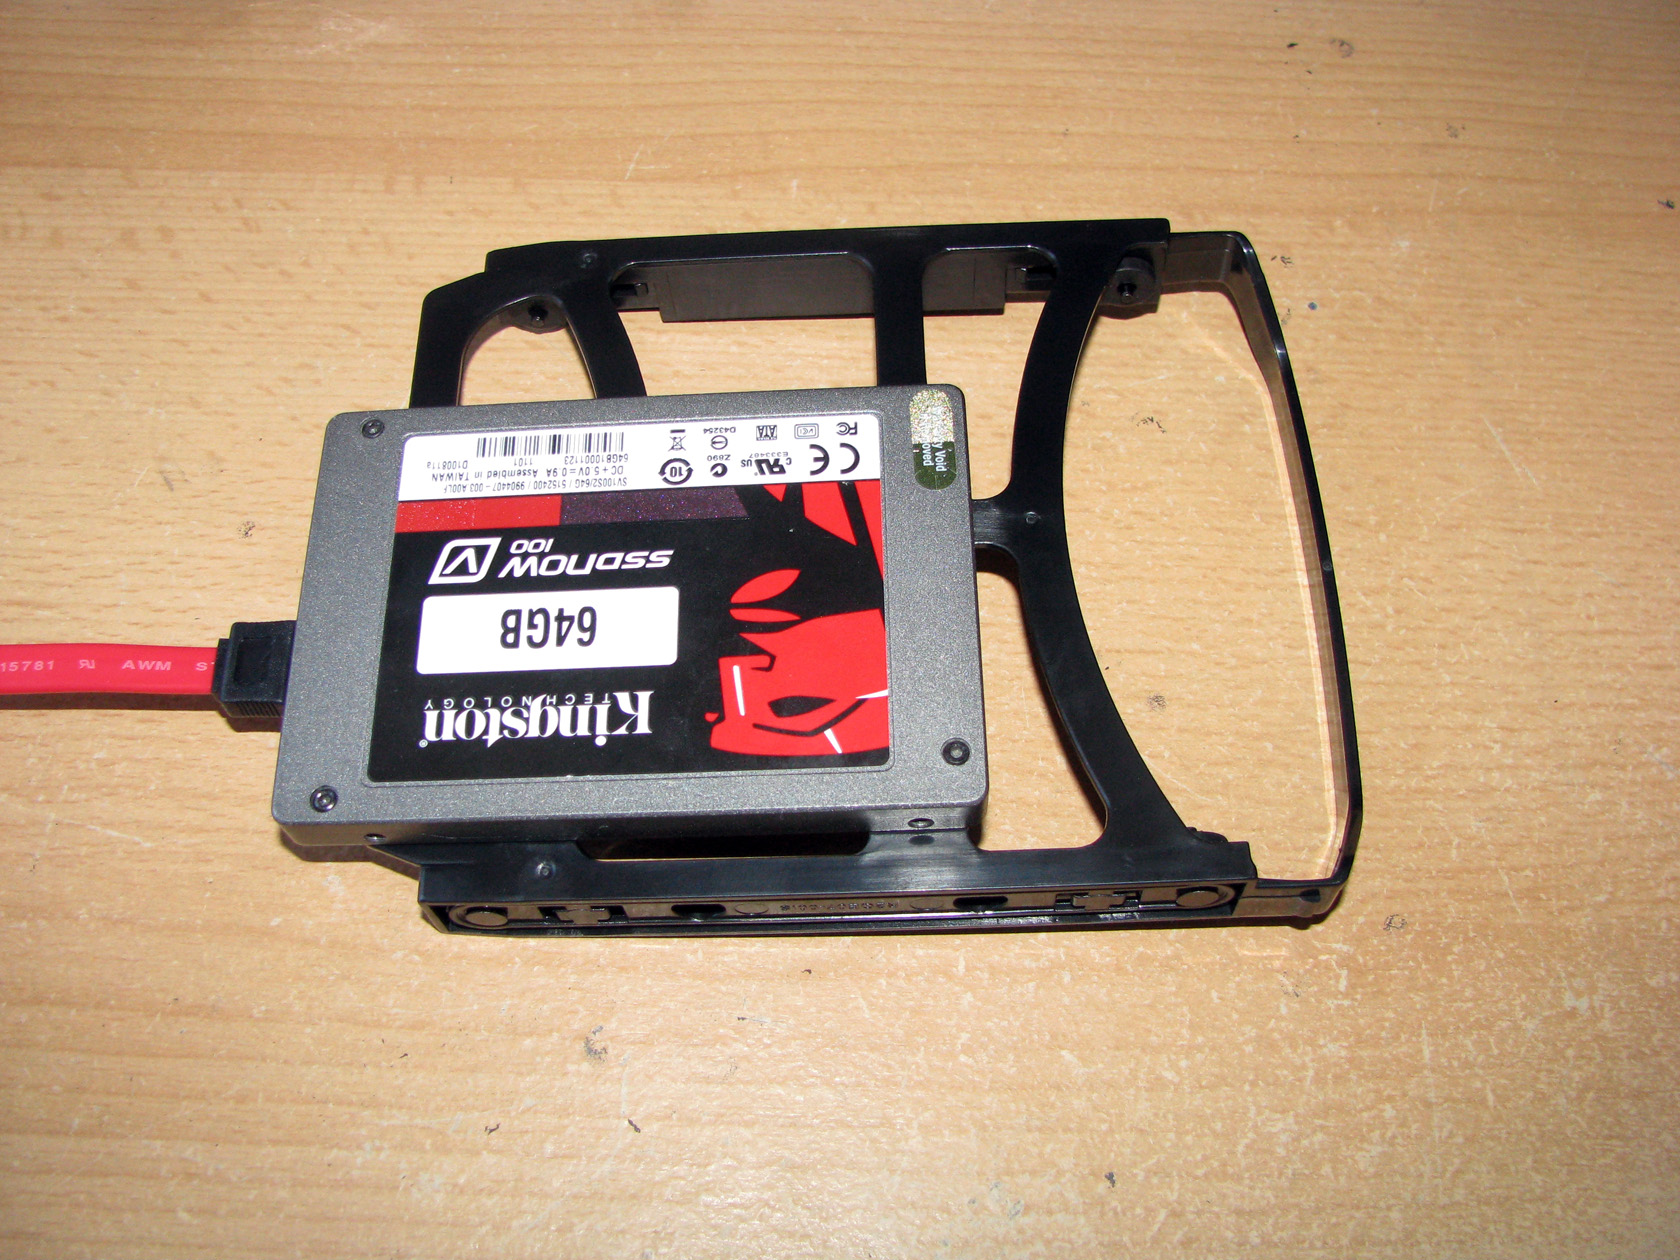
And here I noticed something very interesting. So according to SilentiumPC only 6 of each storage drives can be installed, of course they can be mixed, but what if we modify the 2.5″ holes and make a small chamfer on the holes for mounting the SSD and use screws with very thin heads and some isolating duct just to avoid short circuit on the HDD electronics if there is a HDD installed on top part of the bracket, while an SSD is installed on the bottom side of the bracket? I believe we will be able to install up to 6 x HDDs and 6 x SSDs together. It will be really nice since there are up to 4 x 120mm fans on both sides of the storage chassis. Of course, I didn’t try it and I can’t confirm this, but SilentiumPC surely can 🙂
And this is how all of the HDD bays looks when they are all inside the chassis:
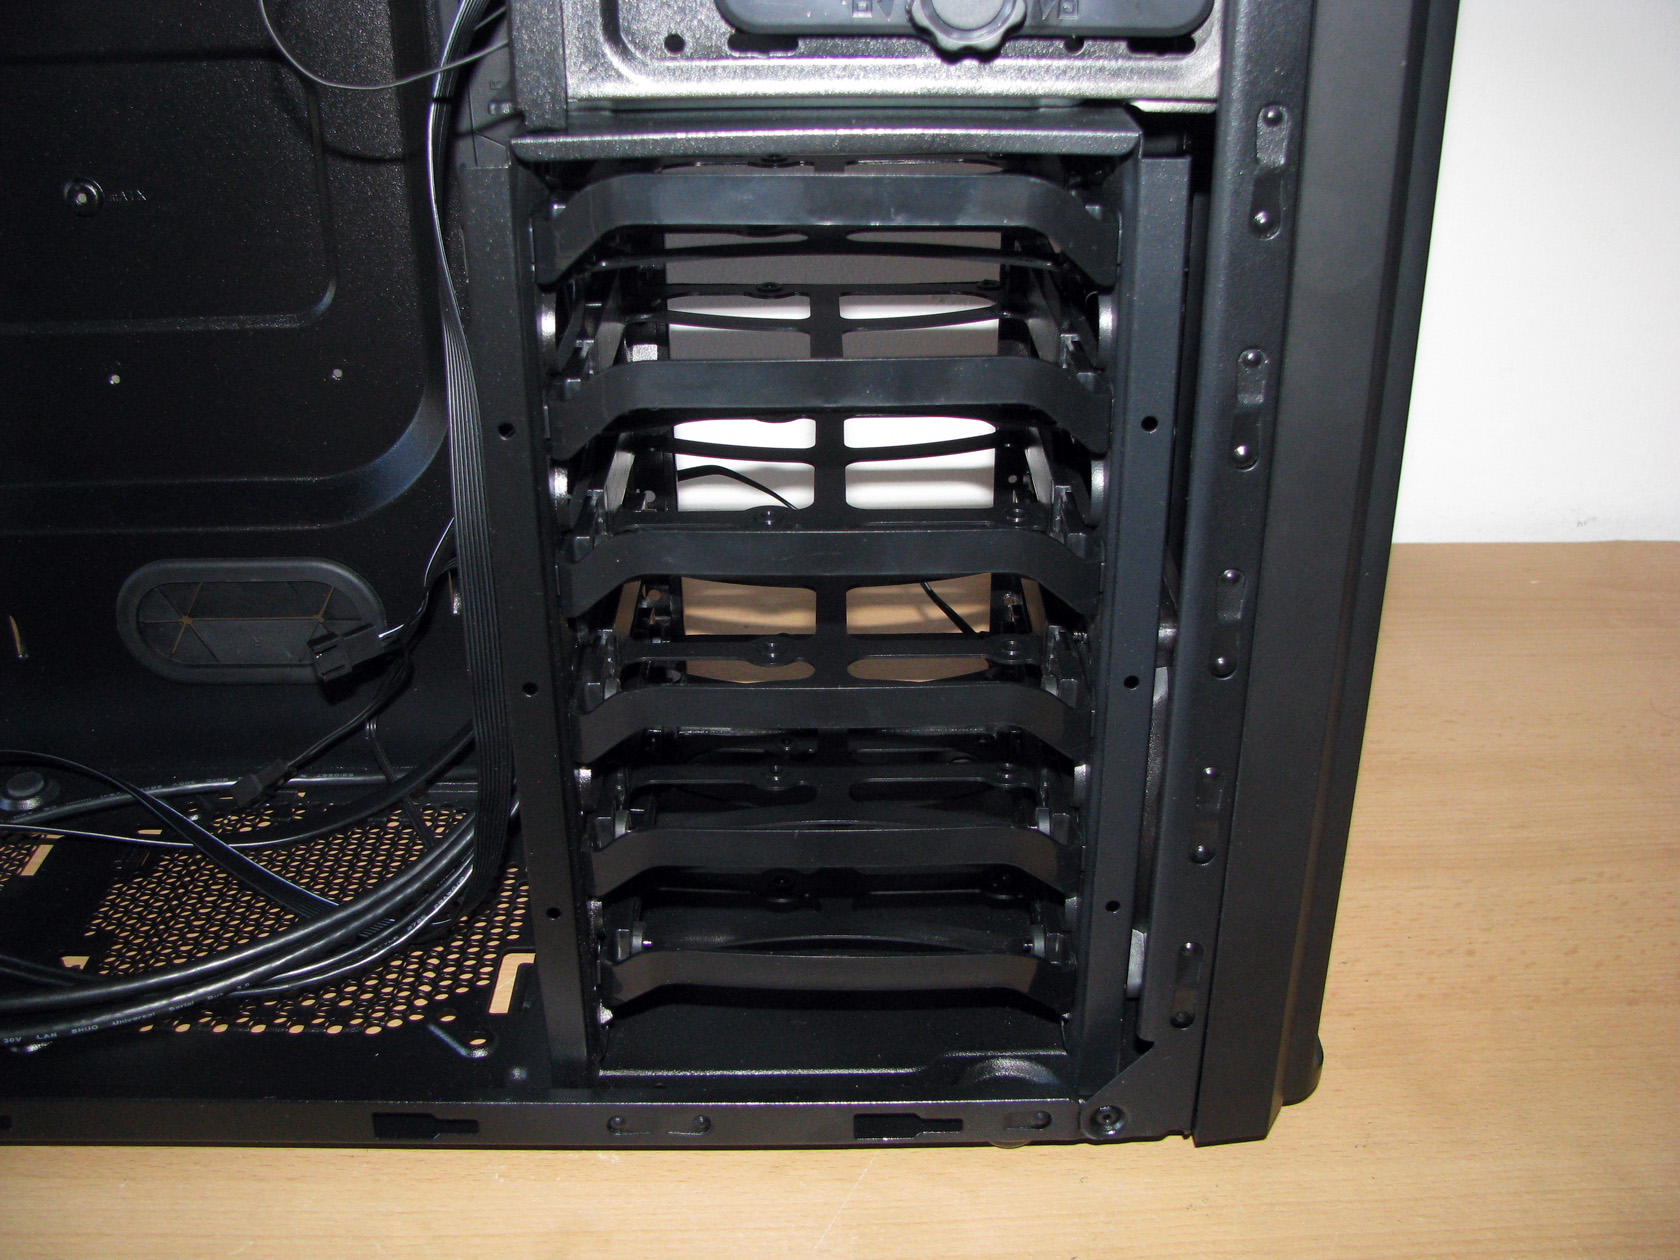
After I was done with the HDD bays I had to install back into the case some additional accessories just to make the case look finished and these were actually the dust filters and the expansion slot brackets, which when back on their spots looked like that:
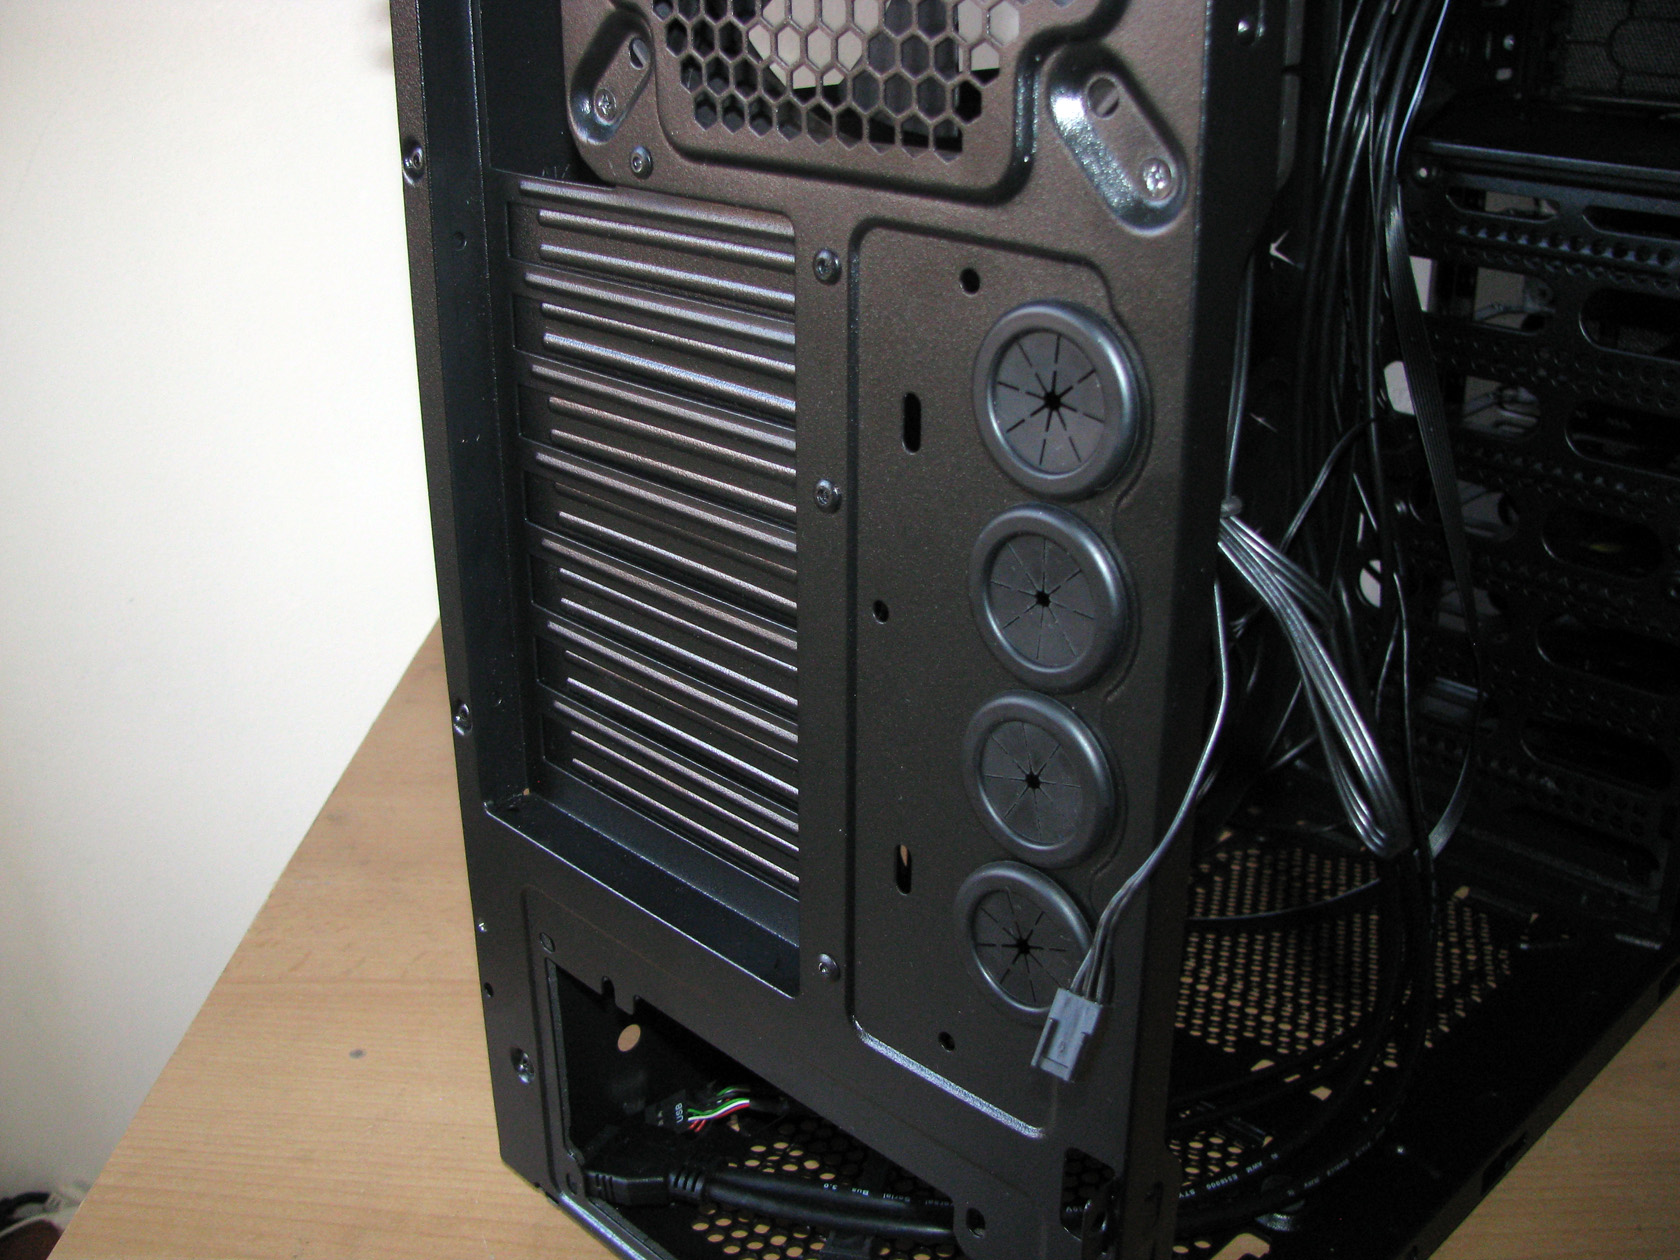
Maybe you’ve already noticed but there are 4 holes for water cooling tubings with rubber finishing preinstalled. Very nice…
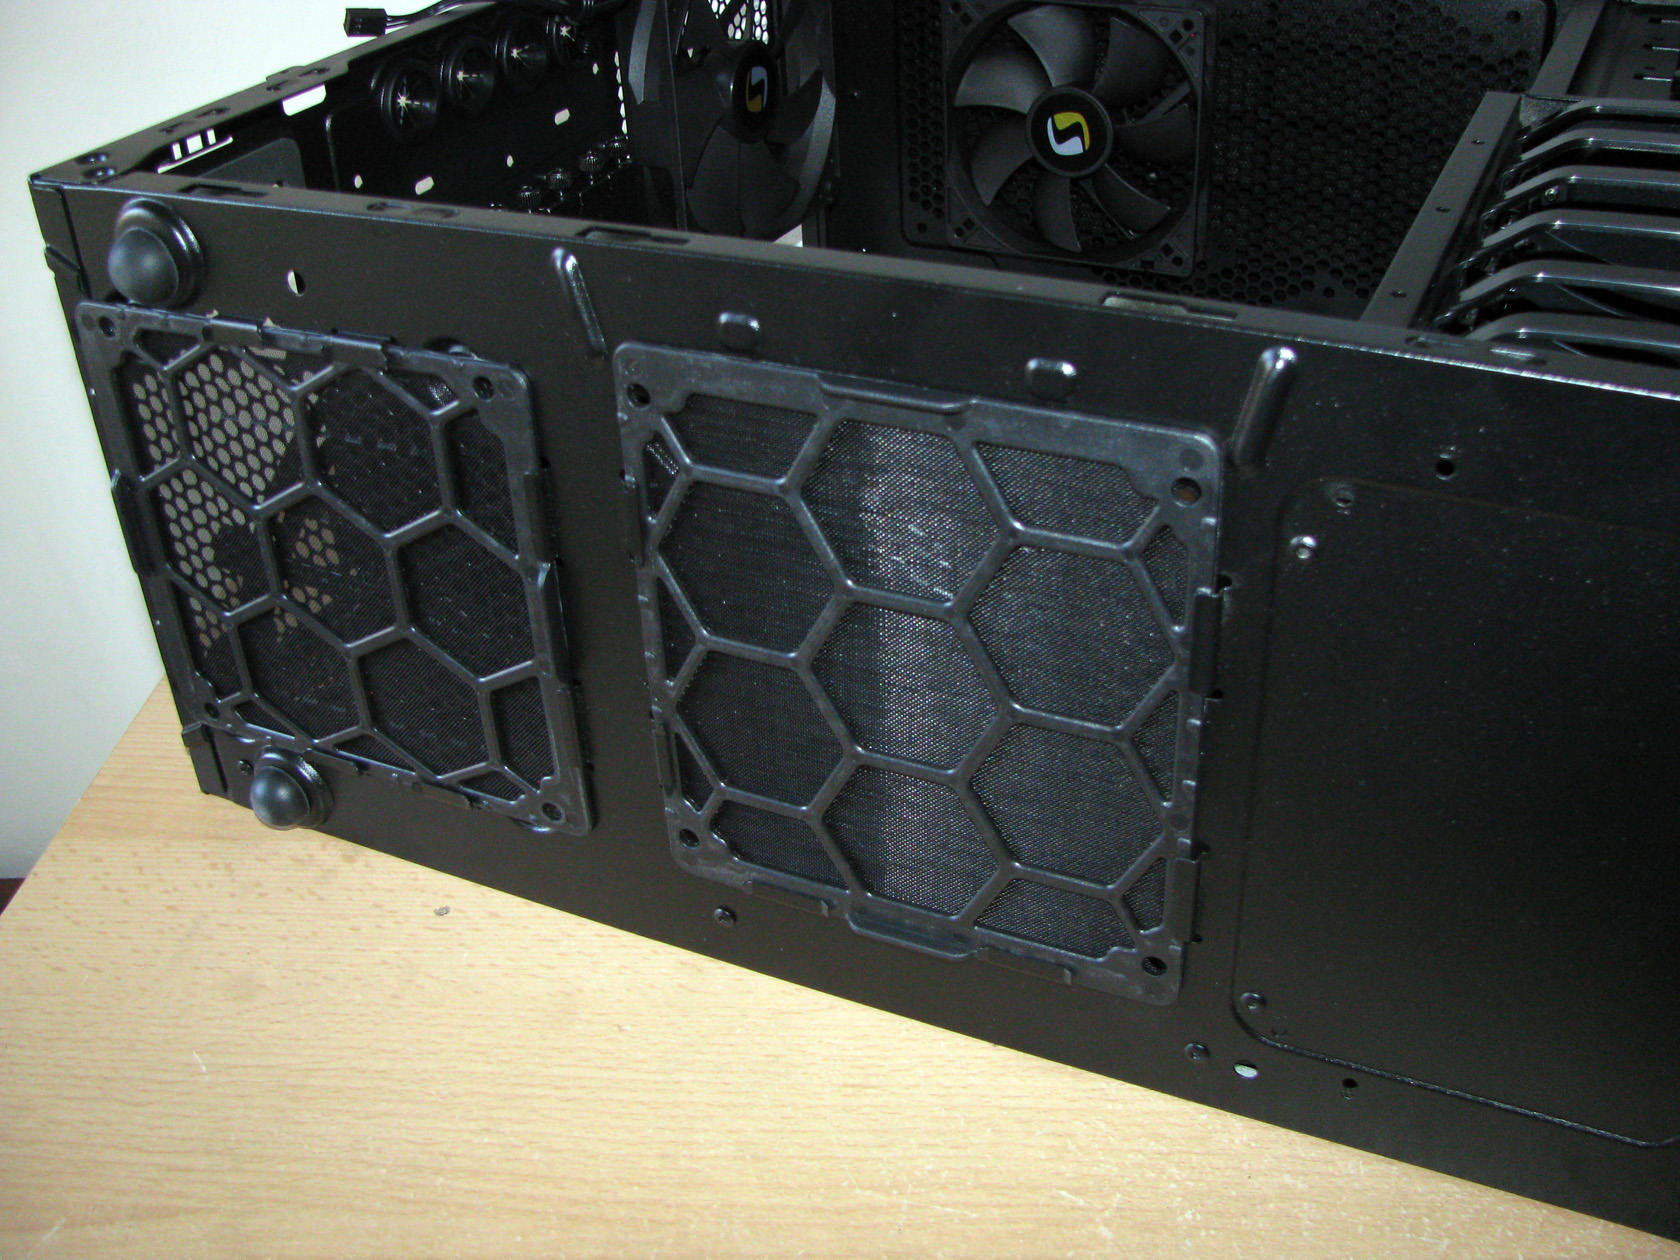
And the 2 dust filters for the bottom holes are back to their places. Apart from that, this case is supplied with 4 rubber feet glued to the case for reducing the vibrations if there are any. The last part to put back to its original position was the side dust filter with the magnets on the left panel:
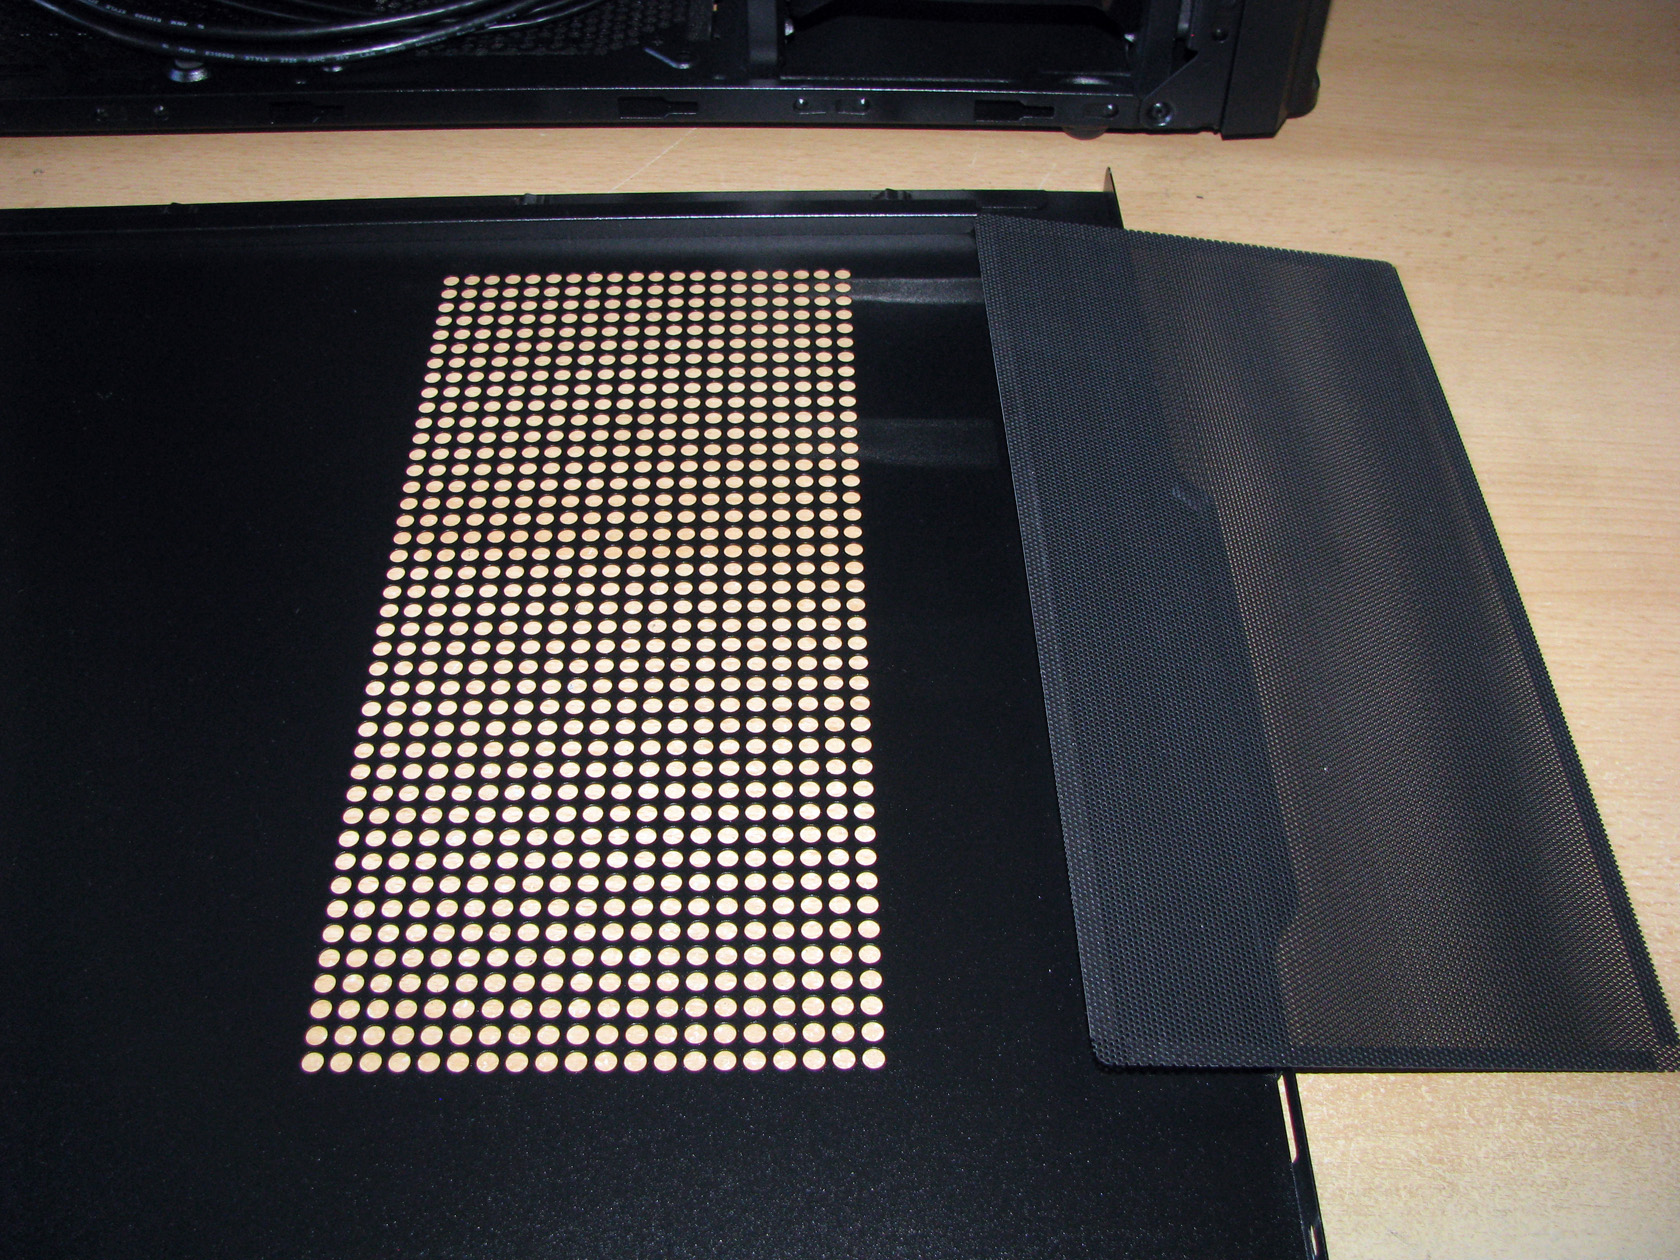
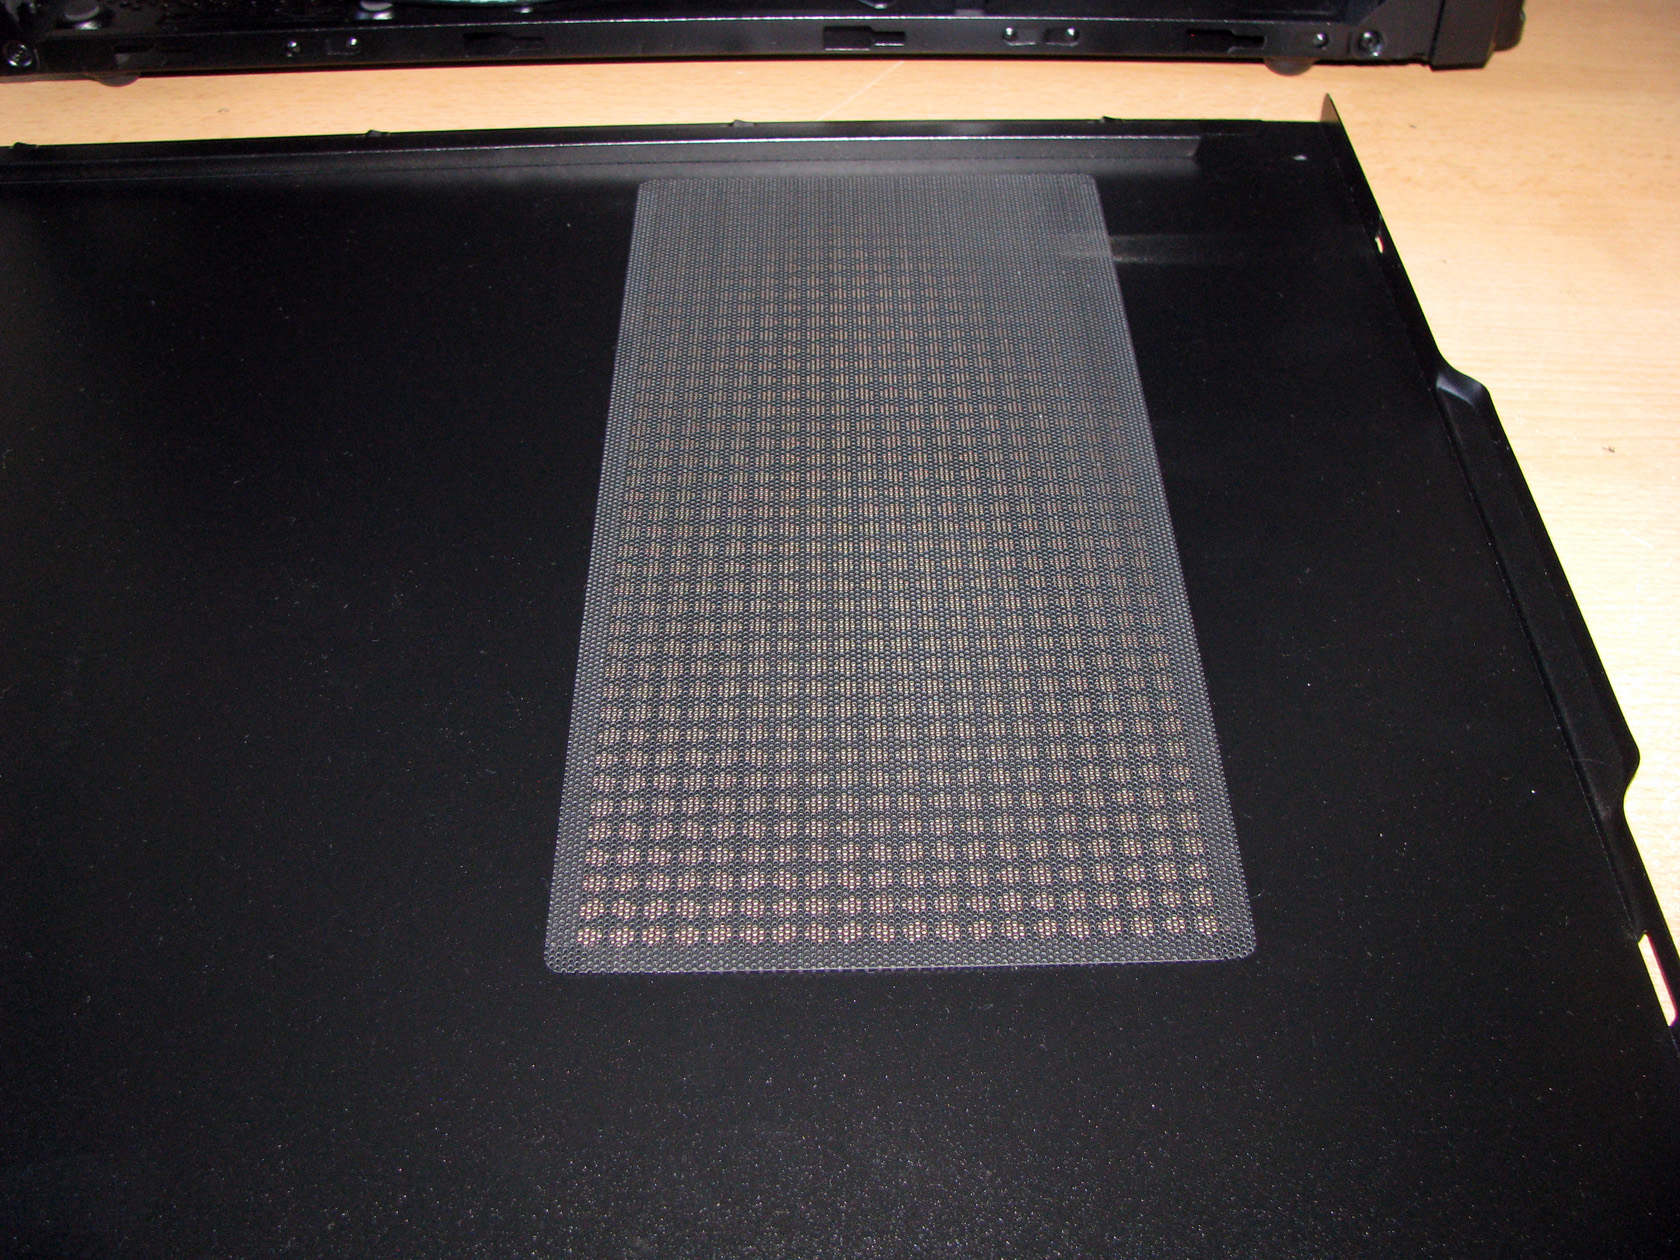
With this part installed I believe the case is back together and now is the moment to pay some attention to the small white box which was inside the package and this is what was inside of it.
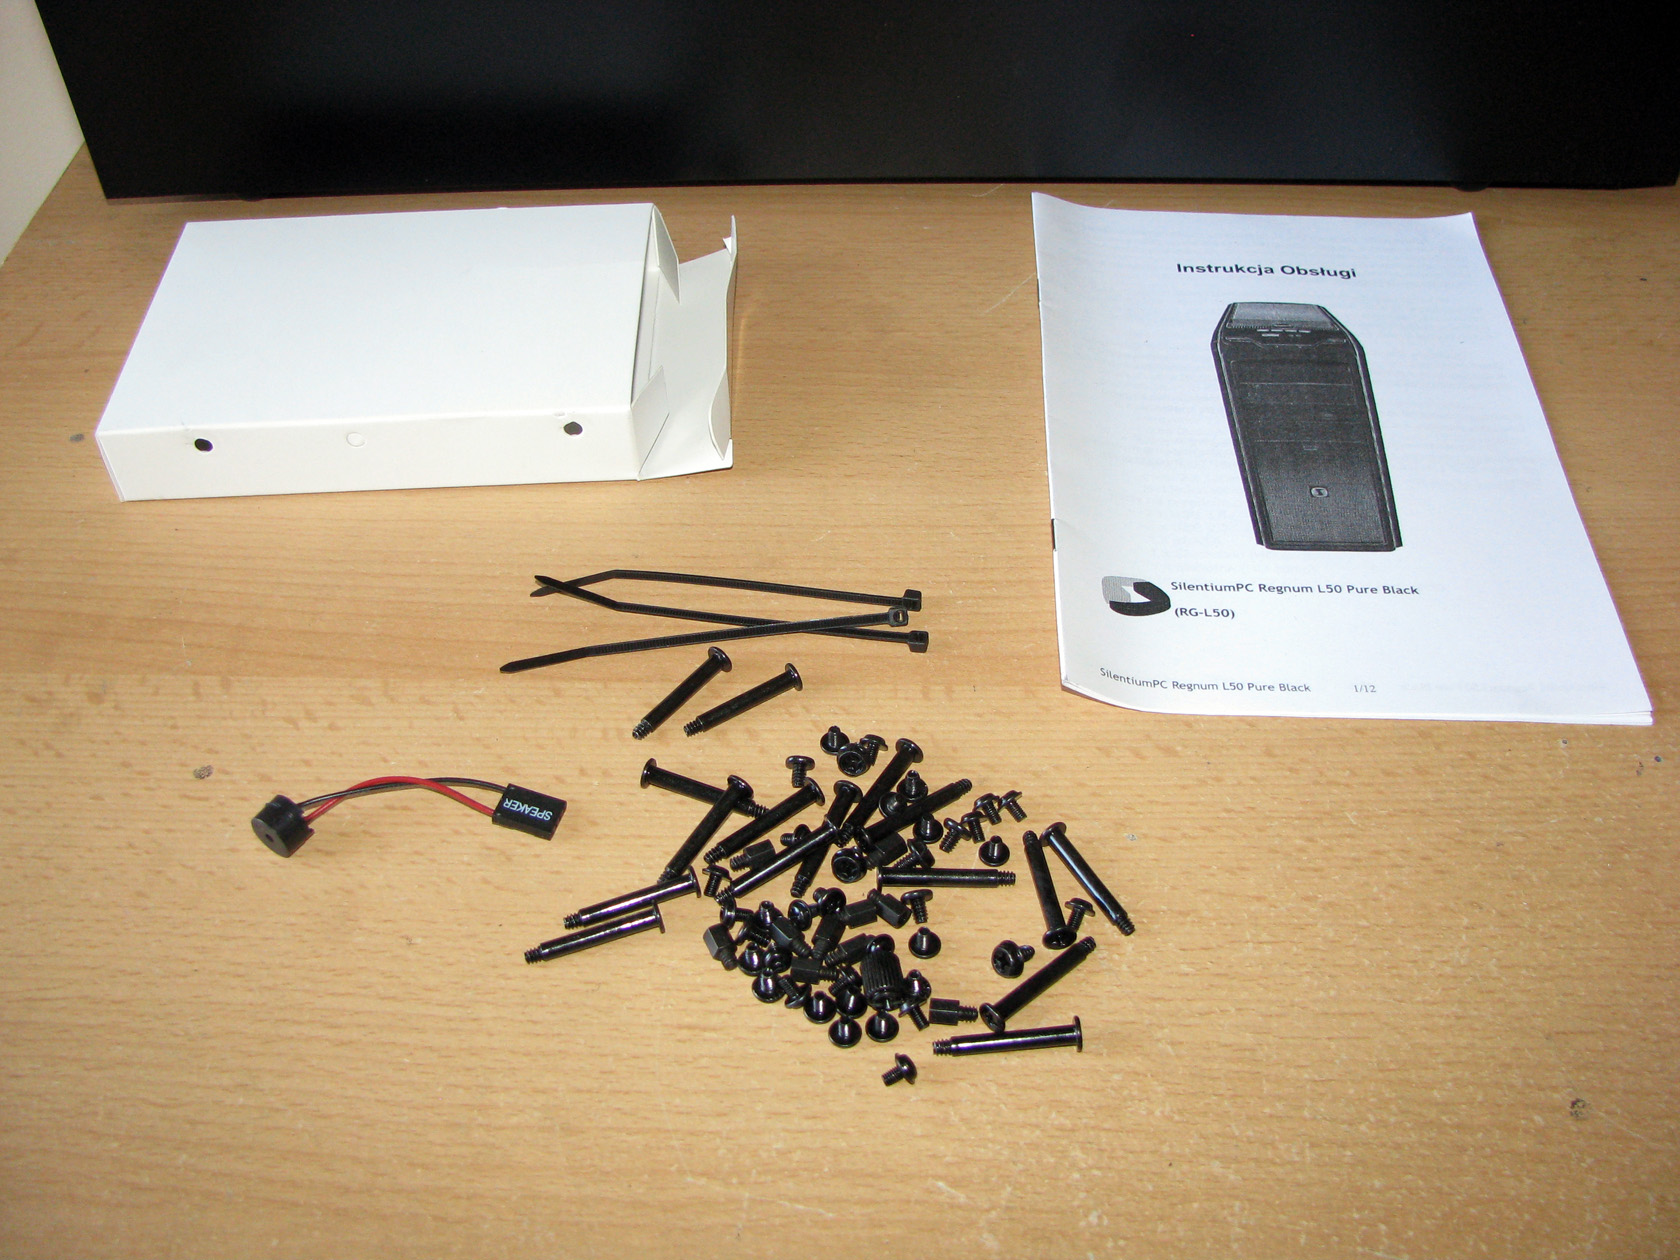
A lot more screws, of course all in black, a motherboard speaker, some zip-ties and one thing that made me smile:
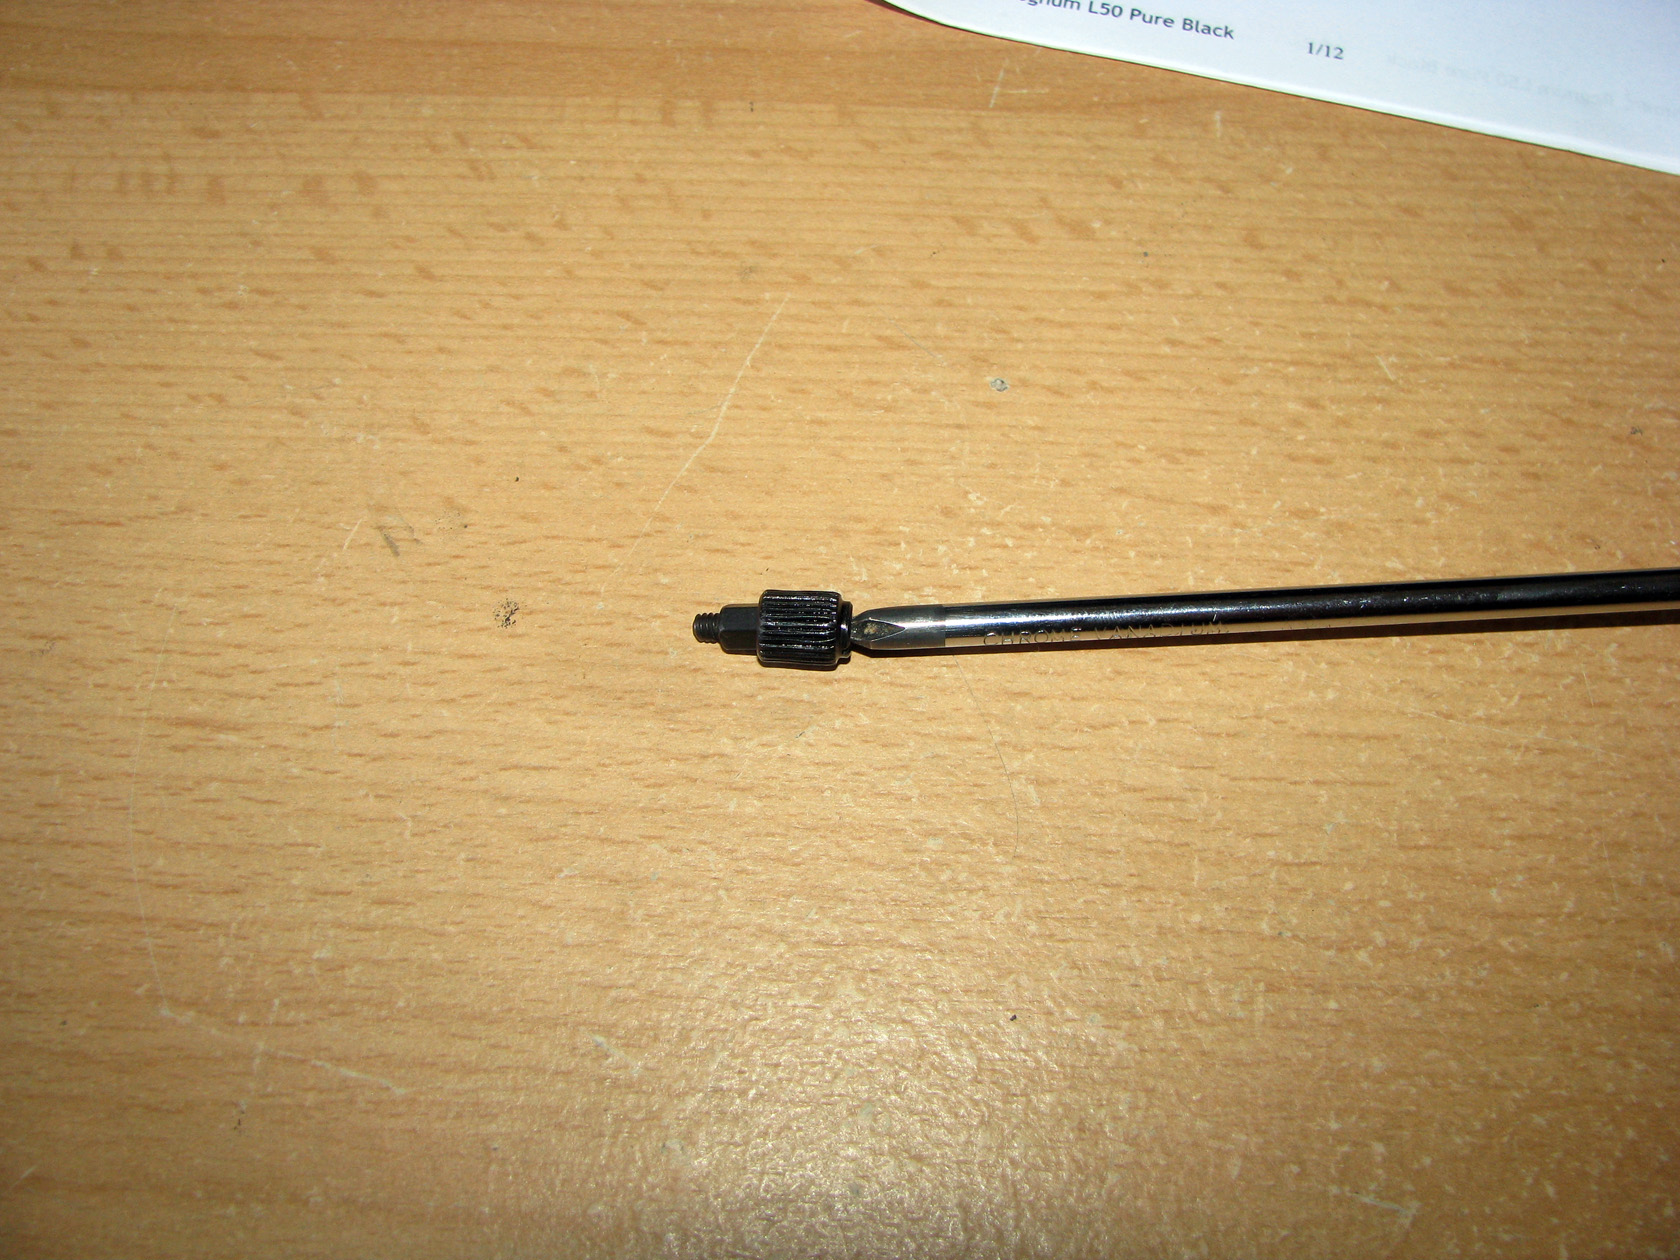
A small tool to be attached to a screwdriver and used to fasten the motherboard standoffs.
So after the case was back together it was time to install my hardware and do some testing to see how the hardware performs inside SilentiumPC Regnum L50 Pure Black.
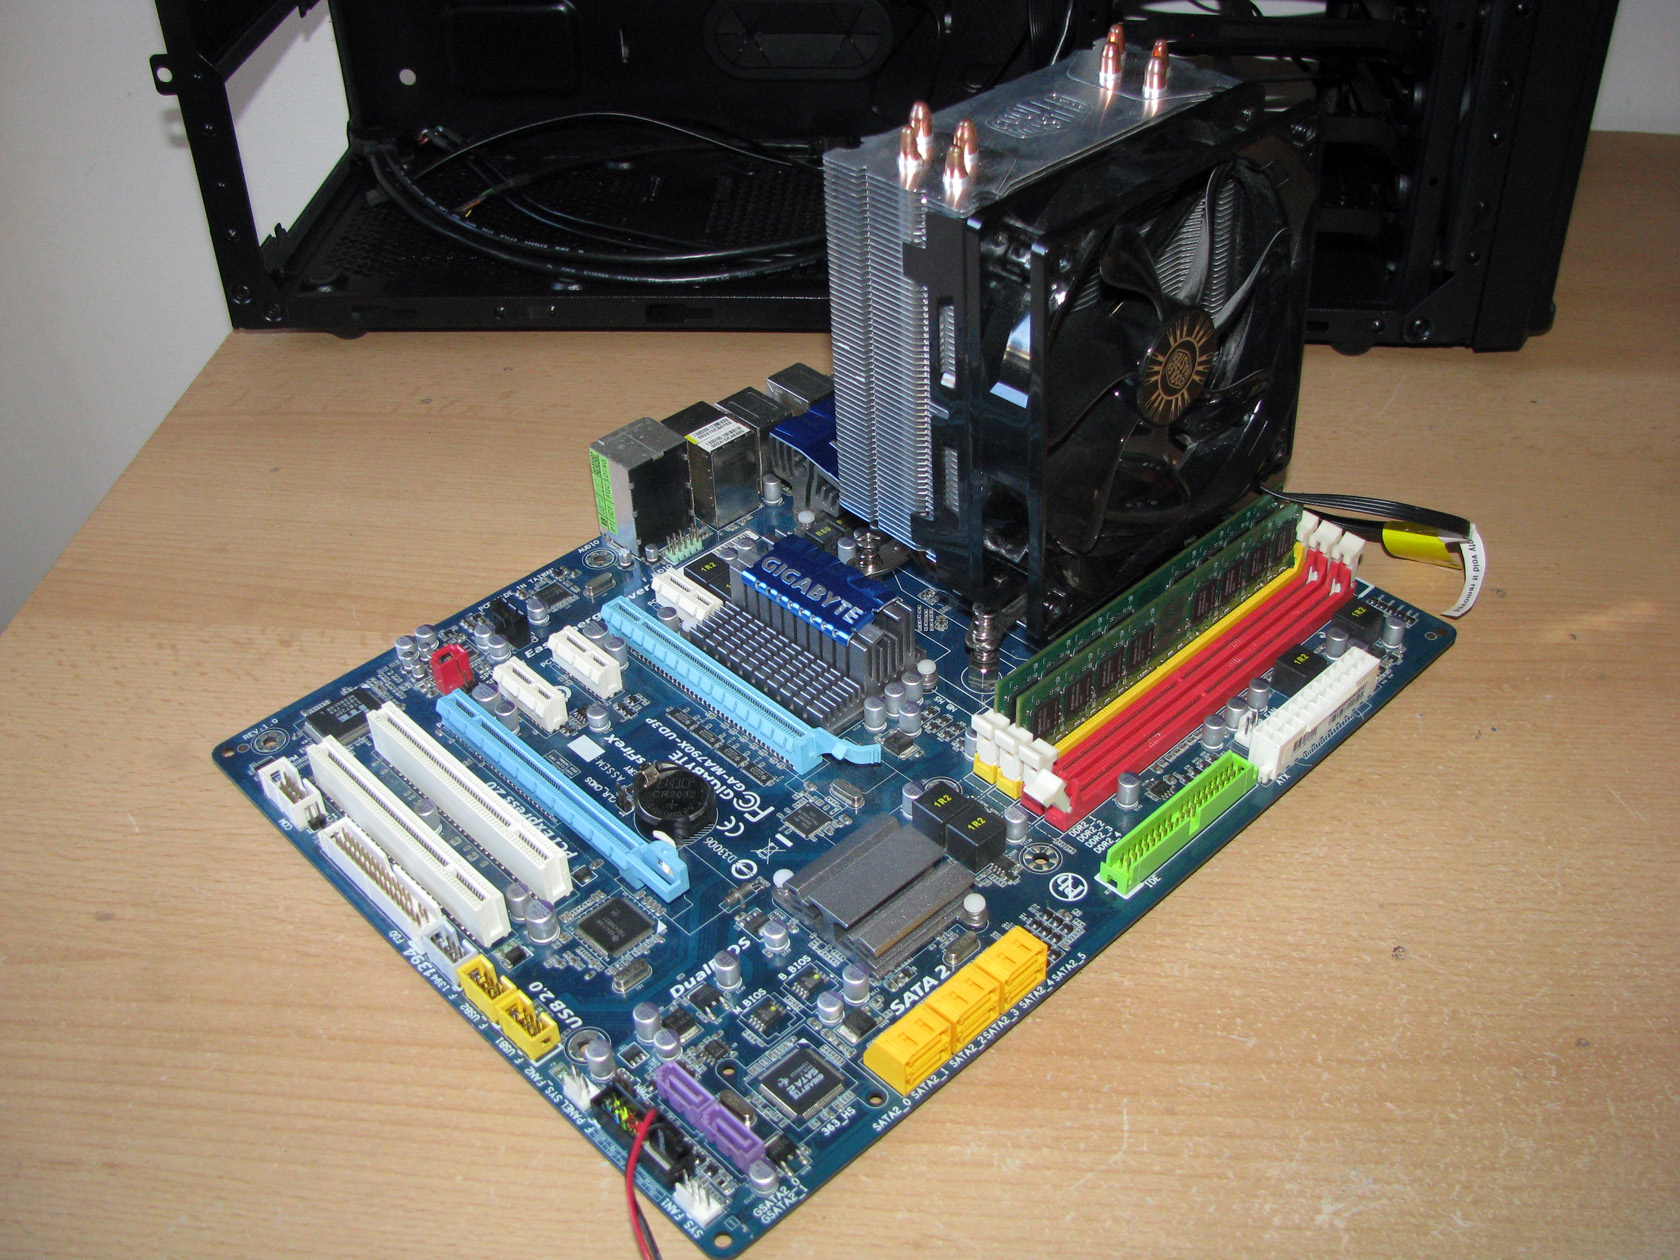
And this is what the case looks like with all the hardware installed:
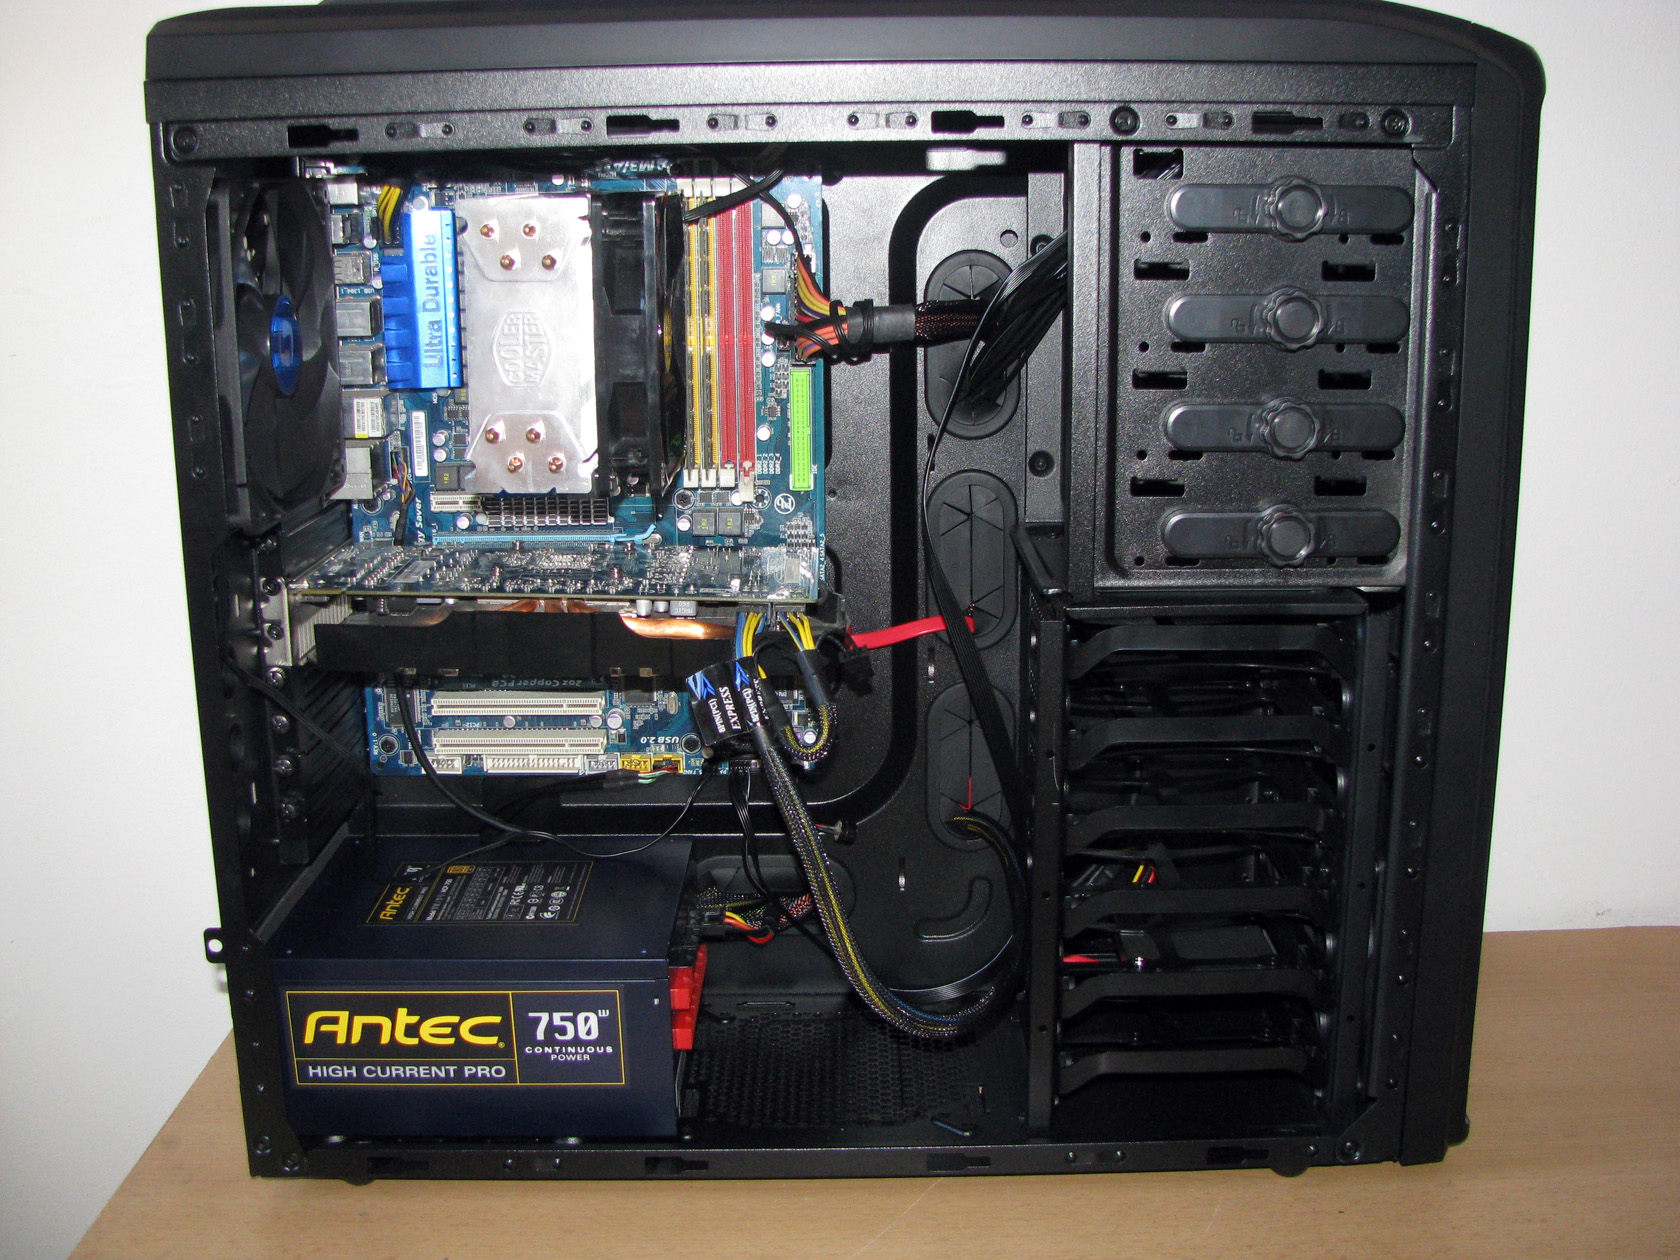
Maybe some of you notice a thing that is very interesting and made to provide comfort to the users of this product and that is the cable management. This feature offers 2 components:
- There are plenty of holes all around the motherboard and the power supply so the cables can be hidden behind the motherboard tray. All of these holes are isolated with rubber so the cables are safe and perfectly hidden.
- The motherboard tray is slightly modified and is moved to the right side panel leaving more space beneath the motherboard so the cables can be arranged in a much better way in that space and the right panel to be closed without much of an efford. And for this test rig I spent about 5 mins arranging the cables. It is not really something impressive but is still much better compared to other cases.
My working environment looked like this:
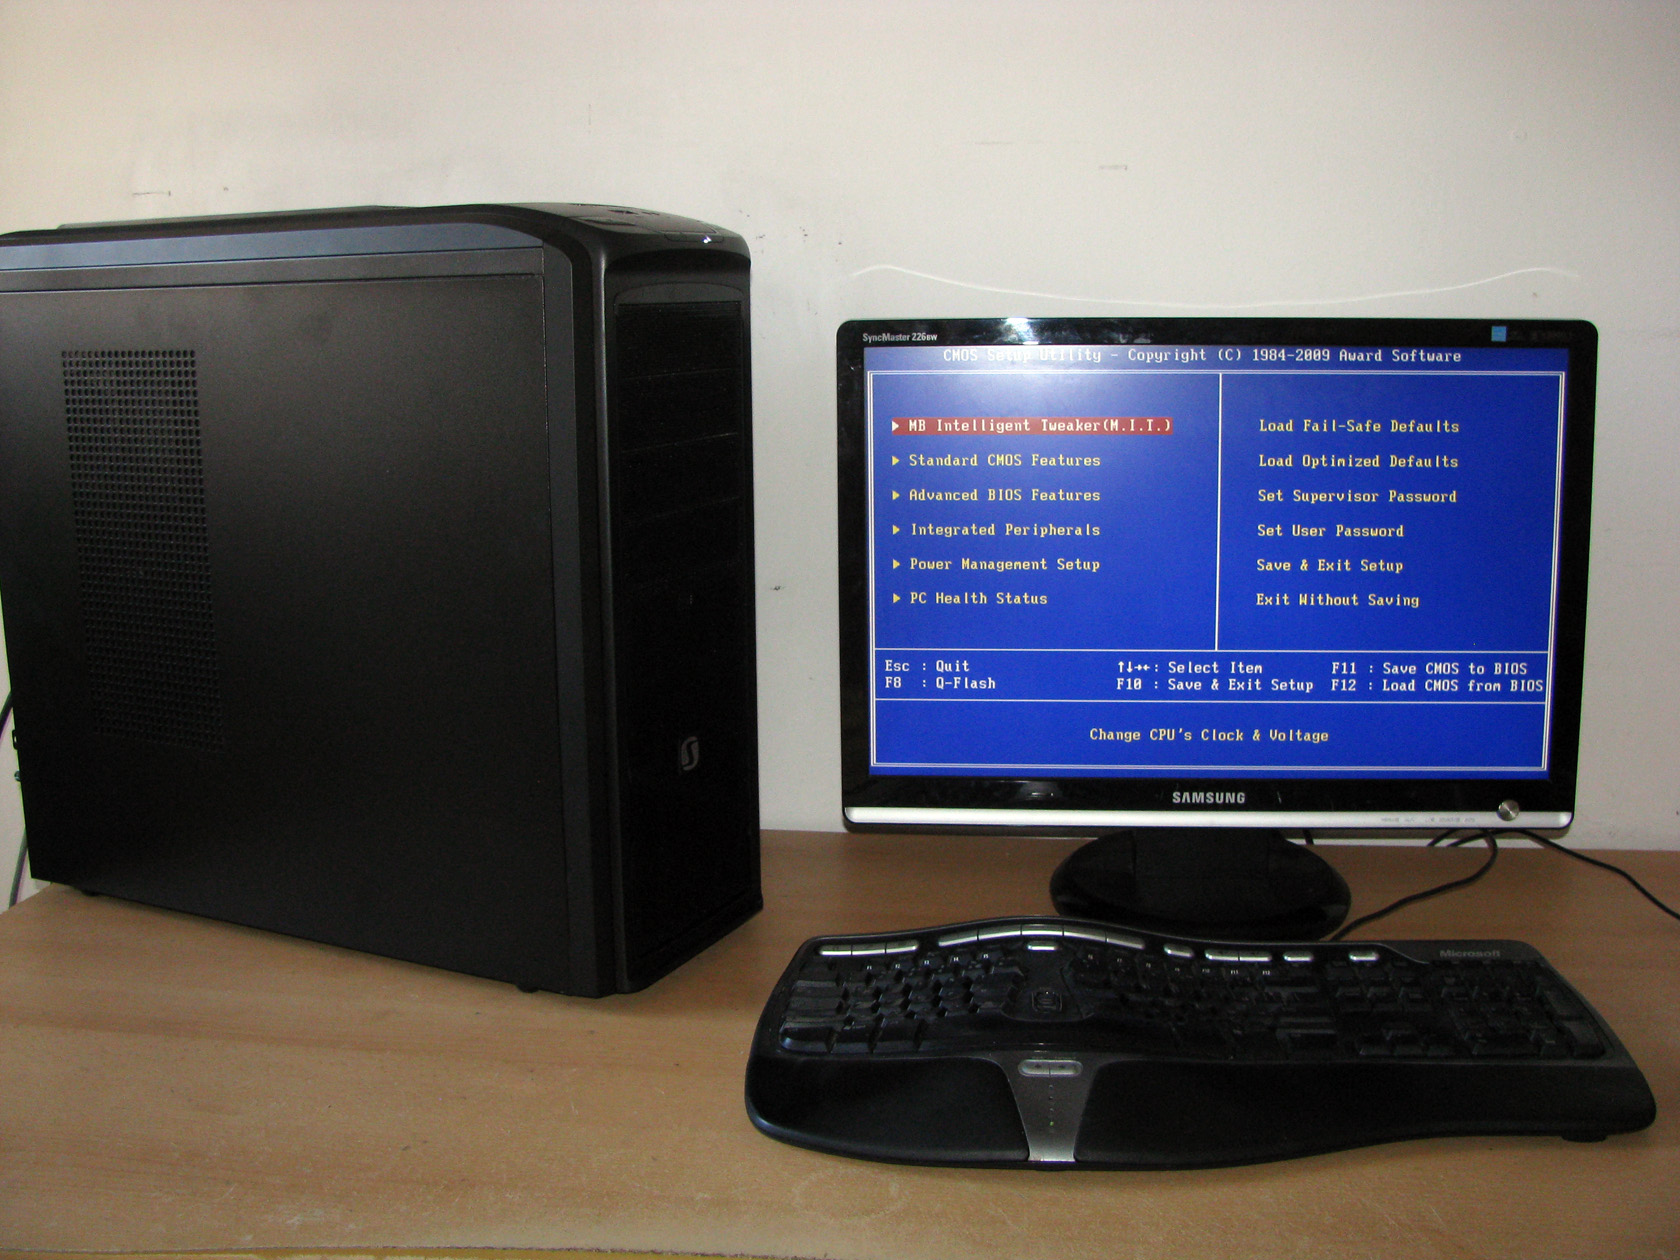
For this test I used my standard hardware:
CPU: AMD Athlon X4 620 at standard frequency of 2612 MHz and overclocked at 3640 MHz (at 1.5V) per core for the tests.
Motherboard: GigaByte 790X-UD3P
Video card: Sapphire 5830 Extreme 1GB DDR5 256bit at standard frequency of 800/1000 MHz and overclocked at 900/1100 for the tests.
Memory: 2 x 2GB Apacer 800 MHz
Hard drive: Kingston SSD SV100S264G
Case: SilentiumPC Regnum L50 Pure Black
Power supply: Antec HCP-750W
Cooler: Cooler Master Hyper 212 Evo
Thermal paste: Gelid GC-Supreme
Fan mounted: The standard 120mm fan from the Hyper 212 Evo package working at ~ 1600 revolutions per minute.
The tests were conducted in a closed system with:
- 120mm fan on the front panel working as intake fan at ~1500 revolutions per minute.
- 120mm fan on the top panel working as exhaust fan working at ~1500 revolutions per minute.
- 140mm fan on the back panel working as exhaust fan working at ~1200 revolutions per minute.
- Room temperature of about 19 degrees.
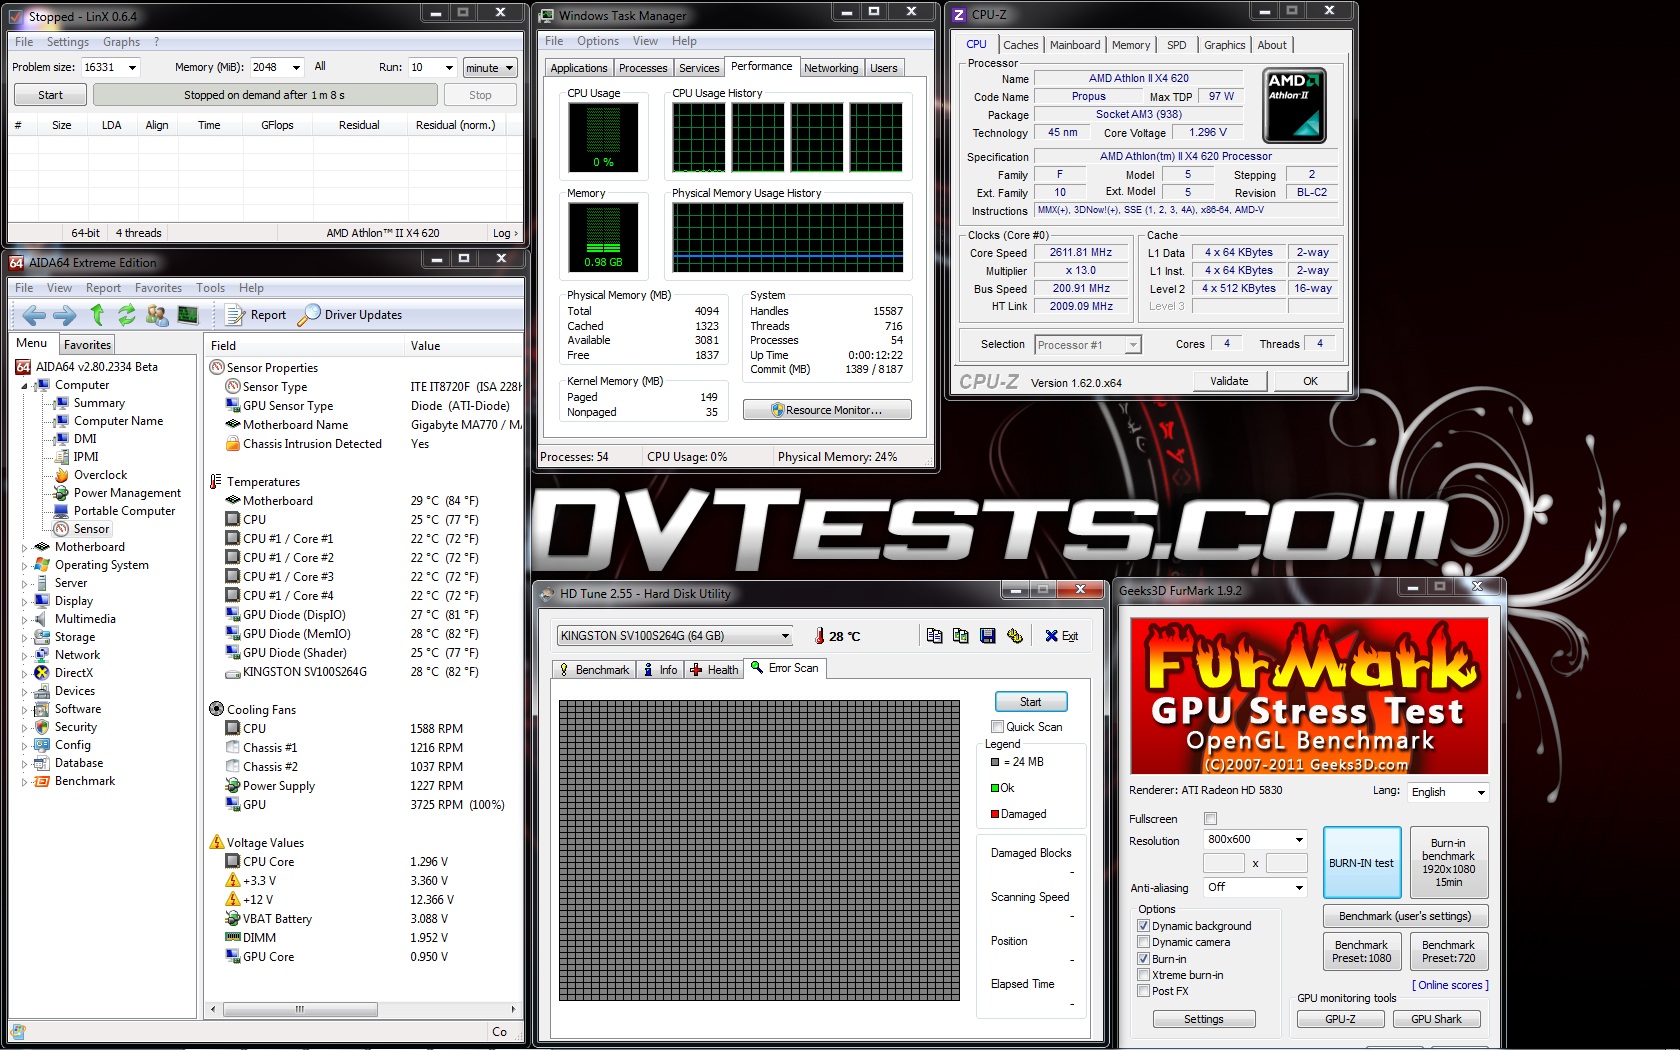
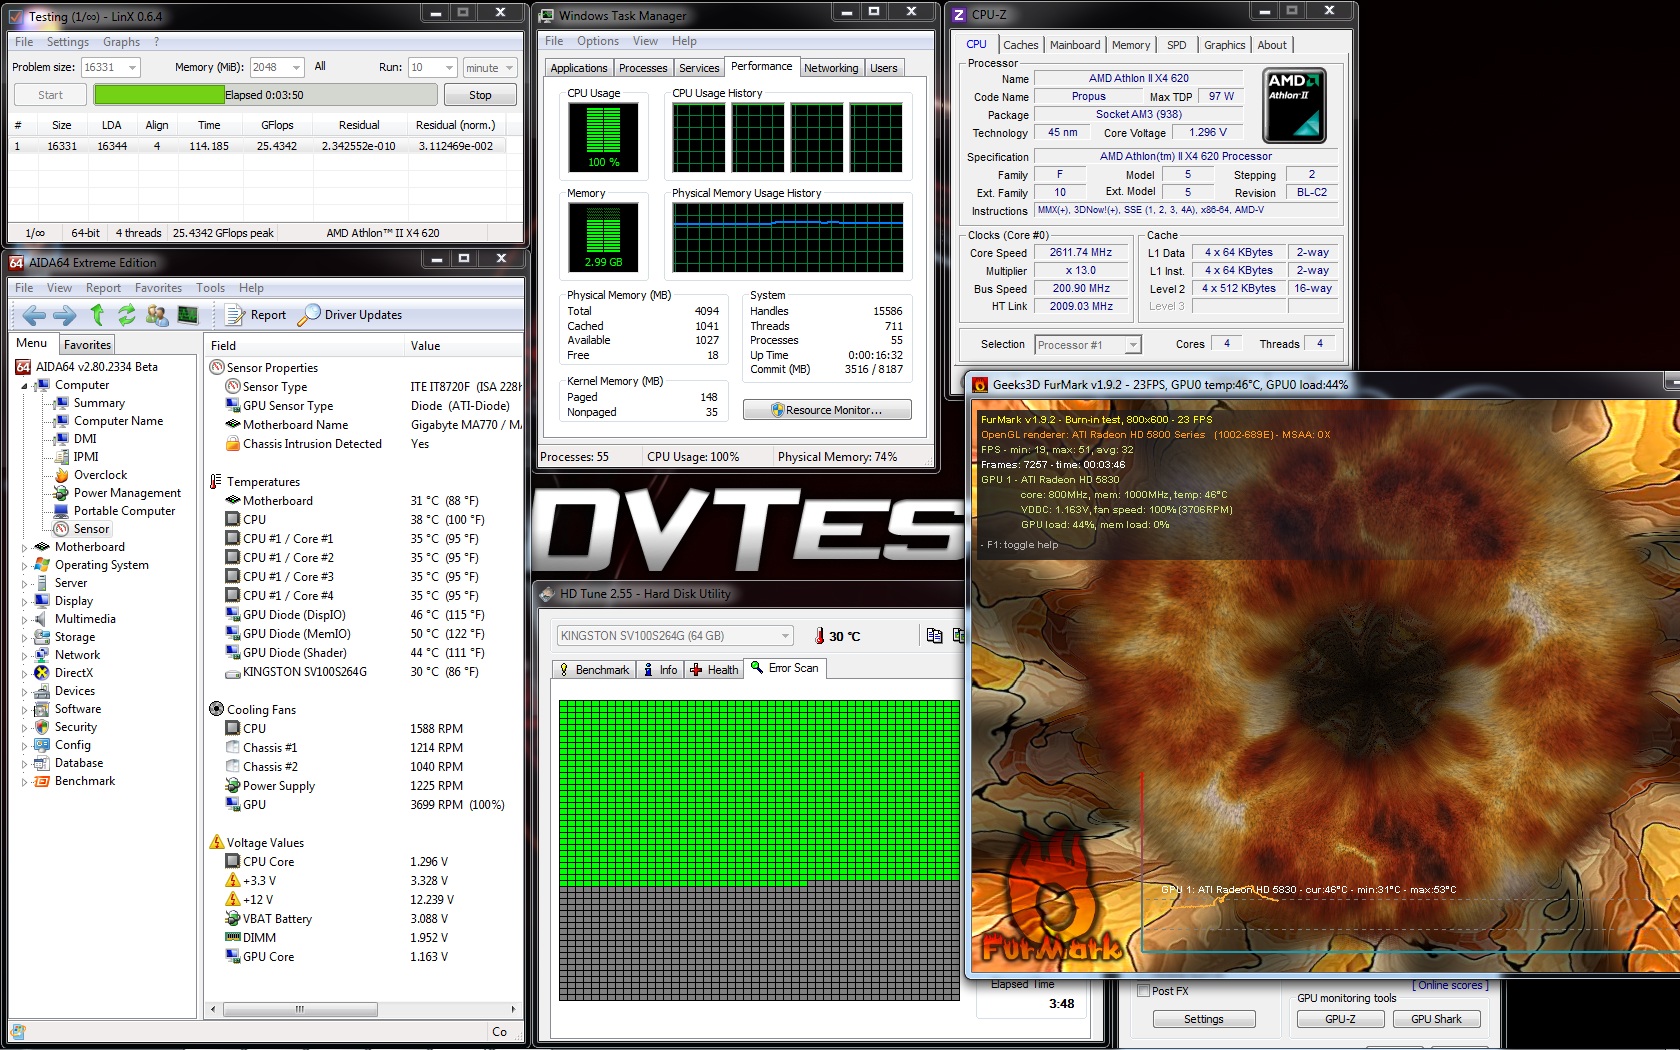
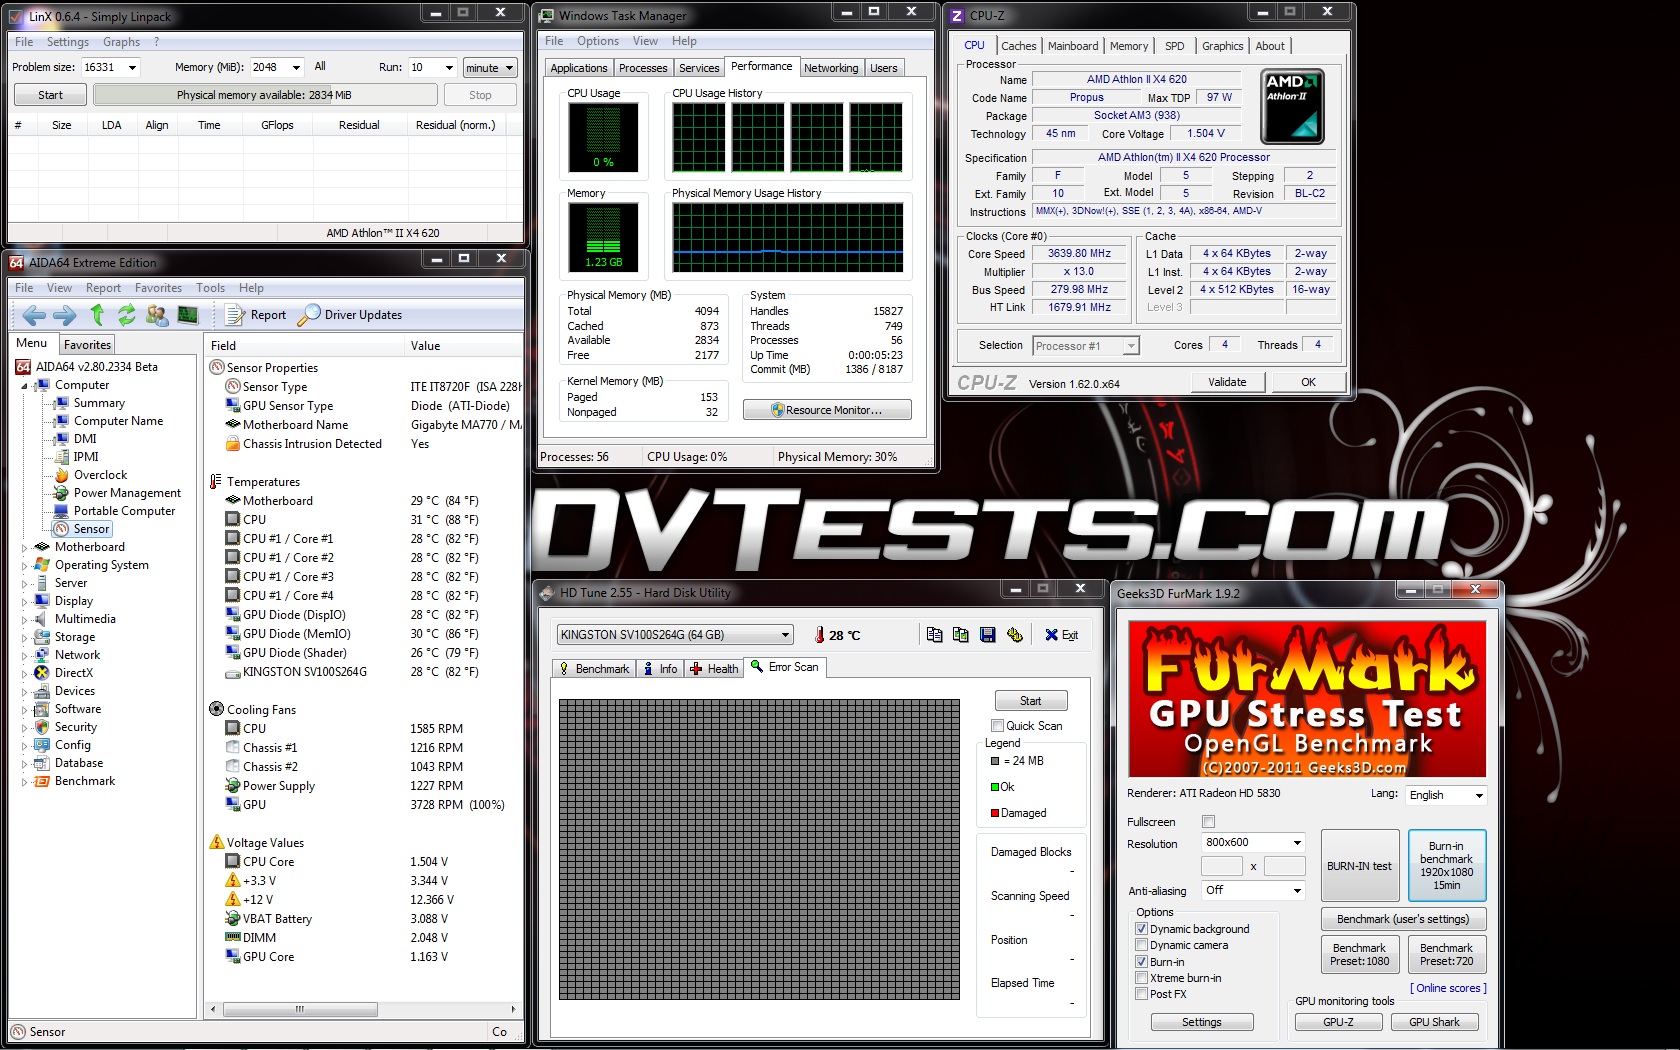
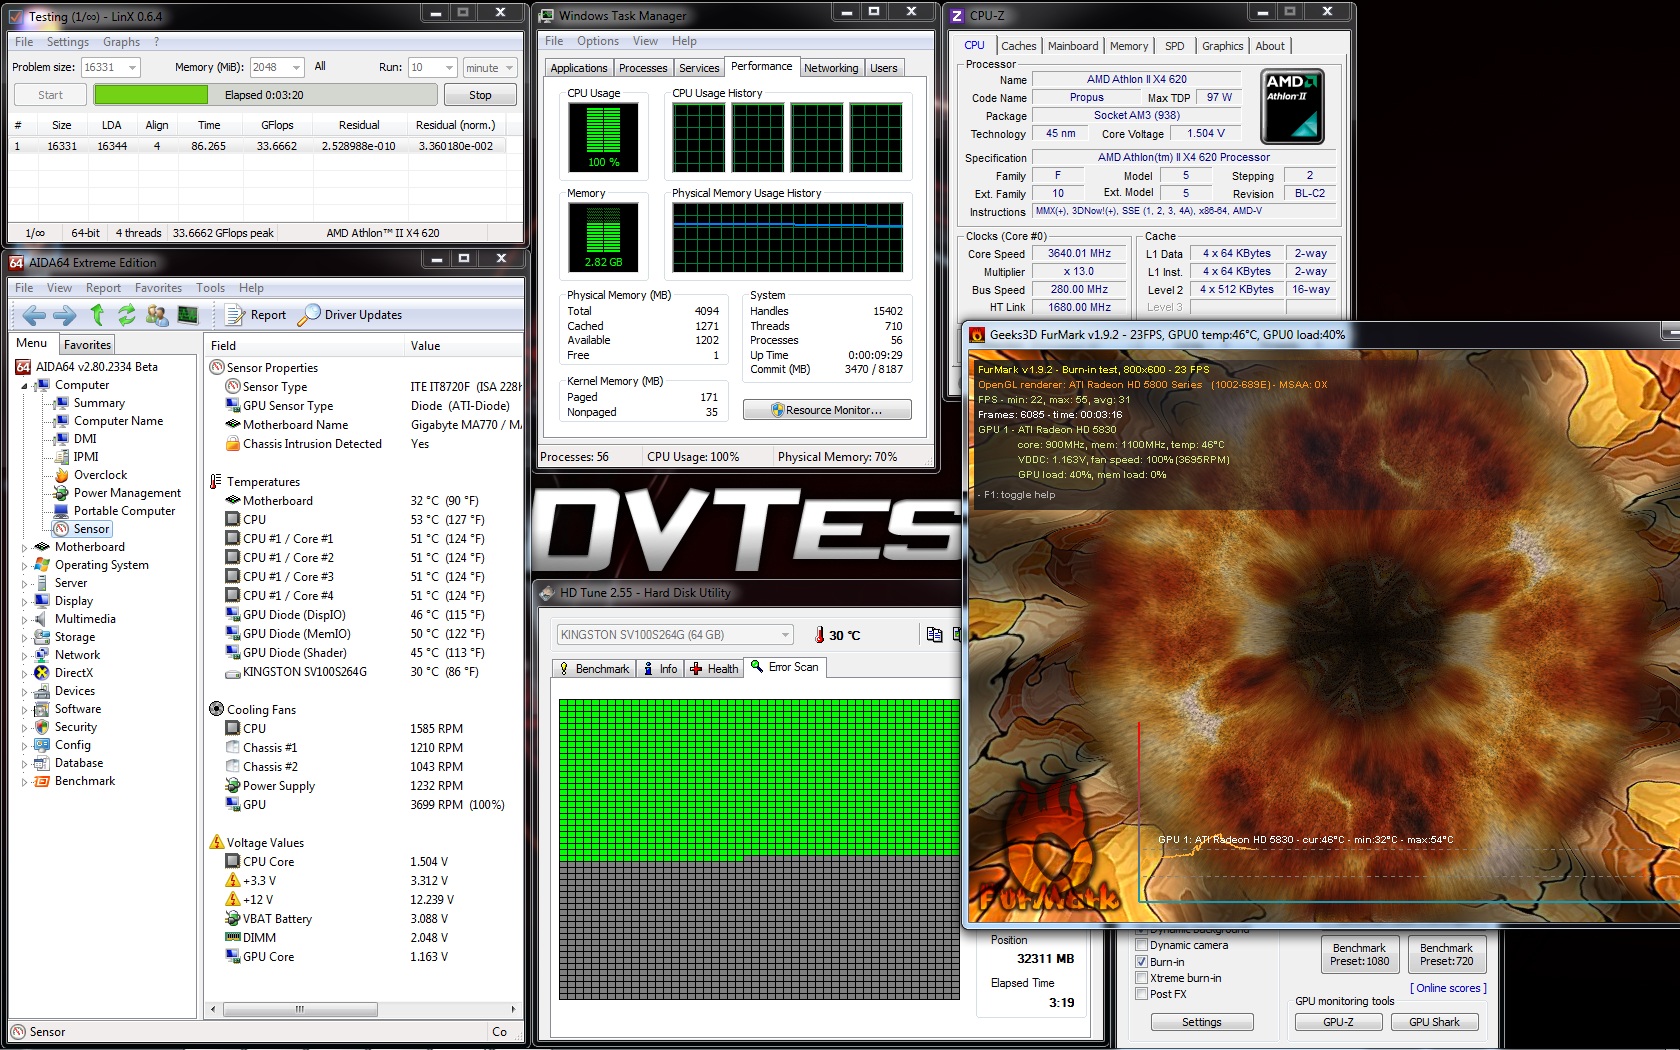
After I was done testing, here are the results I measured.
Test in idle mode of the CPU at 2612MHz, the video card at 800/1000 MHz and the SDD.
Test with full load of the CPU at 2611MHz, the video card at 800/1000 MHZ and the SDD.
Test in idle mode of the CPU at 3640 MHz, overclocked video card at 900/1100 MHz and the SSD.
Test with load of the CPU at 3640 MHz, overclocked video card at 900/1100 MHz and the SSD.
I believe I am done testing and it is time for me to share my conclusions:
- SilentiumPC Regnum L50 Pure Black performance – Well, what can I say… Even though SilentiumPC Regnum L50 Pure Black is a middle tower case it offers very good performance and features and so many options for boosting the cooling and expanding its capabilities. The case is supplied with 3 fans working at average revolutions per minute made to provide optimal performace and balance of the intake and exhaust airflow and as you can see from the pictures above all of my hardware was running nice and smooth with decent temperatures. Apart from that the case can hold up to 10 fans placed on all panels of the case and I am 100% sure that it will provide outstanding performance able to keep cool every modern hardware which is installed inside.
- SilentiumPC Regnum L50 Pure Black noise level – The 3 standard fans are chosen so they can work very quietly even when working at maximum revolutions per minute. Of course, everybody accepts noise in a different way and the guys from SilentiumPC thought of this by providing the integrated fan controller able to control directly the 3 preinstalled fans. I was very suprised how quiet my testing rig was when all of the fans were rotating at maximum speed. Of course, if all 10 fan slots are full with fans then I believe the noise will be totally different.
- SilentiumPC Regnum L50 Pure Black appearance – I really love what the case looks like with this nice and clean design combined with the stylish black colour scheme featuring only one silver part which is actually the logo of the company. Actually, this product reminds me of a case of another brand which is about 2-3 times much more expensive.
Before I finish the test I should point out 1-2 negative things which I thought I should mention:
- The cable coming from the fan controller with the 3 fan connectors is a bit thin, so this could cause some trouble if the users are not working carefully.
- The power and the reset buttons were a bit hard to push but maybe that is because they are brand new.
- The rubber feet are a bit soft and when the case is full and pushing it along the table it could leave marks and of course damage the feet. So just as advice: don’t push but lift the case when moving it.
I think SilentiumPC Regnum L50 Pure Black deserves the following reward:

Official price (MSRP): SilentiumPC Regnum L50 Pure Black – 99$ including VAT
Warranty: 24 months
I thank SilentiumPC for the test sample.


This computer case is cool and design is awesome 🙂
I like that there is a plenty of space for cable management.